
1. Introduction
This manual provides detailed instructions for the safe and effective use of your allsun GK13 Christmas Light Tester. This instrument is designed to help you easily identify and resolve issues with incandescent Christmas light strings, including burnt-out bulbs and blown fuses. It also features a non-contact AC voltage detection function.
2. Product Features
- Non-contact AC voltage detection (12V-600V)
- Built-in retractable bulb remover for easy extraction
- Audible buzzer and visual LED alerts for fault confirmation
- Adjustable sensitivity knob to minimize interference
- Tests bulbs and fuses (for fuses <Ø4x10mm)
- Compact and portable design
3. Setup
Before first use, please follow these steps to prepare your device:
- Remove the Battery Insulation Sheet: Open the battery cover and remove the insulation sheet. This sheet is for shipping safety and must be removed before use.
- Install Batteries Correctly: Ensure the two 1.5V LR44 batteries are installed with the correct polarity (+/-), then close the battery cover securely.
- Turn On the Tester: Slide the product switch to the "ON" position to power on the Voltage Tester.
- Make Contact for Detection: Keep the LED bead at the top in close contact with the object to begin testing.
Visual guide for battery installation and initial power-on.
Setup Video Guide
This video demonstrates the initial setup, including battery installation and basic operation of the allsun GK13 Christmas Light Tester.
4. Operating Instructions
The allsun GK13 offers multiple functions to troubleshoot your Christmas lights:
4.1 Non-Contact AC Voltage Detection
Use this function to safely check for live wires in your light strings or outlets (12V-600V AC). The tester will provide an audible and visual alert when voltage is detected.
4.2 Bulb Removal and Testing
To test individual bulbs, they must first be removed from the light string.
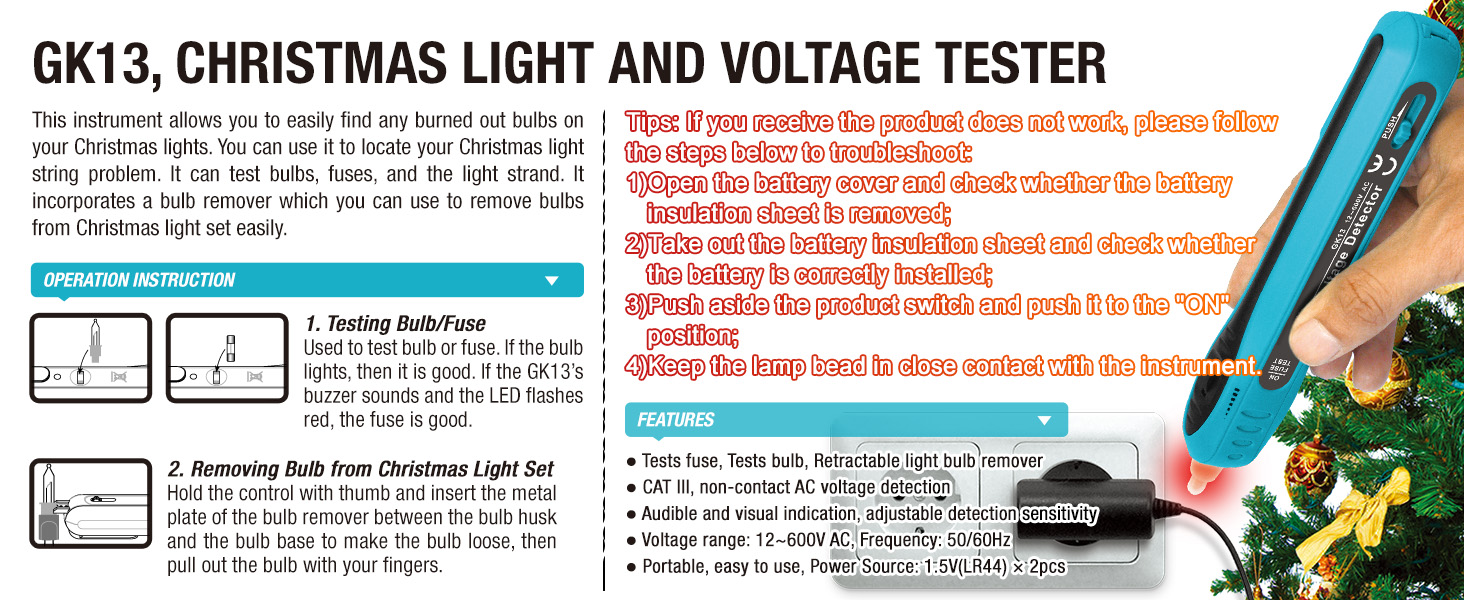
- Remove Bulb: Slide the control to extend the built-in bulb remover. Insert the metal plate between the bulb husk and base to loosen, then pull out the bulb with your fingers. This tool easily handles bulbs with "locking" bases or clips.
- Test Bulb: Turn the function switch to the "BULB TEST" position. Insert the bulb's two terminals into the tester's metal contacts. If the bulb lights up, it is good. If no light, the bulb is damaged.
4.3 Fuse Testing
To test a fuse:
- Test Fuse: Turn the function switch to the "FUSE TEST" position. Press the fuse (suitable for fuses <Ø4x10mm) against the tester, ensuring both terminals touch the metal contacts. A buzzer sound and LED flashes indicate a good fuse. No alarm indicates a blown fuse.

Detailed steps for fuse testing, bulb removal, and bulb testing.
5. Maintenance
5.1 Battery Replacement
The device uses two 1.5V LR44 batteries. When the device's performance degrades or it fails to power on, replace the batteries by opening the battery compartment cover and inserting new batteries with correct polarity.
5.2 General Care
Keep the tester clean and dry. Store it in a cool, dry place when not in use. Avoid exposing it to extreme temperatures or humidity.
6. Troubleshooting
If the product does not work as expected, consider the following:
- Ensure the battery insulation sheet has been completely removed.
- Verify that the batteries are correctly installed with the proper polarity.
- Confirm the product switch is in the "ON" position.
- For bulb testing, ensure the lamp bead is in close contact with the instrument's terminals.
- If testing a bulb that has paint on its wires, it is necessary to remove the paint on the outside of the lamp bead to expose the bright copper wire for normal operation.
- Avoid intense electric fields, as these can cause false alarms during voltage detection.
7. Specifications
| Feature | Specification |
|---|---|
| Voltage Range | 12-600V AC |
| Power Source | 2 x 1.5V LR44 Batteries (included) |
| Operating Temperature | 0°C ~ 40°C |
| Operating Humidity | Under 85% RH |
| Frequency | 50/60Hz |
| Dimensions | 7.5 x 1.9 x 1.2 inches |
| Weight | 2.8 ounces |

Overview of the allsun GK13's design and technical specifications.
8. Safety Information
Important Notes:
- Do NOT detect voltages below 12V or above 600V.
- Do NOT use for DC voltage detection. This device is for AC voltage only.
- Always verify operation on a known live source before use.
- May produce false alarms in strong electric fields.
- For indoor use only, in environments from 0°C to 40°C and under 85% relative humidity.

Key safety precautions and warnings for using the light tester.
9. Compatibility
This tester is specifically designed for:
- Incandescent String Lights
- Mesh Lights
- Icicle Lights
Important: This tester is NOT suitable for LED Christmas light strings.
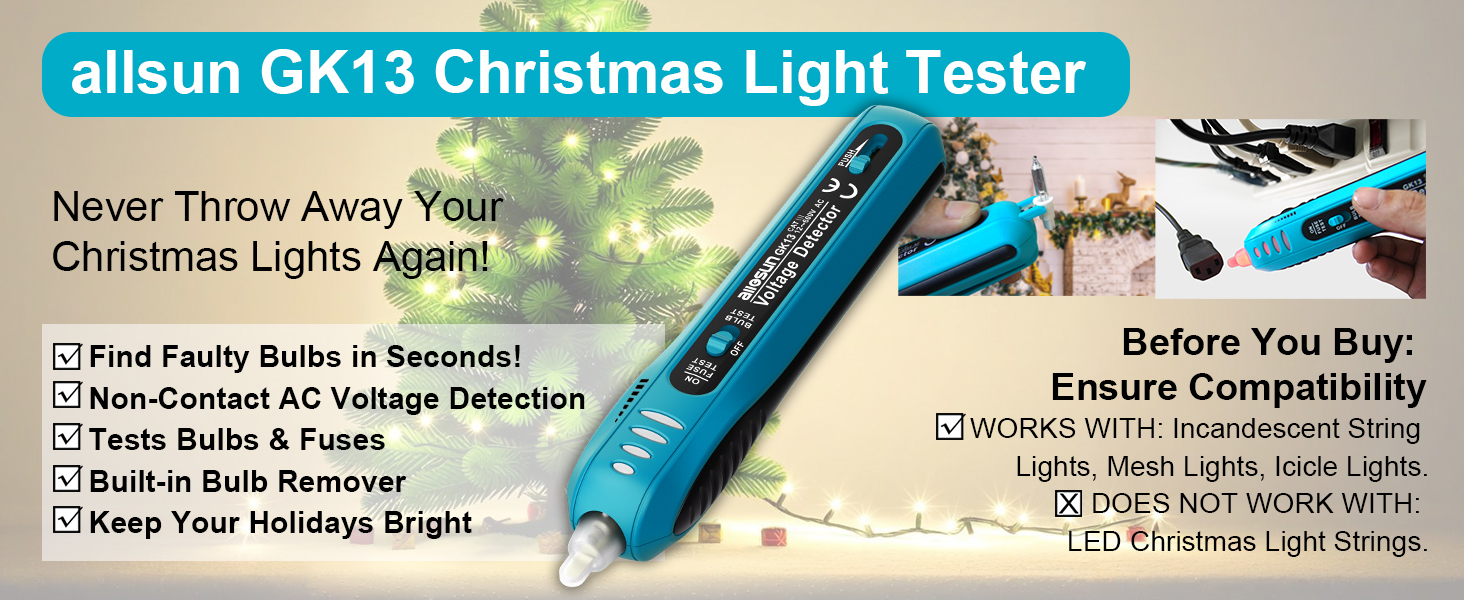
Information regarding the types of Christmas lights compatible with the allsun GK13 tester.
10. Warranty and Support
No specific warranty or support information is provided in the product details. Please refer to the retailer or manufacturer's website for any available warranty details or customer support contacts.