1. Introduction
This manual provides essential information for the safe and effective use of your Arnold 490-020-9020 Professional Trimmer Line. This high-quality twisted co-polymer line is designed for durability and efficient cutting in various outdoor applications.
Key Features:
- Twisted Co-Polymer Line: Engineered for enhanced cutting performance and reduced fraying.
- Fewer Rewinds: Designed to minimize line breakage, leading to less frequent rewinding.
- Hardened Coat for Durability: Provides a robust exterior for extended life against tough vegetation.
- Flexible Inner Core: Offers resilience and prevents snapping, improving overall line integrity.
- Includes Cutting Tool: For convenient and precise line cutting.
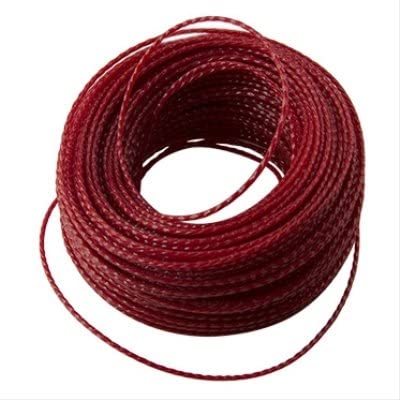
Figure 1: Arnold 490-020-9020 Professional Trimmer Line. This image shows the orange trimmer line coiled in its packaging, highlighting its twisted design and the included cutting tool.
2. Safety Information
Always prioritize safety when operating string trimmers and handling trimmer line.
- Wear Protective Gear: Always wear safety glasses or goggles, long pants, sturdy footwear, and hearing protection when operating a string trimmer.
- Read Trimmer Manual: Consult your string trimmer's instruction manual for specific safety guidelines and line loading procedures.
- Keep Bystanders Away: Ensure children, pets, and other people are at a safe distance (at least 50 feet) from the operating area.
- Inspect Line and Trimmer: Before each use, check the trimmer line for damage and ensure it is properly installed. Inspect the trimmer for any loose parts or damage.
- Avoid Obstacles: Be aware of rocks, fences, and other hard objects that can cause the line to break or projectiles to be thrown.
- Disconnect Power: Always disconnect the power source (unplug electric trimmers, remove battery from cordless trimmers, or turn off engine for gas trimmers) before performing any maintenance, loading line, or clearing debris.
3. Setup and Installation
This section outlines the general steps for installing the Arnold 490-020-9020 Professional Trimmer Line into your string trimmer. Refer to your specific trimmer's manual for detailed instructions, as procedures may vary by model.
Loading Trimmer Line:
- Prepare the Trimmer: Ensure the string trimmer is turned off and disconnected from its power source.
- Remove Trimmer Head Cap: Depending on your trimmer model, you may need to press tabs, twist, or unscrew the cap of the trimmer head to access the spool.
- Remove Old Line/Spool: Carefully remove any remaining old trimmer line or the empty spool from the trimmer head.
- Cut New Line: Using the included cutting tool, cut a length of Arnold 490-020-9020 trimmer line. The required length typically ranges from 10 to 20 feet, depending on your trimmer's spool capacity. Refer to your trimmer manual for the exact recommended length.
- Load the Spool:
- For single-line spools: Thread one end of the line through the hole on the spool and wind it tightly and evenly in the direction indicated by arrows on the spool.
- For dual-line spools: Fold the line in half, hook the midpoint into the center slot of the spool, and wind each half onto its respective side of the spool, ensuring even tension and winding in the correct direction.
- For "feed-through" or "speed-load" heads: Push the line directly through the trimmer head until equal lengths protrude from both sides, then twist the head to wind the line.
- Secure the Line: Leave a few inches of line protruding from the spool and secure it in the designated notch(es) on the spool to prevent unwinding.
- Reassemble Trimmer Head: Feed the secured line ends through the eyelets on the trimmer head, then place the spool back into the head and reattach the cap. Pull the line firmly to release it from the spool notches.
- Trim Excess Line: If necessary, use the trimmer's built-in line cutter or the included cutting tool to trim the line to the appropriate length for operation.
4. Operating Instructions
Once the Arnold 490-020-9020 Professional Trimmer Line is properly installed, you can begin operation.
- Start the Trimmer: Follow your trimmer's manufacturer instructions to start the engine or activate the motor.
- Maintain Proper Stance: Hold the trimmer firmly with both hands, maintaining balance and control.
- Cutting Technique:
- Use the tip of the line to cut grass and weeds.
- Swing the trimmer in a sweeping motion, moving from right to left for optimal cutting and debris deflection.
- Avoid hitting hard surfaces or objects, as this can cause premature line wear or breakage.
- Advancing the Line:
- Bump Feed: Lightly tap the trimmer head on the ground while the trimmer is running to advance the line.
- Automatic Feed: Some trimmers automatically advance the line when the throttle is released and re-engaged.
- Manual Feed: For some models, you may need to manually pull out the line after stopping the trimmer.
- Edge Trimming: For edging, tilt the trimmer head to a 90-degree angle to the ground and walk slowly along the edge.
- Finish Operation: When finished, turn off the trimmer and disconnect the power source. Allow the trimmer to cool before storage.
5. Maintenance
Proper maintenance of your trimmer line and trimmer head ensures optimal performance and longevity.
- Inspect Line Regularly: Check the trimmer line for wear, fraying, or damage before and during use. Replace worn line promptly.
- Clean Trimmer Head: Periodically clean grass and debris from the trimmer head and line exit eyelets to prevent clogging and ensure smooth line advancement.
- Store Line Properly: Store unused trimmer line in a cool, dry place away from direct sunlight to maintain its flexibility and prevent degradation.
- Replace Spool/Head: If the trimmer head or spool becomes damaged or excessively worn, replace it according to your trimmer's manufacturer recommendations.
6. Troubleshooting
This section addresses common issues you might encounter with your trimmer line.
| Problem | Possible Cause | Solution |
|---|---|---|
| Line breaks frequently |
|
|
| Line does not advance |
|
|
| Poor cutting performance |
|
|
7. Specifications
| Feature | Detail |
|---|---|
| Brand | Arnold |
| Model Number | 490-020-9020 |
| Line Diameter | 0.095 inches |
| Line Length | 100 feet |
| Material | Twisted Co-Polymer |
| Color | Natural (Orange) |
| Product Dimensions | 6.25 x 6.25 x 1.75 inches |
| Item Weight | 9 ounces |
| Manufacturer | Arnold Corporation |
| ASIN | B07K1CVXK1 |
8. Warranty and Support
For specific warranty information or product support, please contact Arnold Corporation directly. Details regarding warranty coverage and customer service contact information are typically provided with the product packaging or on the manufacturer's official website.
Note: This trimmer line is an accessory. Warranty terms may differ from the string trimmer itself.