
Introduction
This manual provides detailed instructions for the installation, operation, and maintenance of your WOWOW Brushed Nickel Centerset Bathroom Faucet. Designed for standard 4-inch centers and 3-hole installations, this single-handle faucet features a low arc spout and includes a lift rod drain assembly for convenient use. Constructed from premium 304 stainless steel with a brushed nickel finish, it offers both durability and a modern aesthetic. Two aerators are included to meet various flow rate preferences and water conservation needs.
Package Contents
Before beginning installation, please verify that all components are present:
- Single Handle Bathroom Faucet (Brushed Nickel)
- Lift Rod Drain Stopper Assembly
- Installation Instructions Manual
- Pair of Gloves
- Gasket and Lock Nut
- Additional 2.2 GPM Aerator (1.2 GPM aerator pre-installed)
- Wrench
- Teflon Tape
- 23.6-inch cUPC-certified Hot and Cold Water Supply Hoses
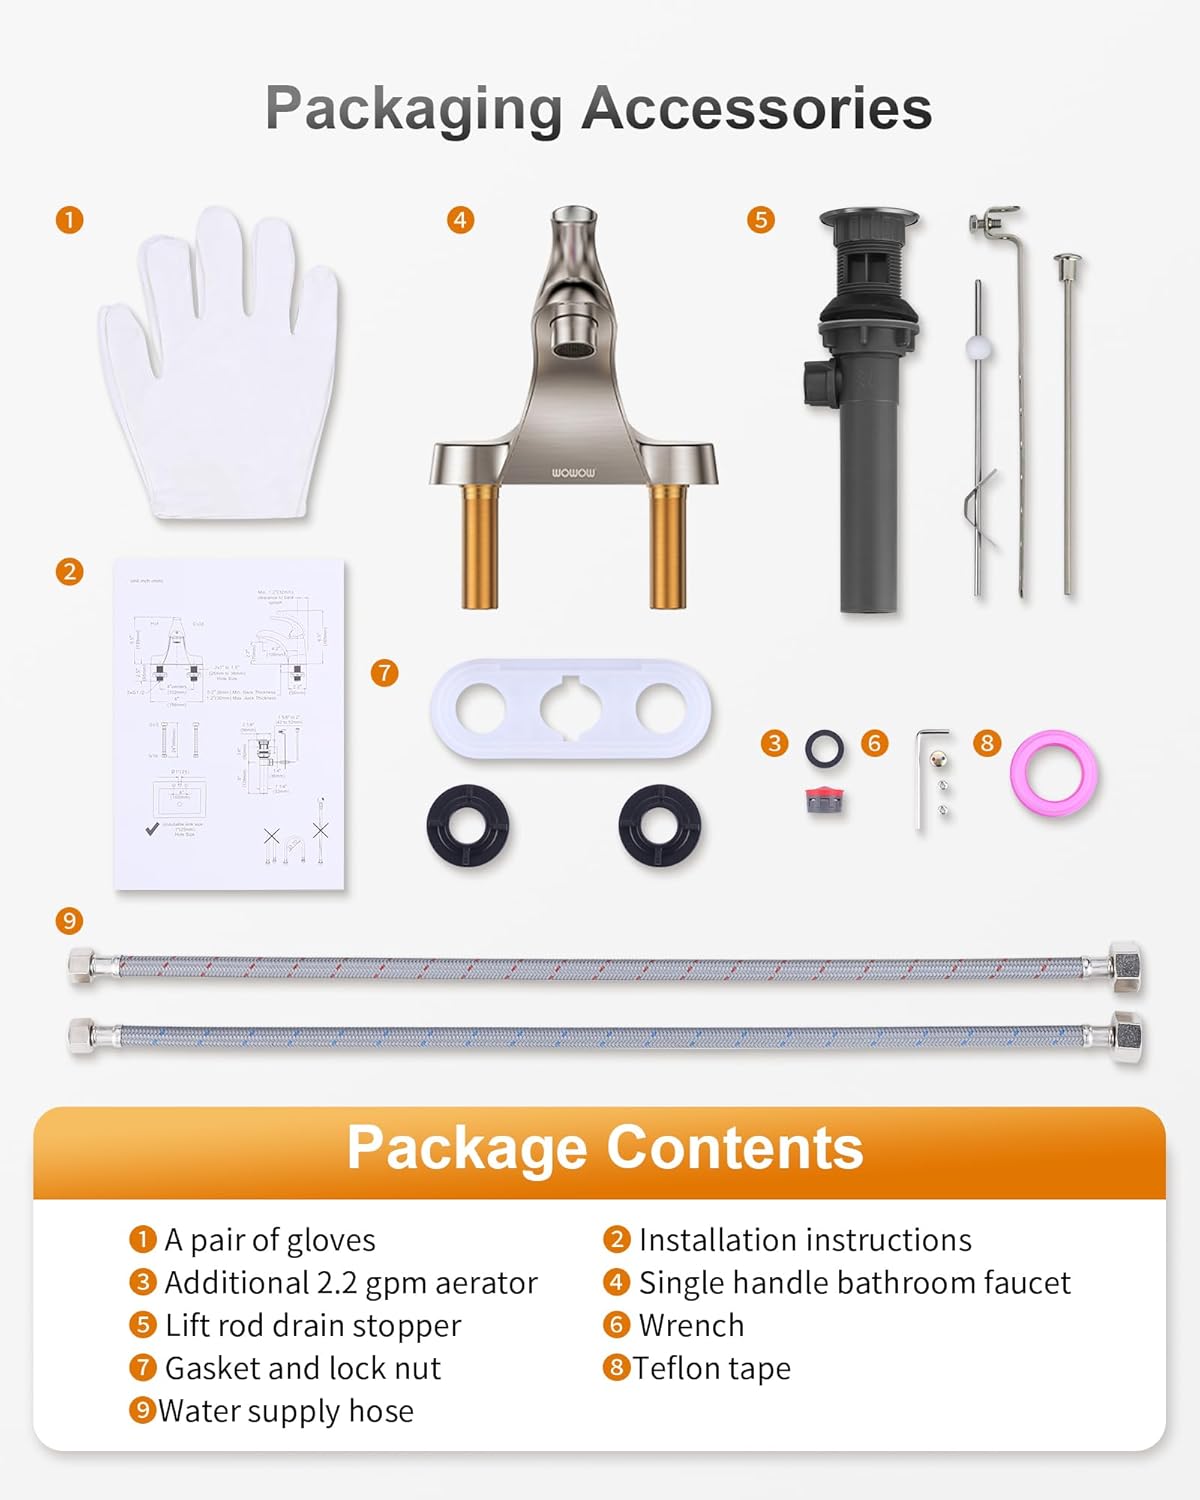
Figure 1: Complete set of faucet components and accessories.
Specifications
| Feature | Specification |
|---|---|
| Brand | WOWOW |
| Model Name | WOWOW Single Hole 4 Inch Centerset Bathroom Sink Faucet |
| Model Number | 2320700-AMUS |
| Color | Brushed Nickel |
| Finish Type | Brushed |
| Material | Stainless Steel |
| Mounting Type | Deck Mount |
| Number of Handles | 1 |
| Hole Count | 3 |
| Installation Type | Centerset |
| Special Feature | Lift Rod Drain |
| Maximum Flow Rate | 1.2 GPM (2.2 GPM optional aerator included) |
| Spout Height | 2.7 Inches |
| Spout Reach | 4.2 Inches |
| Hose Length | 23.6 Inches |
| Item Weight | 2.7 pounds (1.23 Kilograms) |

Figure 2: Product dimensions and compatibility for 4-inch centerset installation.
Installation
Pre-Installation Checklist
- Ensure your sink has 3 holes with a 4-inch centerset configuration.
- Turn off the main water supply to your bathroom.
- Clear the area under the sink for easy access.
- Gather necessary tools: adjustable wrench, screwdriver, plumber's putty or silicone sealant (not included, but recommended).
Faucet Installation Steps
- Prepare the Faucet: Ensure the rubber gasket is properly seated on the bottom of the faucet body.
- Mount the Faucet: Insert the faucet body into the center hole of your sink. From underneath the sink, secure the faucet with the provided gasket and lock nut. Hand-tighten first, then use the wrench for a snug fit, being careful not to overtighten.
- Connect Water Supply Lines: Attach the hot and cold water supply hoses (included) to the corresponding inlets on the faucet and to your shut-off valves. Use the provided Teflon tape on threaded connections to prevent leaks. The hoses are 23.6 inches long.
Lift Rod Drain Assembly Installation
The lift rod drain assembly allows for convenient draining without direct contact with the water. Follow these steps for proper installation:
- Insert Drain Body: Place the drain body into the sink's drain hole from above, ensuring the rubber washer is correctly positioned.
- Secure Drain Body: From underneath the sink, attach the plastic nut and tighten it to secure the drain body.
- Connect Lift Rod: Insert the lift rod (the small rod extending from the back of the faucet) into the horizontal rod of the drain assembly. Secure it with the provided clip and screw. Adjust the height of the lift rod to ensure the drain stopper opens and closes properly.
Video 1: Detailed installation guide for the lift rod drain assembly.

Figure 3: The single handle allows for easy temperature and flow control.
Operating Instructions
Water Flow and Temperature Control
The WOWOW faucet features a single handle for precise control over water flow and temperature:
- Turn On/Off: Lift the handle upwards to turn on the water. Push it downwards to turn off the water.
- Adjust Temperature: Move the handle to the left for hot water and to the right for cold water. The ceramic cartridge ensures smooth and leak-free operation.
- Adjust Flow: The height to which you lift the handle controls the water flow rate.

Figure 4: Visual representation of single handle operation for temperature and flow.
Lift Rod Drain Operation
The integrated lift rod drain assembly provides a hygienic way to manage your sink's drainage:
- Close Drain: Push the lift rod down to close the drain stopper and fill the basin.
- Open Drain: Pull the lift rod up to open the drain stopper and allow water to drain.
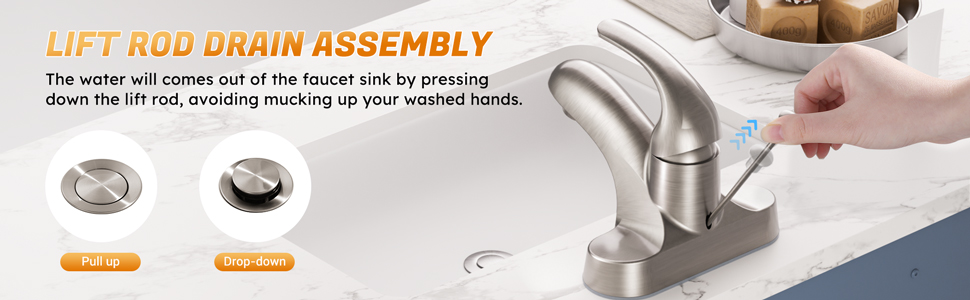
Figure 5: Lift rod drain mechanism for easy basin control.
Maintenance
Cleaning the Faucet
To maintain the brushed nickel finish and ensure longevity, follow these cleaning guidelines:
- Use a soft, damp cloth and mild soap to clean the surface.
- Avoid abrasive cleaners, harsh chemicals, or scouring pads, as these can damage the finish.
- Rinse thoroughly with clean water and dry with a soft towel to prevent water spots.
Aerator Maintenance
The faucet comes with two aerators: a pre-installed 1.2 GPM aerator for water conservation and an additional 2.2 GPM aerator for higher flow. Regular cleaning prevents mineral buildup and maintains optimal water flow.
- Removal: Unscrew the aerator from the end of the spout. A wrench may be needed if it's too tight.
- Cleaning: Separate the aerator components and rinse them under running water. Use a soft brush or toothpick to remove any mineral deposits or debris.
- Reinstallation: Reassemble the aerator and screw it back onto the spout. Hand-tighten, then give a slight turn with a wrench if necessary.
- Swapping Aerators: If you wish to change the flow rate, simply replace the installed aerator with the alternative 2.2 GPM aerator provided, following the removal and reinstallation steps.
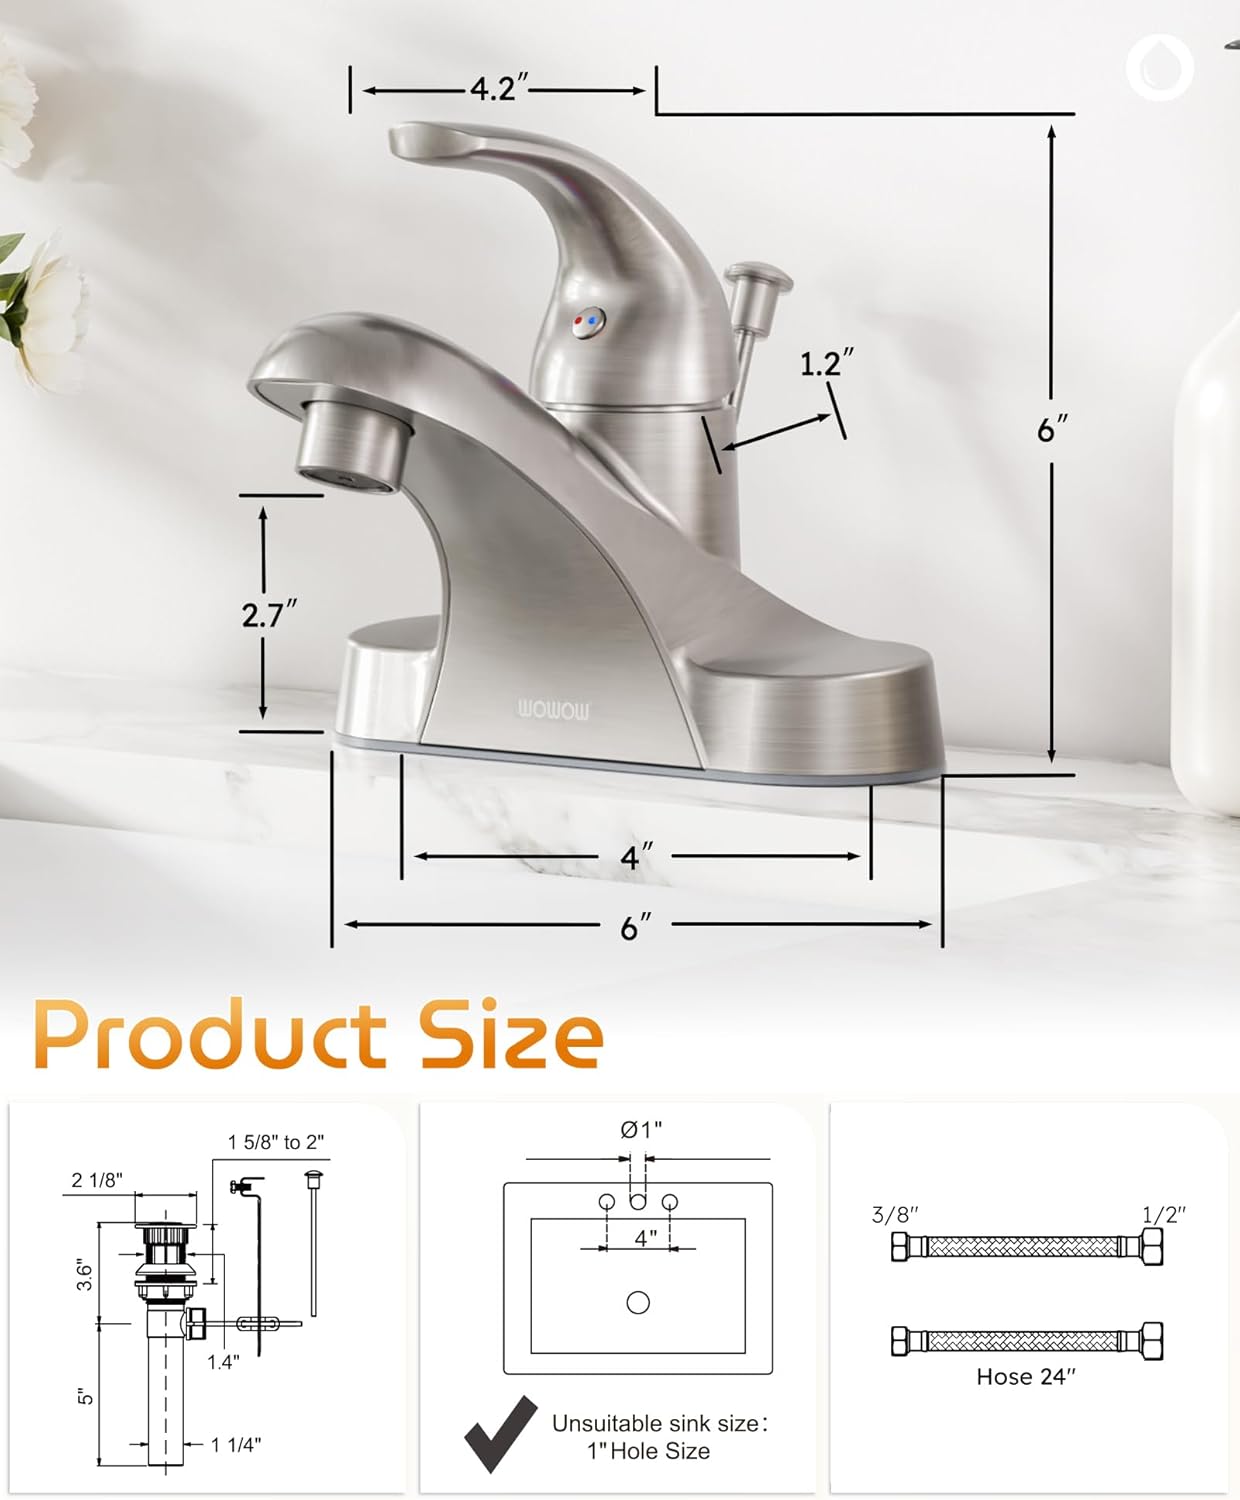
Figure 6: Dual flow options with 1.2 GPM (water-saving) and 2.2 GPM (high flow) aerators.
Troubleshooting
If you encounter any issues with your WOWOW faucet, refer to the common problems and solutions below:
| Problem | Possible Cause | Solution |
|---|---|---|
| Low Water Flow | Clogged aerator, partially closed shut-off valve, or low water pressure. | Clean or replace the aerator. Ensure shut-off valves are fully open. Check main water supply pressure. |
| Leaks from Spout | Worn-out O-rings or ceramic cartridge. | Contact customer support for replacement parts or professional assistance. |
| Leaks from Base | Loose mounting nut or improper gasket seating. | Tighten the mounting nut under the sink. Ensure the gasket is correctly positioned. |
| Drain Stopper Malfunction | Lift rod or horizontal rod misaligned or disconnected. | Re-align or re-connect the lift rod and horizontal rod components. Ensure the clip is secure. |
Warranty & Support
Your WOWOW Bathroom Faucet is covered by a 5 YEARS LIMITED WARRANTY. This warranty covers defects in material and manufacturing under normal use. For warranty claims, technical support, or replacement parts, please contact WOWOW customer service through the retailer where the product was purchased or visit the official WOWOW website.


