
Introduction
The Phenyx Pro PTU-71 Wireless Microphone System is designed to provide reliable, high-quality audio for a variety of applications, including singing, public speaking, karaoke, and live events. Featuring advanced UHF technology with auto-scan and multiple frequency options, this system ensures stable signal transmission and clear sound reproduction. This manual provides detailed instructions for setup, operation, and maintenance to help you get the most out of your new wireless microphone system.
Box Contents
Your Phenyx Pro PTU-71 Wireless Microphone System package includes the following items:
- 1 x dual wireless metal receiver
- 1 x wireless handheld microphone
- 1 x UHF bodypack wireless transmitter
- 1 x lapel lavalier microphone
- 1 x headset microphone
- 1 x 1/4'' audio cable
- 1 x power adapter
- 1 x 6.5mm to 3.5mm adapter
- 4 x AA batteries (for 16-hrs long hour use)
- 2 x antennas
- 1 x user manual
- 1 x anti-rolling ring
- 4 x rubber feet
All necessary components are included to enable quick and efficient setup of your system.

Image: All components included in the Phenyx Pro PTU-71 package.
Product Overview and Features
UHF Wireless Receiver
The dual wireless metal receiver is the central unit of your system, providing long-range coverage and stable signal reception. It features a robust metal build for durability.
- Auto Scan: Automatically identifies the least-interference frequency.
- Lock Function: Locks the selected frequency to prevent accidental changes.
- 2x100 Frequency Groups: Offers 200 selectable UHF frequencies across two channels (Channel 1: 538.3 - 566.5 MHz; Channel 2: 571.3 - 599.5 MHz) for multi-set operation of up to 16 transmitters simultaneously.

Image: Front panel controls of the UHF Wireless Receiver.
UHF Handheld Transmitter
The handheld microphone is built with durable metal and features professional circuitry for clear sound reproduction.
- Real-time Battery Indicator: Monitor battery status directly on the microphone's display.
- ON/MUTE/OFF Switch: Easily mute or power off the microphone.
- Cardioid Polar Pattern: Ensures precise sound pickup and reduces background noise.
- Stable Coverage: Offers a long range of 290 ft – 328 ft line of sight.

Image: Features of the UHF Handheld Transmitter.
Bodypack Transmitter
The premium ABS crafted bodypack transmitter offers hands-free performance and versatility, pairing with either the included lapel or headset microphones.
- 3-pin mini XLR jack: Provides reliable audio connection for lapel or headset mics.
- Low Battery Indicator: Red light flashes when battery is low.
- ON/MUTE/OFF Switch: Mute your sound with a simple press.
- Battery Installation: Requires 2 AA batteries; ensure proper polarity.
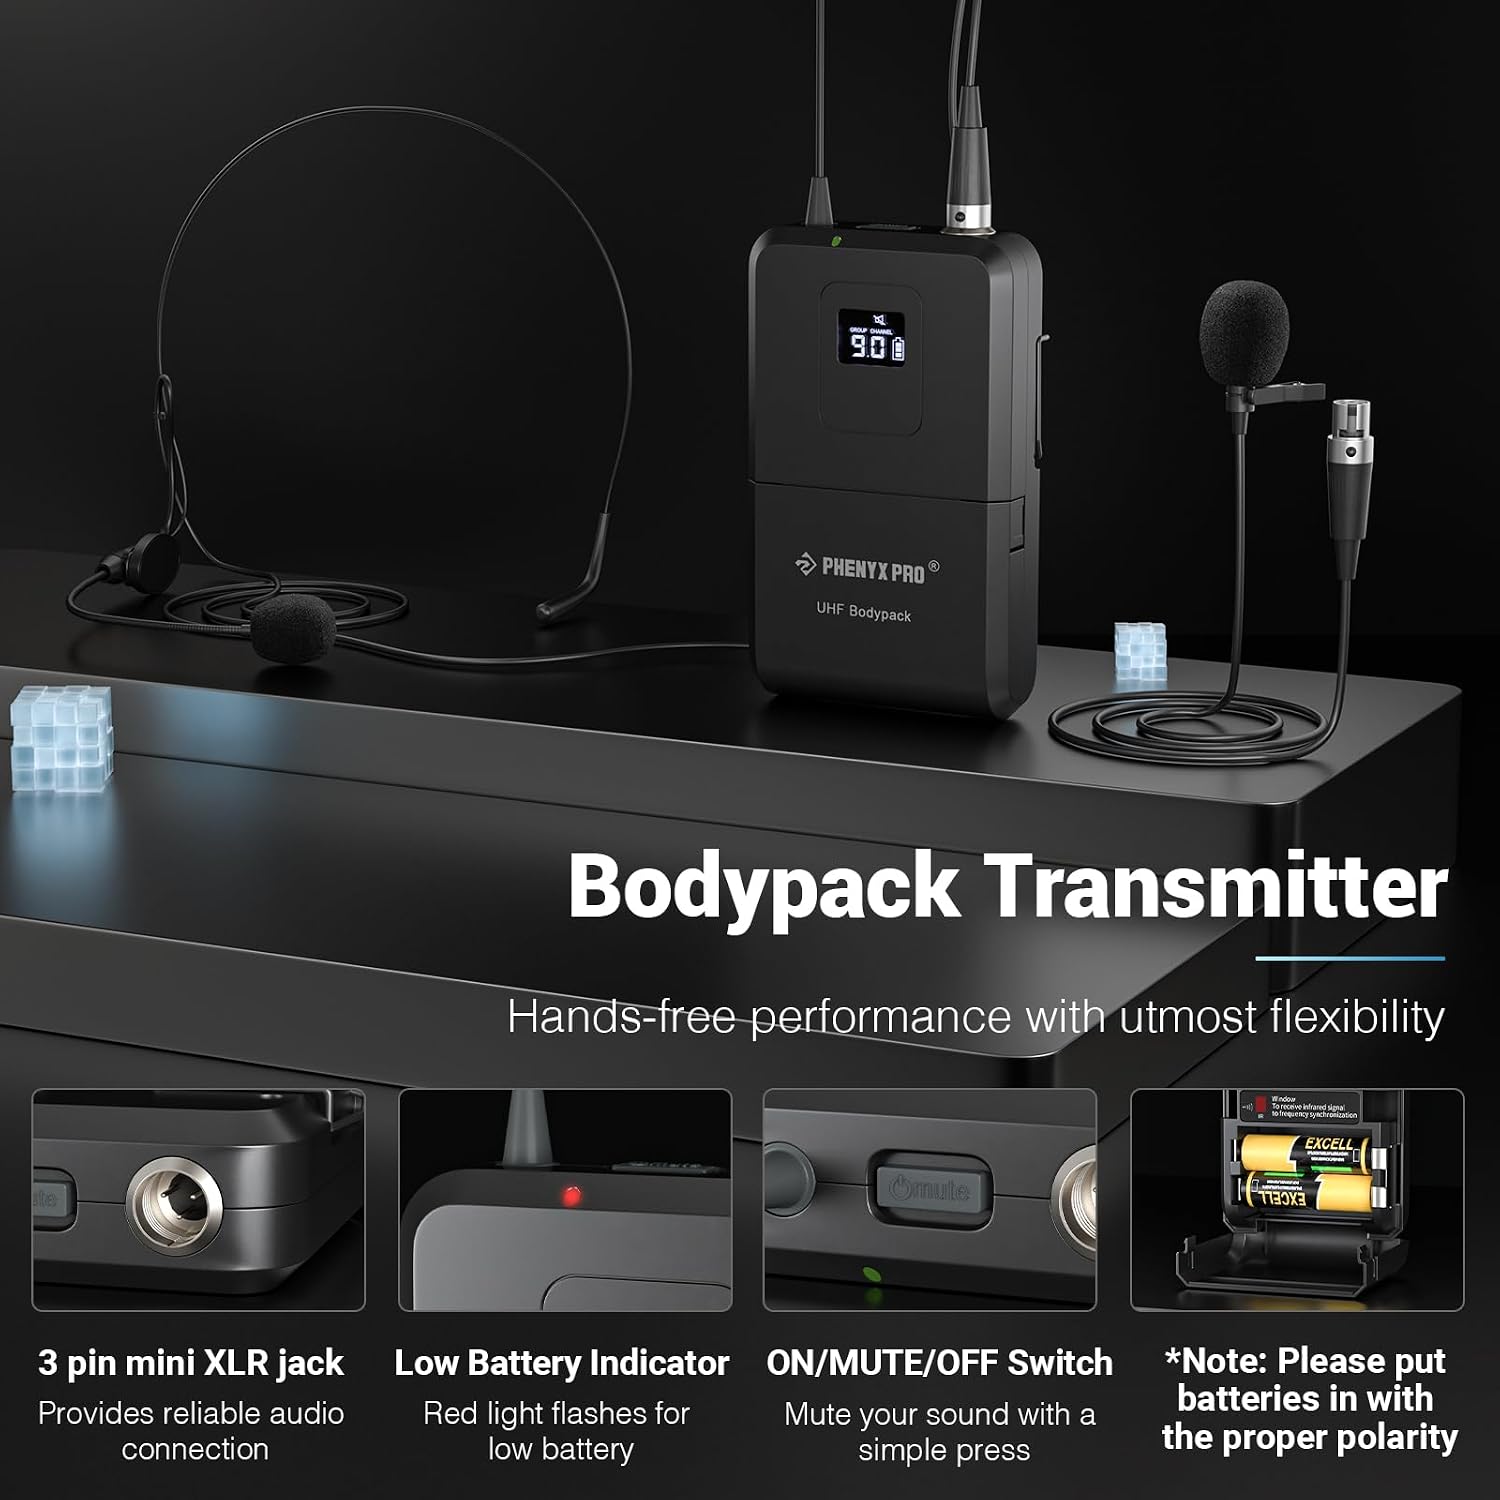
Image: Features of the Bodypack Transmitter.
Powerful Performance Tools
The PTU-71 system incorporates several features to enhance performance and ease of use:
- Auto Scan: Locates a desirable frequency automatically.
- Lock Function: Protects your settings from accidental changes.
- Memory Switch: Remembers previous settings for instant recall.
- Multiset Operation: Professional circuitry allows reliable coverage and expands up to 100m/328ft with 2x100 tunable frequency groups for simultaneous multiset hookup.

Image: Overview of the system's powerful performance tools.
Flexibility and Sound Quality
- The dynamic microphone renders reliable and professional live performance, enabling you to move and dance freely.
- Unidirectional mics with cardioid polar pattern are designed for true sound reproduction.
- 3-pin mini XLR jack professionally renders lush and natural audio.
- Keep your microphone about 1-2 inches (3-5 cm) away from your mouth for optimal sound capture.

Image: Flexibility and sound quality features.
Designed for Convenience
- Snap-on BNC antennas for easy system installation.
- Anti-rolling rings color-code and protect your mics.
- Memory switch retains previous settings to simplify next direct hookup.

Image: Convenience features of the system.
Setup
How to Set Up Auto Scan
- Long press the SET button (2s) on the receiver to initiate auto-scan.
- Wait until a new frequency appears on the receiver's display.
- Tap the SET button again on the receiver to initiate IR sync.
- Vertically aim the IR window of a transmitter (handheld or bodypack) to that of the receiver to pair them up.

Image: Visual guide for Auto Scan setup.
How to Lock Settings
To secure your settings and prevent accidental changes, long press the UP button (2s) on the receiver. The display will show "L ON" to indicate that the settings are locked.

Image: Visual guide for locking receiver settings.
Connection Diagrams
The PTU-71 system offers various connection options for different audio setups:
Karaoke with Your Home Theater System

Diagram: Receiver connected to TV via RCA (with optional DAC converter) and to an audio mixer/speaker.
Karaoke with Your Home Amplifier Mixer Receiver

Diagram: Receiver connected to an amplifier mixer receiver and then to a speaker.
Professional Setup

Diagram: Receiver connected to an audio mixer and then to an audio amplifier.
Operating Instructions
Once the system is set up and paired, ensure the receiver is connected to your audio system (mixer, amplifier, or speaker). Turn on the microphones and adjust the volume knobs on the receiver for optimal sound levels. The LCD display on the receiver and microphones will show the active channel and battery status. For best performance, keep the microphones within the specified operating range and avoid obstructions.
Maintenance
To ensure the longevity and optimal performance of your Phenyx Pro Wireless Microphone System, follow these maintenance guidelines:
- Cleaning: Use a soft, dry cloth to clean the receiver and microphones. Avoid using liquid cleaners or abrasive materials.
- Battery Care: Remove batteries from microphones and bodypack transmitters if the system will not be used for an extended period to prevent leakage.
- Storage: Store the system in a cool, dry place away from direct sunlight and extreme temperatures. The included hard case is ideal for safe storage and transport.
- Antennas: Handle antennas carefully to avoid bending or breaking. Ensure they are securely attached to the receiver during operation.
Troubleshooting
Here are solutions to common issues you might encounter with your Phenyx Pro Wireless Microphone System:
- No Sound: Ensure all components are powered on, cables are securely connected, and volume levels are adjusted. Check microphone batteries.
- Cutoffs and Static Noises: This might be due to a complex signal environment. Try using the Auto Scan feature to find a clear frequency. If issues persist, consider upgrading to a True Diversity wireless microphone system (e.g., Phenyx Pro PTU-1U or PTA-2) for stronger interference resistance.
- Limited Range: Ensure antennas are fully extended and positioned correctly. Avoid physical obstructions between the transmitter and receiver. Consider using an antenna distribution system (e.g., Phenyx Pro PAS-225X) to extend operating range.
- Microphone Not Pairing: Ensure the transmitter's IR window is correctly aimed at the receiver's IR light during the sync process.

Image: Troubleshooting guide for signal issues.

Image: Recommended antenna distribution system for extended range.
Specifications
| Specification | Detail |
|---|---|
| Brand | Phenyx Pro |
| Model Name | PTU-71-1H1B |
| Item Weight | 4.62 pounds (2.1 Kilograms) |
| Product Dimensions | 12.2 x 6.93 x 12.2 inches |
| Microphone Form Factor | Lavalier/Handheld |
| Polar Pattern | Unidirectional |
| Connectivity Technology | Wireless, UHF, XLR 6.35MM JACK |
| Connector Type | 6.35 mm Jack, XLR |
| Number of Channels | 2 (2x100 selectable UHF frequencies) |
| Frequency Range | 530MHZ - 580MHZ (Channel 1: 538.3-566.5 MHz, Channel 2: 571.3-599.5 MHz) |
| Frequency Response | 18 KHz |
| Signal-to-Noise Ratio | 98 dB |
| Power Source | Battery Powered (4 AA batteries included) |
| Material | Metal (receiver and handheld mic) |
| Operating Range | Up to 328ft line of sight |
| Compatible Devices | Television, PA System, Audio Mixer, Karaoke Machine, Speaker |
Warranty & Support
Phenyx Pro products are crafted with premium components and precision engineering, ensuring trusted quality and lasting reliability. We stand firmly behind every product we make. For detailed warranty information or technical support, please refer to the included user manual or visit the official Phenyx Pro website.
You can also find the User Manual (PDF) here.
Official Product Videos
Set up tutorial for PTU-71B
This video provides a step-by-step tutorial on how to set up the PTU-71B system, covering initial connections and basic operation.
PTU-71 Dual Wireless Mic Set with Handheld Microphone & Bodypack with auto scan function
This video showcases the PTU-71 Dual Wireless Mic Set, highlighting its auto-scan function and the inclusion of both a handheld microphone and a bodypack transmitter.


