1. Product Overview
The Topeak Roadie DA G is a compact and lightweight dual-action pump equipped with an integrated gauge, specifically designed for road cyclists. Its dual-action mechanism efficiently inflates tires, while the analog gauge provides clear pressure readings.
Key Features
- Dual Action: Inflates tires on both the push and pull strokes, allowing for efficient inflation up to 120 psi / 8 bar.
- Integrated Gauge: Features an easy-to-read 1-1/8 inch diameter analog gauge for accurate pressure monitoring during inflation.
- Durable Construction: Constructed with an aluminum barrel and thumb lock, complemented by a polymer handle for reliable performance.
- Compact and Lightweight: Weighs approximately 4.09 oz and measures 8.6 inches x 1.3 inches x 1.2 inches, making it easy to carry.
- Additional Features: Includes an integrated dust cap to protect the valve head and a side mount bracket for convenient attachment to a bicycle frame. Designed for Presta valves only.
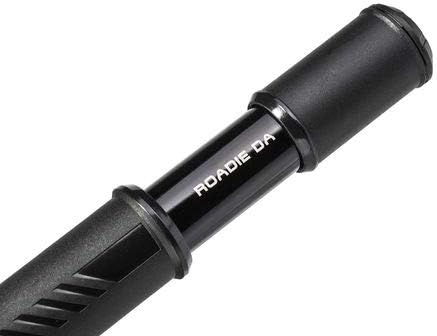
Image: Close-up view of the Topeak Roadie DA G pump barrel.
2. Package Contents
Verify that all components are present in the package:
- Topeak Roadie DA G Mini Bike Pump with Gauge
- Side Mount Bracket

Image: The Topeak Roadie DA G Mini Bike Pump, showing the pump body and integrated gauge.
3. Setup and Installation
3.1 Mounting the Pump
The Roadie DA G pump includes a side mount bracket for convenient attachment to your bicycle frame, typically alongside a water bottle cage.
- Identify suitable mounting points on your bike frame, usually near the water bottle bosses.
- Secure the side mount bracket to the frame using the provided screws (if applicable) or existing water bottle cage screws.
- Slide the pump into the bracket, ensuring it is held firmly in place.

Image: The Topeak Roadie DA G pump securely mounted on a bicycle frame.
3.2 Preparing for Inflation (Presta Valve Only)
This pump is designed exclusively for Presta valves. Before attaching the pump, ensure your tire has a Presta valve.
- Unscrew the small knurled nut on the tip of the Presta valve counter-clockwise until it is loose.
- Press down briefly on the valve stem to release a small amount of air. This ensures the valve is open and ready for inflation.
4. Operating Instructions
4.1 Attaching to Valve
- Remove the integrated dust cap from the pump head.
- Firmly push the pump head onto the Presta valve stem until it is fully seated.
- Engage the thumb lock lever by pushing it down to secure the pump head to the valve, creating an airtight seal.

Image: A hand attaching the pump head to a Presta valve on a bicycle wheel.
4.2 Inflating Tires
The Roadie DA G features a dual-action design for faster inflation.
- Hold the pump firmly with one hand on the handle and the other on the barrel.
- Push and pull the handle in a smooth, continuous motion. Air will be delivered into the tire on both the push and pull strokes.
- Continue pumping until the desired pressure is reached, as indicated on the integrated gauge.
4.3 Reading the Gauge
The analog gauge provides real-time pressure readings in both PSI and Bar.
- The outer ring of the gauge typically displays pressure in PSI (Pounds per Square Inch).
- The inner ring displays pressure in Bar.
- Refer to your tire's sidewall for the recommended pressure range.
4.4 Detaching the Pump
- Once the desired pressure is achieved, disengage the thumb lock lever by flipping it up.
- Carefully pull the pump head straight off the valve stem.
- Screw the small knurled nut on the Presta valve tip clockwise until it is finger-tight to seal the valve.
- Replace the integrated dust cap on the pump head.
5. Care and Maintenance
- Cleaning: Wipe the pump clean with a damp cloth after use, especially if it has been exposed to dirt or moisture. Avoid using harsh chemicals.
- Storage: Store the pump in a dry place, away from direct sunlight and extreme temperatures. Ensure the dust cap is in place to protect the valve head.
- Lubrication: Periodically apply a small amount of silicone-based lubricant to the pump's plunger shaft to maintain smooth operation. Do not over-lubricate.
- Inspection: Regularly check the pump head and thumb lock lever for wear or damage. Ensure the gauge is clear and readable.
6. Troubleshooting
- Pump not inflating tire:
- Ensure the Presta valve nut is unscrewed and the valve has been briefly depressed to open it.
- Verify the pump head is fully seated on the valve stem and the thumb lock lever is securely engaged.
- Check for any visible damage to the pump's seals or O-rings.
- Air leaking from valve connection:
- Re-seat the pump head firmly and ensure the thumb lock lever is fully engaged.
- Inspect the rubber gasket inside the pump head for wear or damage.
- Inaccurate gauge reading:
- Compare the reading with another known accurate gauge if possible.
- Ensure the pump is held steady during inflation to avoid erratic readings.
7. Technical Specifications
| Feature | Specification |
|---|---|
| Brand | Topeak |
| Model | Roadie DA G |
| Material | Aluminum, Plastic |
| Item Weight | 3.4 Ounces (96.4 grams) |
| Product Dimensions (L x W x H) | 8.6" x 1.3" x 1.2" (21.8 cm x 3.3 cm x 3.0 cm) |
| Maximum Pressure | 120 PSI / 8 Bar |
| Valve Compatibility | Presta Only |
| Operation Mode | Manual, Dual-Action |
| Included Components | Pump, Side Mount Bracket |
8. Warranty Information
The Topeak Roadie DA G Mini Bike Pump is covered by a 1-year manufacturer's warranty. This warranty covers defects in materials and workmanship under normal use. For warranty claims or further support, please contact Topeak customer service or refer to the official Topeak website.
9. General Topeak Information
This video provides a general overview of Topeak's commitment to cycling accessories, showcasing various product lines including transport solutions, maintenance tools, and safety equipment. While not specific to the Roadie DA G pump, it illustrates the brand's dedication to quality and innovation in cycling.
Video: Topeak Brand Overview. This video highlights various Topeak cycling accessories and their applications.


