Adventure Force UltiDinoCity001
Adventure Force Ultimate Dino City Garage Instruction Manual
Introduction
Welcome to the Adventure Force Ultimate Dino City Garage! This instruction manual provides important information for the safe assembly, operation, and maintenance of your new toy. Please read this manual thoroughly before use and retain it for future reference.
The Ultimate Dino City Garage offers an immersive play experience with multiple levels, dynamic features, and exciting dinosaur-themed obstacles. It is designed for imaginative play and can store numerous die-cast vehicles.
Safety Information
WARNING: CHOKING HAZARD – Small parts. Not for children under 3 years. Adult supervision is recommended during assembly and play.
- Keep all packaging materials away from children to prevent suffocation.
- Ensure all parts are securely assembled before play.
- Do not modify the product in any way.
- This product is intended for indoor use.
- Periodically inspect the toy for damage. Discontinue use if any parts are broken or loose.
Package Contents
Before assembly, please ensure all components listed below are present:
- Ultimate Dino City Garage structure components
- 5 Die-Cast vehicles
- Race Track sections
- Crane assembly
- Dinosaur figures (T-Rex, Raptor, Pterodactyl)
- Instruction Manual (this document)
- Any additional accessories as depicted on the packaging
If any parts are missing or damaged, please contact customer support.
Setup and Assembly
Follow these steps carefully to assemble your Ultimate Dino City Garage. Adult assembly is required.
Step 1: Base Structure Assembly
Begin by connecting the main base sections of the garage. Ensure all connection points click securely into place to form the foundation of the multi-level structure.
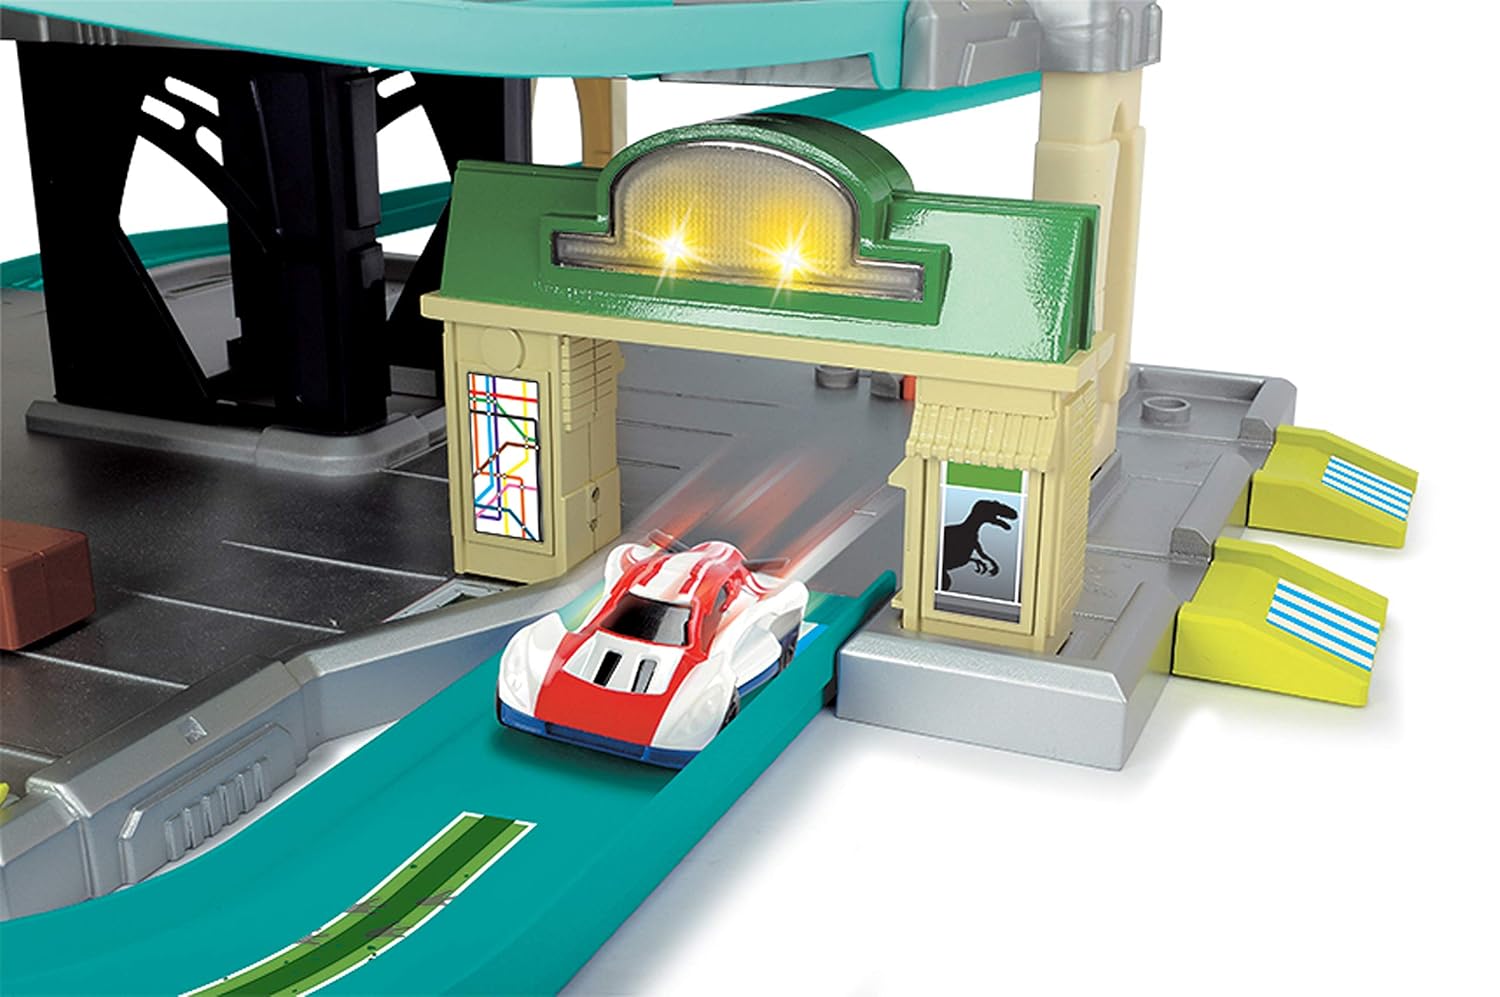
Image: Overall view of the Ultimate Dino City Garage, illustrating its multi-level design and various play areas. This image helps visualize the complete structure.
Step 2: Attaching Parking Decks and Ramps
Attach the five parking decks to the central support structure. Then, connect the various ramps and tracks that link the levels. Pay close attention to the green spiral track leading down to the T-Rex jaw.

Image: Side view of the garage, focusing on the green spiral ramp that descends into the T-Rex's mouth, a key feature for vehicle descent.
Step 3: Installing the Elevator and Crane
Install the working car elevator in its designated shaft. Ensure it moves smoothly between levels. Next, attach the 360-degree crane to the top level. The crane can be used to lift cars or hold the pterodactyl figure.

Image: Detail of the orange crane arm extending over a car in a black lifting platform, demonstrating the crane's functionality to lift vehicles.
Step 4: Attaching Double Racing Track and Dino Obstacles
Connect the high-speed double racing track. Position the raptor figure near the end of this track. Place the T-Rex jaw at the bottom of the spiral track. Ensure all dinosaur figures are securely attached to their designated spots.

Image: A top-down perspective showing two cars positioned at the start of the red double racing track, ready to descend. This highlights the racing feature.
Step 5: Adding Mechanical Features and Details
Integrate the smaller mechanical features such as the gas station, repair station, and car wash on their respective levels. These add interactive elements to the garage and enhance play scenarios.

Image: A white and red toy car speeding through a green gate structure with illuminated lights, indicating one of the interactive features like a gas station or entrance point.
Operating Instructions
Once assembled, your Ultimate Dino City Garage is ready for play. Here’s how to use its main features:
Car Elevator
Manually operate the elevator to transport die-cast vehicles to any of the five parking decks. Place a car on the elevator platform and use the crank or lever (if present) to move it up or down.
Spiral Track and T-Rex Jaw
Place a car at the top of the green spiral track. Release it to watch it race down, potentially encountering the menacing T-Rex jaw at the bottom. The T-Rex jaw may open or close as cars pass through.
Double Racing Track and Raptor
Position two cars at the starting gates of the red double racing track. Release them simultaneously for a high-speed race. The cars will race to beat the raptor figure positioned near the track's end.
360-Degree Crane
Use the crane to lift and move cars around the top level. The crane can also hold the pterodactyl figure, allowing it to "fly" around the garage. The wrecking ball attachment can be used for imaginative demolition play.
Light and Sound Features
The garage includes two light and sound features. These can be activated by pushing the gas pump or by driving a car through specific gates. Refer to the markings on the garage for exact activation points.
Interactive Stations
Explore the gas station, repair station, and car wash on different levels. These stations provide additional play scenarios for your die-cast vehicles.
Maintenance
- Cleaning: Wipe the garage and vehicles with a soft, damp cloth. Do not use harsh chemicals or abrasive cleaners.
- Storage: Store the garage in a dry, cool place away from direct sunlight when not in use.
- Inspection: Periodically check all connections and moving parts to ensure they are secure and functioning correctly.
Troubleshooting
- Cars not moving smoothly on tracks: Ensure tracks are clean and free of debris. Check for any misaligned track sections.
- Elevator not moving: Verify that the elevator mechanism is not jammed and that all parts are correctly assembled.
- Lights/Sounds not working: Check if the activation points (gas pump, gates) are being pressed or triggered correctly. This product states "no batteries required" for its battery description, implying mechanical operation or pre-installed, non-replaceable power for features.
- Parts feel loose: Re-check assembly instructions to ensure all connections are secure.
Specifications
| Feature | Detail |
|---|---|
| Brand | Adventure Force |
| Model Number | UltiDinoCity001 |
| Age Range | Kid (Minimum Recommended age: 36 months) |
| Number of Parking Levels | 5 |
| Vehicle Capacity | Up to 55 Die-Cast vehicles |
| Included Vehicles | 5 Die-Cast vehicles |
| Height | Over 3 feet tall |
| Battery Requirement | No batteries required |
| Material | Metal (Frame Material Type) |
| Assembly Required | No |
Warranty and Support
For warranty information or customer support, please refer to the contact details provided on the product packaging or visit the official Adventure Force website. Keep your purchase receipt as proof of purchase.
Ask a question about this manual
Ask about setup, troubleshooting, compatibility, parts, safety, or missing instructions. Manuals+ will review the question and use this page’s manual context to help answer it.