1. Introduction
This manual provides essential information for the safe and efficient use of your Aquacomputer D5 NEXT Pumpe. Please read these instructions carefully before installation and operation. This pump is designed for use in liquid cooling systems, typically for computers or similar applications requiring controlled fluid circulation.

Image 1.1: Front view of the Aquacomputer D5 NEXT Pumpe, displaying its OLED screen and RGB lighting.
2. Safety Information
- Electrical Safety: Always disconnect power before installing, cleaning, or performing any maintenance on the pump. Ensure all electrical connections are secure and dry.
- Water and Electronics: This device operates with water. Ensure no water comes into contact with electrical components outside of the pump's sealed housing.
- Installation: Install the pump in a stable position to prevent accidental dislodgement or damage.
- Voltage: Only operate the pump with a 12 Volt DC power supply as specified. Using incorrect voltage can damage the device and pose a safety risk.
- Children and Pets: Keep the device and its components out of reach of children and pets.
3. Package Contents
Verify that all components listed below are present in your package:
- Aquacomputer D5 NEXT Pumpe (Model 41118)
- Mounting bracket
- Mounting screws and nuts
- Power cable (4-pin Molex or SATA power adapter, depending on revision)
- USB connection cable

Image 3.1: Contents of the Aquacomputer D5 NEXT Pumpe package, including the pump, mounting hardware, and cables.
4. Setup
Follow these steps for proper installation of your D5 NEXT Pumpe:
- Mounting: Secure the pump using the provided mounting bracket and screws. Ensure the pump is oriented correctly for your system's flow path.
- Fluid Connections: Connect your liquid cooling system's inlet and outlet tubes to the pump. Ensure all fittings are tightened securely to prevent leaks.
- Electrical Connections:
- Power: Connect the pump's power cable to a suitable 12V DC power source from your computer's power supply (e.g., 4-pin Molex or SATA power connector).
- Data (Optional): For advanced monitoring and control, connect the USB cable from the pump to an available USB header on your motherboard.
- Initial Fill and Leak Test: Before powering on your system, fill the liquid cooling loop with coolant. Perform a leak test by running the pump on external power (if possible) or briefly powering the system, carefully checking all connections for leaks.

Image 4.1: Underside of the pump, illustrating the various connection ports for power and data.
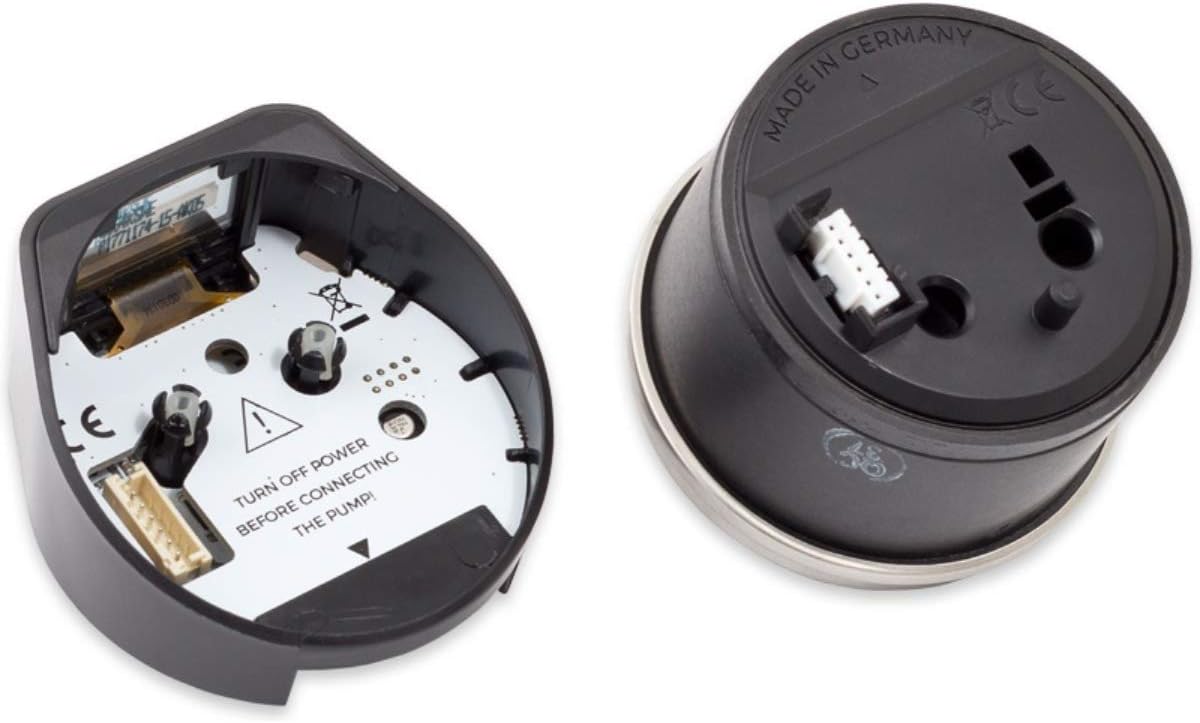
Image 4.2: Internal view of the pump's electronics, with a visible warning: "TURN OFF POWER BEFORE CONNECTING THE PUMP!"
5. Operating Instructions
The Aquacomputer D5 NEXT Pumpe features an integrated OLED display and control buttons for direct interaction, as well as software control via USB.
- Power On: Once installed and connected, power on your system. The pump will initialize and display its current status on the OLED screen.
- OLED Display: The display shows real-time information such as coolant temperature and flow rate.
- On-Device Controls: Use the buttons located near the OLED display to navigate menus and adjust pump settings directly on the device. Refer to the on-screen prompts for specific functions.
- Software Control: For comprehensive control and customization, install the Aquasuite software on your computer. Connect the pump via USB to access advanced settings, create profiles, and monitor performance.
6. Maintenance
Regular maintenance ensures optimal performance and longevity of your pump.
- Coolant Quality: Use high-quality, non-corrosive coolant specifically designed for liquid cooling systems. Replace coolant periodically as recommended by the coolant manufacturer.
- Cleaning: Periodically inspect the pump and cooling loop for any signs of sediment buildup or blockages. If necessary, drain the system and clean the pump impeller and housing.
- Leak Checks: Regularly check all fittings and connections for any signs of leaks.
7. Troubleshooting
If you encounter issues with your D5 NEXT Pumpe, consider the following troubleshooting steps:
- Pump Not Starting/No Power:
- Ensure the power cable is securely connected to both the pump and the power supply.
- Verify that the power supply is functioning correctly and providing 12V DC.
- Check for any loose connections or damaged cables.
- Low Flow Rate/No Flow:
- Inspect the cooling loop for any blockages in tubing, radiators, or water blocks.
- Check the coolant level in your reservoir.
- Ensure the pump impeller is not obstructed by debris.
- Unusual Noise:
- Air trapped in the system can cause noise. Tilt your system gently to help release air bubbles.
- Ensure the pump is securely mounted and not vibrating against other components.
- Low Voltage Alarm:
- This indicates the pump is not receiving adequate voltage. Check your power supply connections and ensure the power supply is capable of delivering sufficient power.
- Test with a different power cable or power supply if possible.
8. Specifications
| Feature | Specification |
|---|---|
| Brand | Aquacomputer |
| Model Number | 41118 |
| Color | Black |
| Material | Ceramic |
| Style | Submersible |
| Product Dimensions (L x W x H) | 6.3" x 4.33" x 3.94" |
| Power Source | DC Power Supply |
| Voltage | 12 Volts |
| Item Weight | 0.6 Pounds |
9. Warranty and Support
For warranty claims or technical support, please refer to the following information:
- Return Policy: This product typically includes a 30-day return period from the date of purchase. Please check with your retailer for specific return conditions.
- Manufacturer Warranty: Aquacomputer is a German company. For manufacturer warranty service, you may need to contact Aquacomputer directly. Be aware that international shipping costs and processing times may apply for customers outside of Germany.
- Retailer Support: For initial support or warranty inquiries, it is often best to contact the retailer from whom you purchased the product. They may be able to assist with troubleshooting or facilitate warranty claims.