
Introduction
This manual provides essential information for the proper installation, operation, and maintenance of your Kidde I12040 AC Hardwired Interconnect Photoelectric Smoke Alarm. Please read this manual thoroughly before installation and keep it in a safe place for future reference. This device is designed to detect smoke and alert occupants to potential fire hazards.
Important Safety Information
- WARNING: This unit will not operate without power. Ensure proper AC wiring and battery backup installation.
- DANGER: This smoke alarm is not a substitute for property, disability, life, or other insurance of any kind.
- CAUTION: Do not paint the smoke alarm. Paint can clog the openings and interfere with the sensor's ability to detect smoke.
- Regularly test your smoke alarm as described in the "Operating" section.
- Replace the smoke alarm unit every 10 years from the date of manufacture.
Package Contents
- Kidde I12040 AC Hardwired Interconnect Photoelectric Smoke Alarm Unit(s)
- Mounting Bracket
- Wiring Harness
- Installation Hardware (screws, anchors)
- User Manual
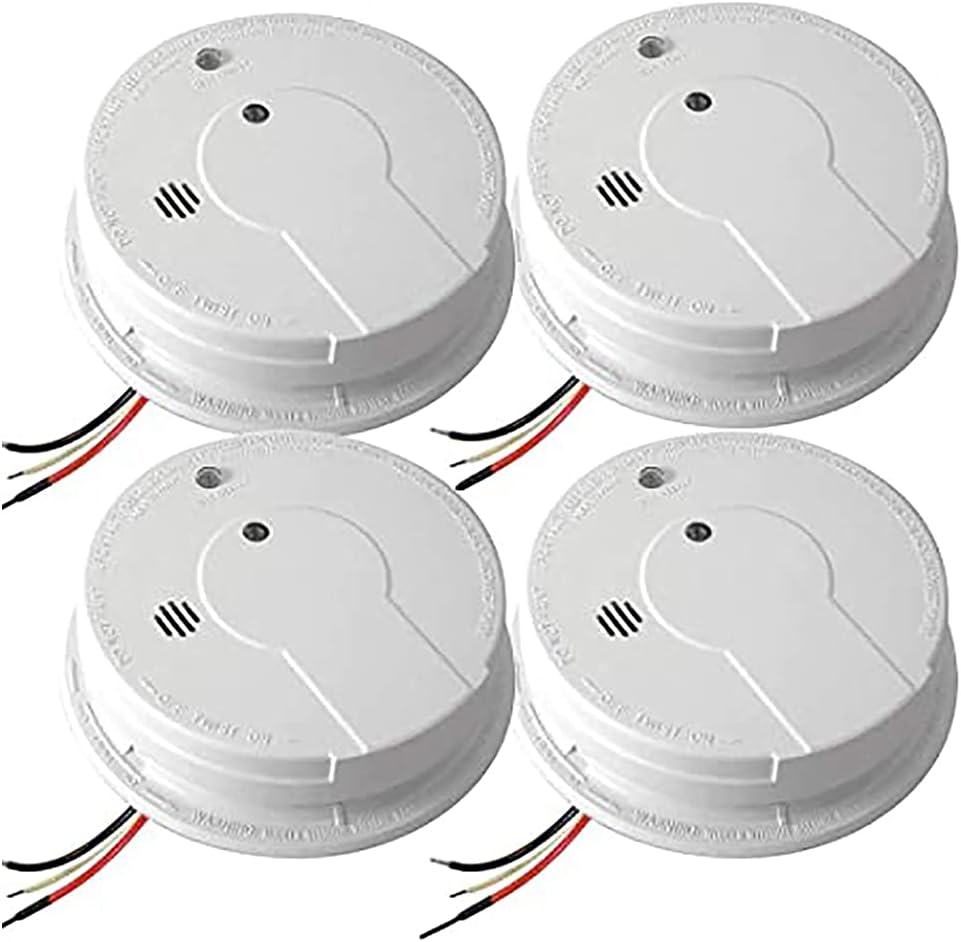
Image: Four Kidde I12040 smoke alarms. Each alarm is white, circular, and features a central test/hush button and ventilation slots. Red, black, and white wires extend from the back of each unit, indicating their hardwired and interconnect capabilities.
Setup and Installation
Location Recommendations
- Install smoke alarms on every level of your home, including basements.
- Place alarms inside and outside of sleeping areas.
- Mount on the ceiling or high on a wall (at least 4 inches from the ceiling/wall intersection).
- Avoid placing near windows, doors, or forced-air vents.
- Keep away from cooking appliances, fireplaces, and high-humidity areas.
Wiring Instructions
- Turn off power: Before beginning, ensure the power to the circuit where the alarm will be installed is turned off at the main fuse or circuit breaker panel.
- Connect wiring harness:
- Connect the black wire from the alarm harness to the hot (live) wire in the junction box.
- Connect the white wire from the alarm harness to the neutral wire in the junction box.
- Connect the red wire from the alarm harness to the interconnect wire (if applicable) in the junction box. If not interconnecting, cap the red wire.
- Secure connections: Use wire nuts to secure all connections.
- Install 9V Battery: Open the battery compartment and connect a new 9V alkaline battery. Ensure correct polarity. Close the compartment.
- Mounting Bracket: Attach the mounting bracket to the electrical junction box using the provided screws.
- Attach Alarm: Align the alarm with the mounting bracket and twist clockwise until it locks into place.
- Restore Power: Turn the power back on at the main fuse or circuit breaker panel.
- Test Unit: Press and hold the Test/Hush button until the alarm sounds. Refer to the "Operating" section for detailed testing procedures.
Note: All wiring must be installed in accordance with the National Electrical Code (NEC) and local codes. If you are unsure about wiring, consult a qualified electrician.
Operating Instructions
Normal Operation
- Power On: Once properly installed and powered, the alarm will emit a short chirp and the LED indicator will flash briefly.
- Standby Mode: The LED indicator will flash approximately once every 40-60 seconds, indicating normal operation.
- Alarm Condition: If smoke is detected, the alarm will sound a loud, continuous horn pattern (3 beeps, pause, 3 beeps). The LED on the alarming unit will flash rapidly. If interconnected, all other alarms will also sound.
Testing the Alarm
Test your smoke alarm weekly to ensure proper function.
- Ensure the alarm is receiving AC power and has a fresh 9V battery installed.
- Press and hold the Test/Hush button firmly for a few seconds.
- The alarm will sound a loud, pulsating horn. If interconnected, all connected alarms should also sound.
- Release the button. The alarm should stop sounding.
- If the alarm does not sound, refer to the "Troubleshooting" section.
Hush Feature
The Hush feature temporarily silences the alarm for approximately 8-10 minutes. This is useful for nuisance alarms caused by cooking smoke or steam.
- During an alarm, press the Test/Hush button.
- The alarm will silence, and the LED will flash every 10 seconds to indicate it is in Hush mode.
- After approximately 8-10 minutes, the alarm will automatically reset. If smoke is still present, the alarm will sound again.
- Do not use the Hush feature in actual emergency situations.
Maintenance
Cleaning Your Smoke Alarm
- Clean your smoke alarm at least once a month.
- Use a soft brush attachment on your vacuum cleaner to remove dust and debris from the alarm's vents.
- Do not use cleaning solvents or sprays directly on the alarm.
Battery Replacement
- The alarm will chirp approximately once every 40-60 seconds to indicate a low battery.
- Immediately replace the 9V battery with a new one.
- To replace: Twist the alarm counter-clockwise to remove it from the mounting bracket. Open the battery compartment, disconnect the old battery, and connect the new one. Close the compartment and reattach the alarm to the bracket.
- Test the alarm after battery replacement.
End of Life Replacement
Smoke alarms have a limited lifespan. This Kidde I12040 alarm should be replaced 10 years from the date of manufacture. The manufacture date is printed on the back of the alarm.
Troubleshooting
| Problem | Possible Cause | Solution |
|---|---|---|
| Alarm chirps once every 40-60 seconds. | Low 9V battery. | Replace the 9V battery immediately. |
| Alarm sounds intermittently or falsely. | Dust, insects, high humidity, cooking fumes, or steam. | Clean the alarm. Relocate if consistently triggered by non-fire sources. Use Hush feature for nuisance alarms. |
| Alarm does not sound during test. | No AC power, dead 9V battery, or faulty unit. | Check circuit breaker. Replace 9V battery. If still no sound, replace the unit. |
| Interconnected alarms do not all sound. | Wiring issue with interconnect wire, or one unit is faulty. | Verify interconnect wiring. Test each unit individually. Replace faulty unit. |
If troubleshooting steps do not resolve the issue, contact Kidde Customer Service or a qualified electrician.
Specifications
- Model: I12040A
- Brand: Kidde
- Power Source: 120V AC Hardwired with 9V Battery Backup
- Sensor Type: Photoelectric
- Alarm Type: Audible (85 dB at 10 feet)
- Interconnect: Up to 24 Kidde devices (18 of which can be initiating)
- Operating Temperature: 40°F (4.4°C) to 100°F (37.8°C)
- Operating Humidity: 10% to 95% relative humidity, non-condensing
- Item Weight: Approximately 2.89 pounds (for 4 units)
- Dimensions (per unit): Approximately 5.6 inches diameter, 1.7 inches depth
- UPC: 704452305415
Warranty and Support
Kidde provides a limited warranty for this product. For specific warranty details, please refer to the documentation included with your purchase or visit the official Kidde website. For technical support or further assistance, please contact Kidde Customer Service.
Kidde Customer Service: Visit Kidde Support Page


