1. Introduction
This manual provides detailed instructions for the safe and effective operation of your Retevis RT15 Mini Walkie Talkie. Please read this manual thoroughly before using the device to ensure proper functionality and to prevent damage.
The Retevis RT15 is a compact and lightweight two-way radio designed for various applications, including family activities, restaurant communication, and general short-range communication. It features 16 channels, CTCSS/DCS codes for enhanced privacy, VOX hands-free operation, and a rechargeable lithium-ion battery.

Image: A set of five Retevis RT15 Mini Walkie Talkies, showcasing their compact design.

Image: The Retevis RT15 held in a hand, illustrating its ergonomic and mini design.
2. Package Contents
Please check the package contents upon unboxing to ensure all items are present and in good condition:
- Retevis RT15 Mini Walkie Talkie Unit(s)
- Rechargeable Lithium-ion Battery(ies) (1000mAh)
- USB Charging Cable(s)
- Power Adapter(s)
- Belt Clip(s)
- User Manual (this document)
- Optional: Programming Cable (if purchased separately)
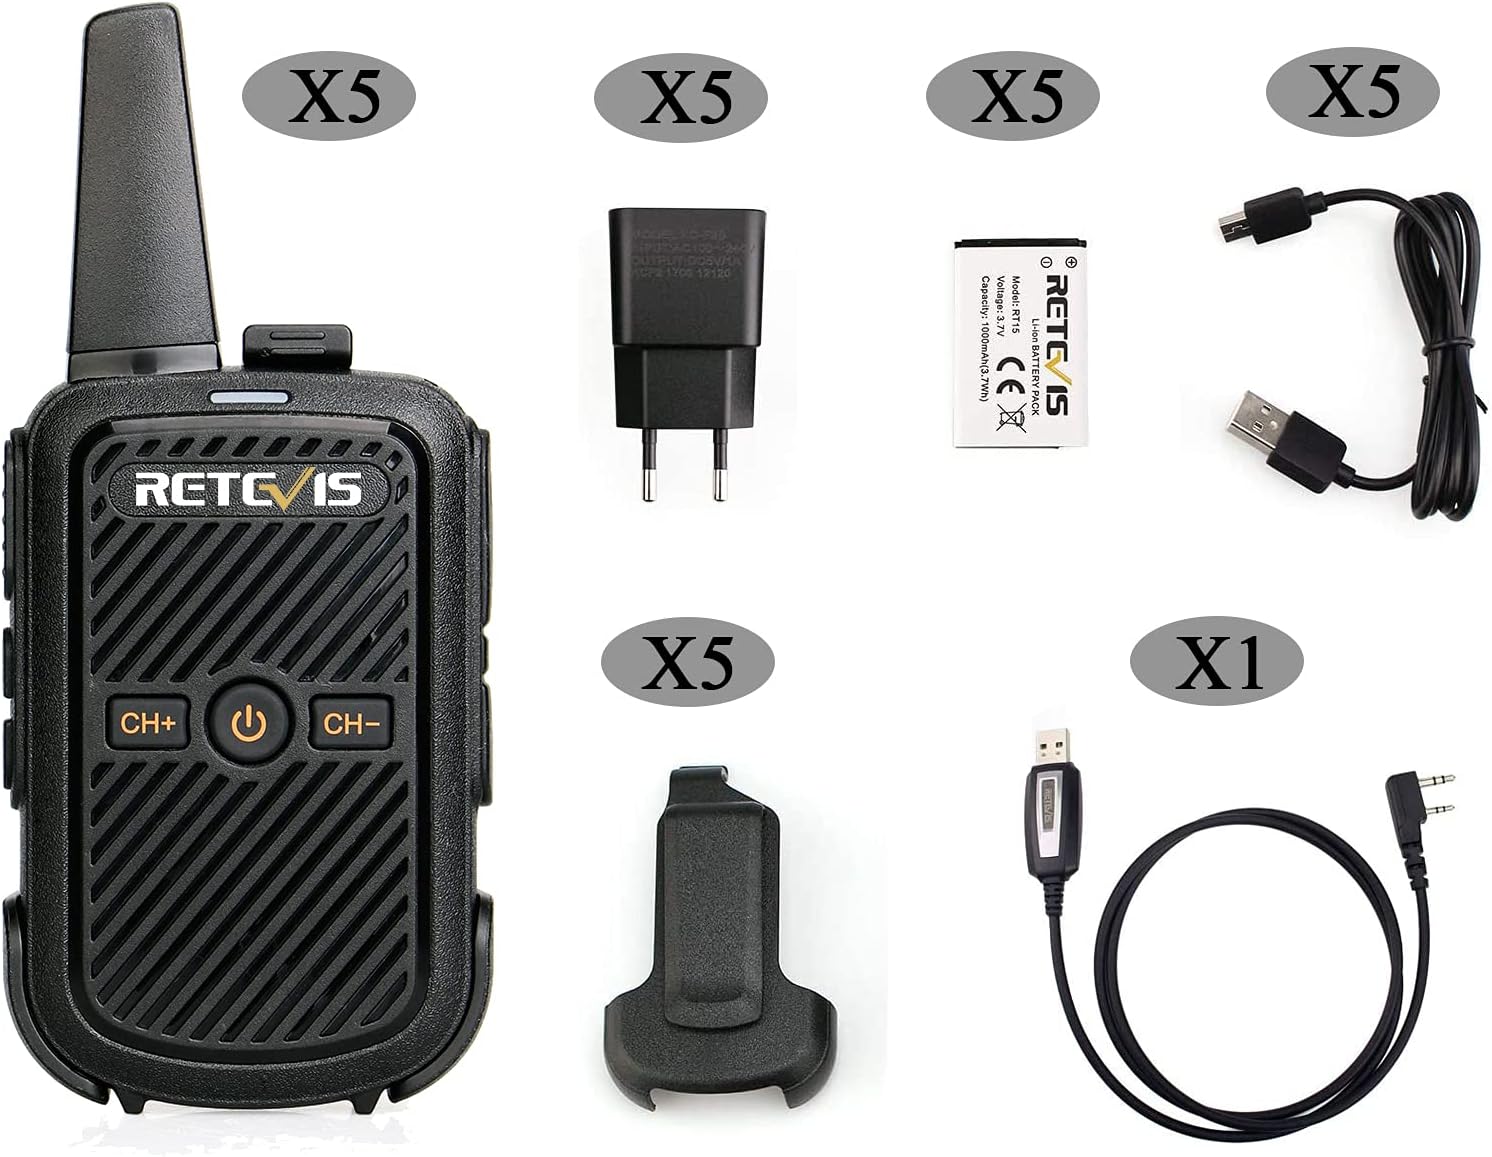
Image: Visual representation of the Retevis RT15 and its standard accessories, including the radio, battery, charger, USB cable, and belt clip.
3. Product Overview
Familiarize yourself with the various parts and controls of your Retevis RT15 walkie talkie:

Image: Detailed diagram illustrating the front and side components of the Retevis RT15, with labels for each part such as antenna, power button, channel selectors, PTT key, and various ports.
- Antenna: For transmitting and receiving signals.
- Signal Light / Charger Light: Indicates radio status (e.g., transmitting, receiving, charging).
- Power Button: Press and hold to turn the radio on/off.
- CH+ / CH- Buttons: Used to select channels.
- Speaker: Outputs received audio.
- Microphone: Captures your voice for transmission.
- PTT (Push-to-Talk) Key: Press and hold to transmit, release to receive.
- Monitor Button: Press to temporarily disable squelch and listen to weak signals.
- Lock Key: Press and hold to lock/unlock the keyboard.
- MIC/Speaker Port: For connecting external audio accessories (e.g., earpiece, microphone).
- USB Port: For charging the radio.
- Charger Connector: Connects to the USB charging cable.

Image: Various angles of the Retevis RT15, highlighting its compact form factor and the detachable belt clip.
4. Setup
4.1 Battery Installation
- Ensure the radio is powered off.
- Remove the battery cover on the back of the radio by sliding it down or gently prying it open (no screws required).
- Align the battery with the contacts inside the battery compartment.
- Gently press the battery into place until it clicks securely.
- Replace the battery cover, ensuring it snaps firmly into position.

Image: Step-by-step visual guide for installing the lithium-ion battery into the Retevis RT15 walkie talkie.
4.2 Charging the Battery
Before initial use, fully charge the battery. A full charge typically takes several hours.
- Connect the USB charging cable to the USB port on the walkie talkie.
- Connect the other end of the USB cable to the provided power adapter.
- Plug the power adapter into a standard electrical outlet.
- The charger light on the radio will indicate charging status (e.g., red for charging, green for fully charged).
- Once fully charged, disconnect the charger.
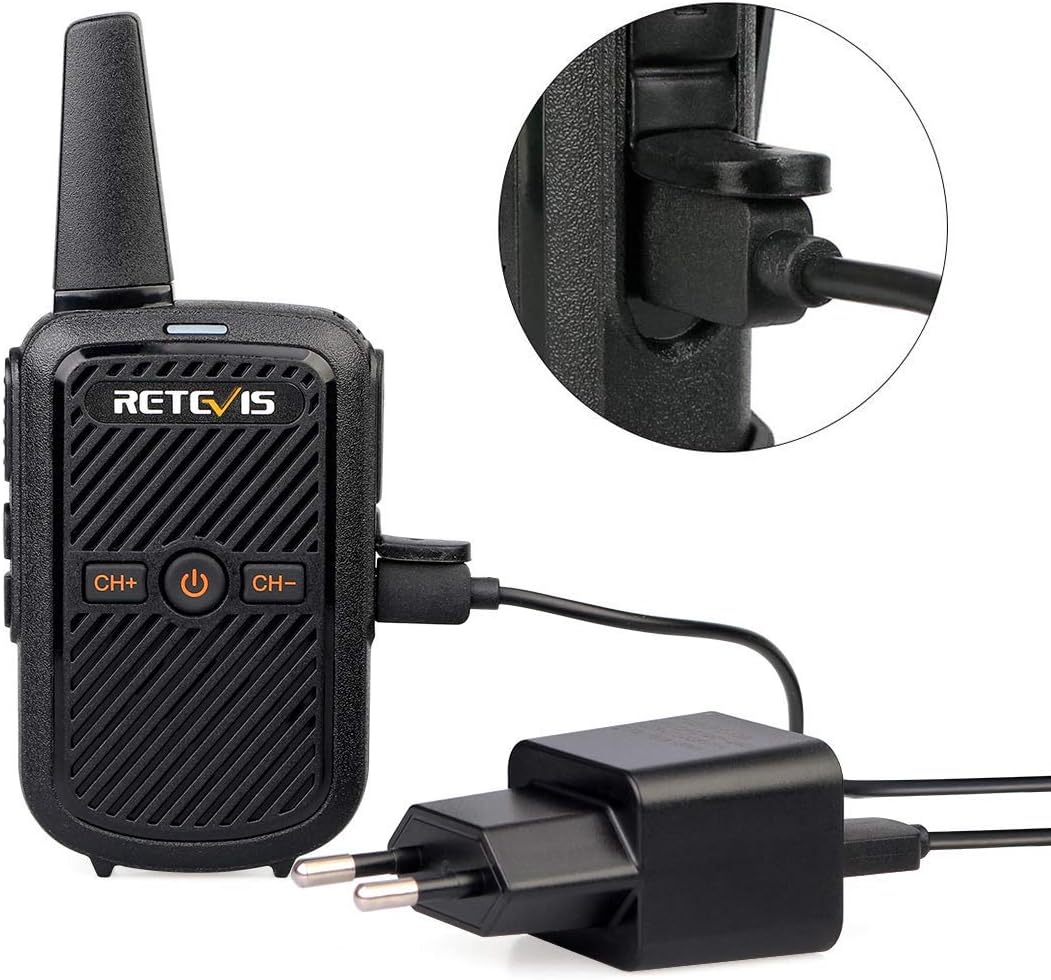
Image: The Retevis RT15 connected to its charger, demonstrating the micro USB charging interface.
4.3 Attaching the Belt Clip
The detachable belt clip allows for convenient carrying.
- Align the belt clip with the grooves on the back of the radio.
- Slide the clip upwards until it locks into place.
- To remove, slide the clip downwards while pressing the release tab (if present).
5. Operating Instructions
5.1 Power On/Off
- To power on: Press and hold the Power button (center button) until the radio turns on.
- To power off: Press and hold the Power button until the radio turns off.
5.2 Channel Selection
The RT15 has 16 channels. To select a channel:
- Press the CH+ button to increase the channel number.
- Press the CH- button to decrease the channel number.
5.3 Transmitting and Receiving
- To transmit: Press and hold the PTT key on the side of the radio. Speak clearly into the microphone. The signal light will illuminate.
- To receive: Release the PTT key. The radio will automatically receive signals on the selected channel.
5.4 VOX (Voice Operated Transmission)
VOX allows hands-free transmission when your voice is detected. To activate VOX:
- Switch to channel 7.
- Turn off the radio.
- While holding the CH+ key, turn on the radio.
- The radio will announce "VOX ON" or "VOX OFF". Repeat the process to toggle VOX.

Image: Visual representation of the VOX feature, enabling hands-free communication.
5.5 Scanning
Scanning allows the radio to automatically search for active channels.
- To enter scan mode: Press and hold the CH- key for 2 seconds. The radio will begin scanning.
- To exit scan mode: Press and hold the CH- key for 2 seconds again.
5.6 Monitor Function
The monitor function temporarily disables the squelch, allowing you to hear very weak signals or noise on a channel.
- To enter monitor mode: Press the Monitor button (side key).
- To exit monitor mode: Release the Monitor button.
5.7 Keyboard Lock
To prevent accidental changes to settings:
- To lock the keyboard: Press and hold the Lock key (side key) for 2 seconds.
- To unlock the keyboard: Press and hold the Lock key for 2 seconds again.

Image: A visual guide to the simple settings of the Retevis RT15, including how to activate Monitor, VOX, Keyboard Lock, and Scanning functions.
5.8 CTCSS / DCS Codes
The RT15 supports 50 CTCSS (Continuous Tone-Coded Squelch System) and 208 DCS (Digitally Coded Squelch) codes. These codes help filter out unwanted conversations on a shared channel, improving call clarity. To use CTCSS/DCS, all radios in your group must be set to the same channel and the same CTCSS/DCS code. These codes are typically programmed using software and a programming cable (not included).

Image: Illustration of how CTCSS/DCS reduces interference and enhances communication clarity.
6. Maintenance
- Cleaning: Use a soft, damp cloth to clean the radio's surface. Do not use harsh chemicals or abrasive cleaners.
- Battery Care: To prolong battery life, avoid overcharging and fully discharging the battery frequently. Store the radio and battery in a cool, dry place when not in use for extended periods.
- Storage: Store the radio in a dry environment, away from direct sunlight, extreme temperatures, and dust.
- Antenna: Do not bend or modify the antenna, as this can affect performance.
7. Troubleshooting
| Problem | Possible Cause | Solution |
|---|---|---|
| Radio does not power on. | Battery is low or not installed correctly. | Charge the battery or re-install it correctly. |
| Cannot transmit or receive. | Incorrect channel selected; battery low; radio out of range; squelch level too high. | Ensure radios are on the same channel; charge battery; move closer to other radio; use monitor function to check for weak signals. |
| Poor audio quality or static. | Weak signal; interference; incorrect CTCSS/DCS code. | Move to an open area; check for sources of interference; ensure correct CTCSS/DCS code is set for your group. |
| Keyboard is unresponsive. | Keyboard is locked. | Press and hold the Lock key for 2 seconds to unlock. |
8. Specifications
| Feature | Specification |
|---|---|
| Brand | Retevis |
| Model Number | EUA9144AX5-C9018A (RT15) |
| Color | Black |
| Number of Channels | 16 |
| Frequency Range | 446 MHz |
| Maximum Range | Up to 3 Kilometers (environment dependent) |
| Battery Capacity | 1000mAh Lithium-ion |
| Voltage | 3.7 Volts |
| Special Features | Emergency Alarm, Rechargeable, VOX, CTCSS/DCS |
| Product Dimensions (D x W x H) | 2.1 x 5.9 x 13.6 cm |
| Water Resistance Level | Not waterproof |

Image: Illustration of the typical communication range for the Retevis RT15, indicating varying distances based on environment.

Image: Visual representation of the 1000mAh battery capacity of the Retevis RT15.
9. Warranty and Support
Retevis offers the following warranty for the RT15 Mini Walkie Talkie:
- Radio Body: 2-year warranty from the date of purchase.
- Accessories: 1-year warranty from the date of purchase.
- Returns: 30-day no-reason return policy.
Beyond the warranty period, maintenance services are still available, though buyers may be required to cover associated costs.
For any questions, technical support, or warranty claims, please contact Retevis customer service through the Amazon platform. We aim to respond within 12 hours.