1. Safety Instructions
Please read these instructions carefully before installation and use. Retain this manual for future reference.
- Electrical Safety: Ensure the power supply is disconnected before installation, maintenance, or cleaning. Only use the provided UL listed transformer/power supply.
- Voltage: This product operates on 12V DC. Do not connect directly to 120V AC mains power.
- Indoor Use Only: These puck lights are designed for indoor applications. Do not expose to moisture or outdoor elements.
- Proper Installation: Follow all installation steps precisely. If you are unsure about electrical wiring, consult a qualified electrician.
- Heat Dissipation: Ensure adequate ventilation around the lights to prevent overheating. Do not cover the lights with insulating material.
2. Package Contents
Verify that all components are present in your package:
- 6 x LED Puck Lights
- 1 x UL Listed Transformer/Power Supply
- 1 x Hub (splitter for connecting multiple lights)
- 6 x Extension Cables
- 1 x Rotary Dimmer Switch
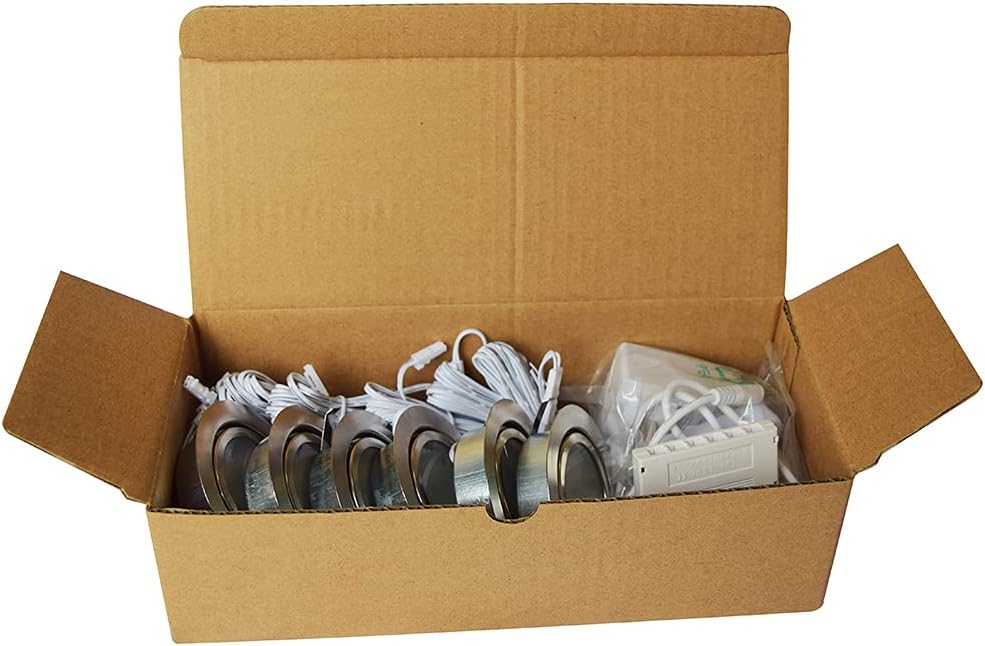
Image: Package contents including puck lights, power supply, hub, and dimmer.

Image: Detailed view of product dimensions and a visual list of included items.
3. Setup
This section outlines the basic connection of the components before installation.
- Connect the power supply (transformer) to the rotary dimmer switch.
- Connect the output of the rotary dimmer switch to the input of the hub.
- Connect the extension cables to the output ports of the hub.
- Connect each LED puck light to an available extension cable.
- Once all connections are made, plug the power supply into a standard wall outlet.
Video: Demonstration of connecting the recessed LED puck lights and testing the dimming function.

Image: Example of the plug-and-play setup for the puck lights.
4. Installation
The LAMPAOUS P-50 puck lights are designed for recessed mounting.
- Determine Location: Choose the desired locations for your puck lights under cabinets, shelves, or in display cases. Ensure there is sufficient space behind the mounting surface for the light fixture and wiring.
- Mark Cutout: Using a pencil, mark the center of each desired light location. The recommended cutout hole size is between Φ 2-2/5'' (60mm) and Φ 2-1/2'' (63.5mm).
- Drill Holes: Carefully drill the cutout holes using an appropriate hole saw.
- Route Wiring: Feed the extension cables through the drilled holes.
- Insert Lights: Connect the puck light to its respective extension cable. Gently press the puck light into the punched hole until the spring clips secure it in place.
- Secure Cables: Use cable clips or ties to neatly secure any excess wiring.

Image: Recessed installation diagram with cutout dimensions.
5. Operating Instructions
The LAMPAOUS P-50 puck lights feature a rotary dimmer switch for brightness control.
- Power On/Off: Turn the rotary knob clockwise until you hear a click to power on the lights. Turn counter-clockwise until you hear a click to power off.
- Adjust Brightness: Once powered on, rotate the knob clockwise to increase brightness (up to 100%) and counter-clockwise to decrease brightness (down to 0%).
- Memory Function: The dimmer switch will remember the last brightness setting used when the lights are turned on again.

Image: Visual guide to adjusting brightness with the dimmer switch.

Image: Illustration of the 0-100% brightness dimming capability.
6. Maintenance
These LED puck lights require minimal maintenance.
- Cleaning: Disconnect power before cleaning. Use a soft, dry cloth to wipe the surface of the lights. Do not use abrasive cleaners or solvents.
- LED Lifespan: The integrated LED chips are designed for long-term use and do not require bulb replacement.
- Wiring Inspection: Periodically check all wiring connections to ensure they are secure and undamaged.
7. Troubleshooting
If you encounter issues with your LAMPAOUS P-50 puck lights, refer to the following common problems and solutions:
| Problem | Possible Cause | Solution |
|---|---|---|
| Lights do not turn on. | No power, loose connection, faulty power supply/dimmer. | Check if the power supply is plugged in and the outlet is functional. Ensure all cables are securely connected. Test the power supply and dimmer if possible. |
| Lights flicker or dim inconsistently. | Loose connection, incompatible dimmer (if not using included), faulty component. | Verify all connections. Ensure you are using the provided rotary dimmer. If flickering persists, contact customer support. |
| Only some lights are working. | Faulty puck light, loose connection to the hub or extension cable. | Check the connections for the non-working lights. Try swapping a non-working light with a working one to identify if the light itself or the connection is the issue. |
| Lights have a delayed turn-on. | Normal operation for some LED drivers. | A slight delay (less than 1 second) can be normal for some LED systems. If the delay is significant or inconsistent, check connections. |
8. Specifications
Key technical details for the LAMPAOUS P-50 LED Puck Lights:
- Brand: LAMPAOUS
- Model Number: P-50
- Light Source: LED
- Number of Lights: 6 per pack
- Wattage: 2 watts per light, 12 watts total
- Brightness: 160 lumens per light, 960 lumens total
- Color Temperature: 3000K Warm White (other variants available)
- Voltage: 12 Volts DC
- Control Method: Rotary Dimmer Switch
- Material: Aluminum, Polycarbonate
- Finish: Brushed Metallic Grey
- Mounting Type: Recessed Mount
- Cutout Diameter: Φ 2-2/5'' (60mm) - Φ 2-1/2'' (63.5mm)
- Item Dimensions (L x W x H): 1.08"L x 2.17"W x 0.79"H (per puck light)
- Weight: 1.5 Pounds (total package)
- Water Resistance Level: Not Water Resistant (Indoor Use Only)
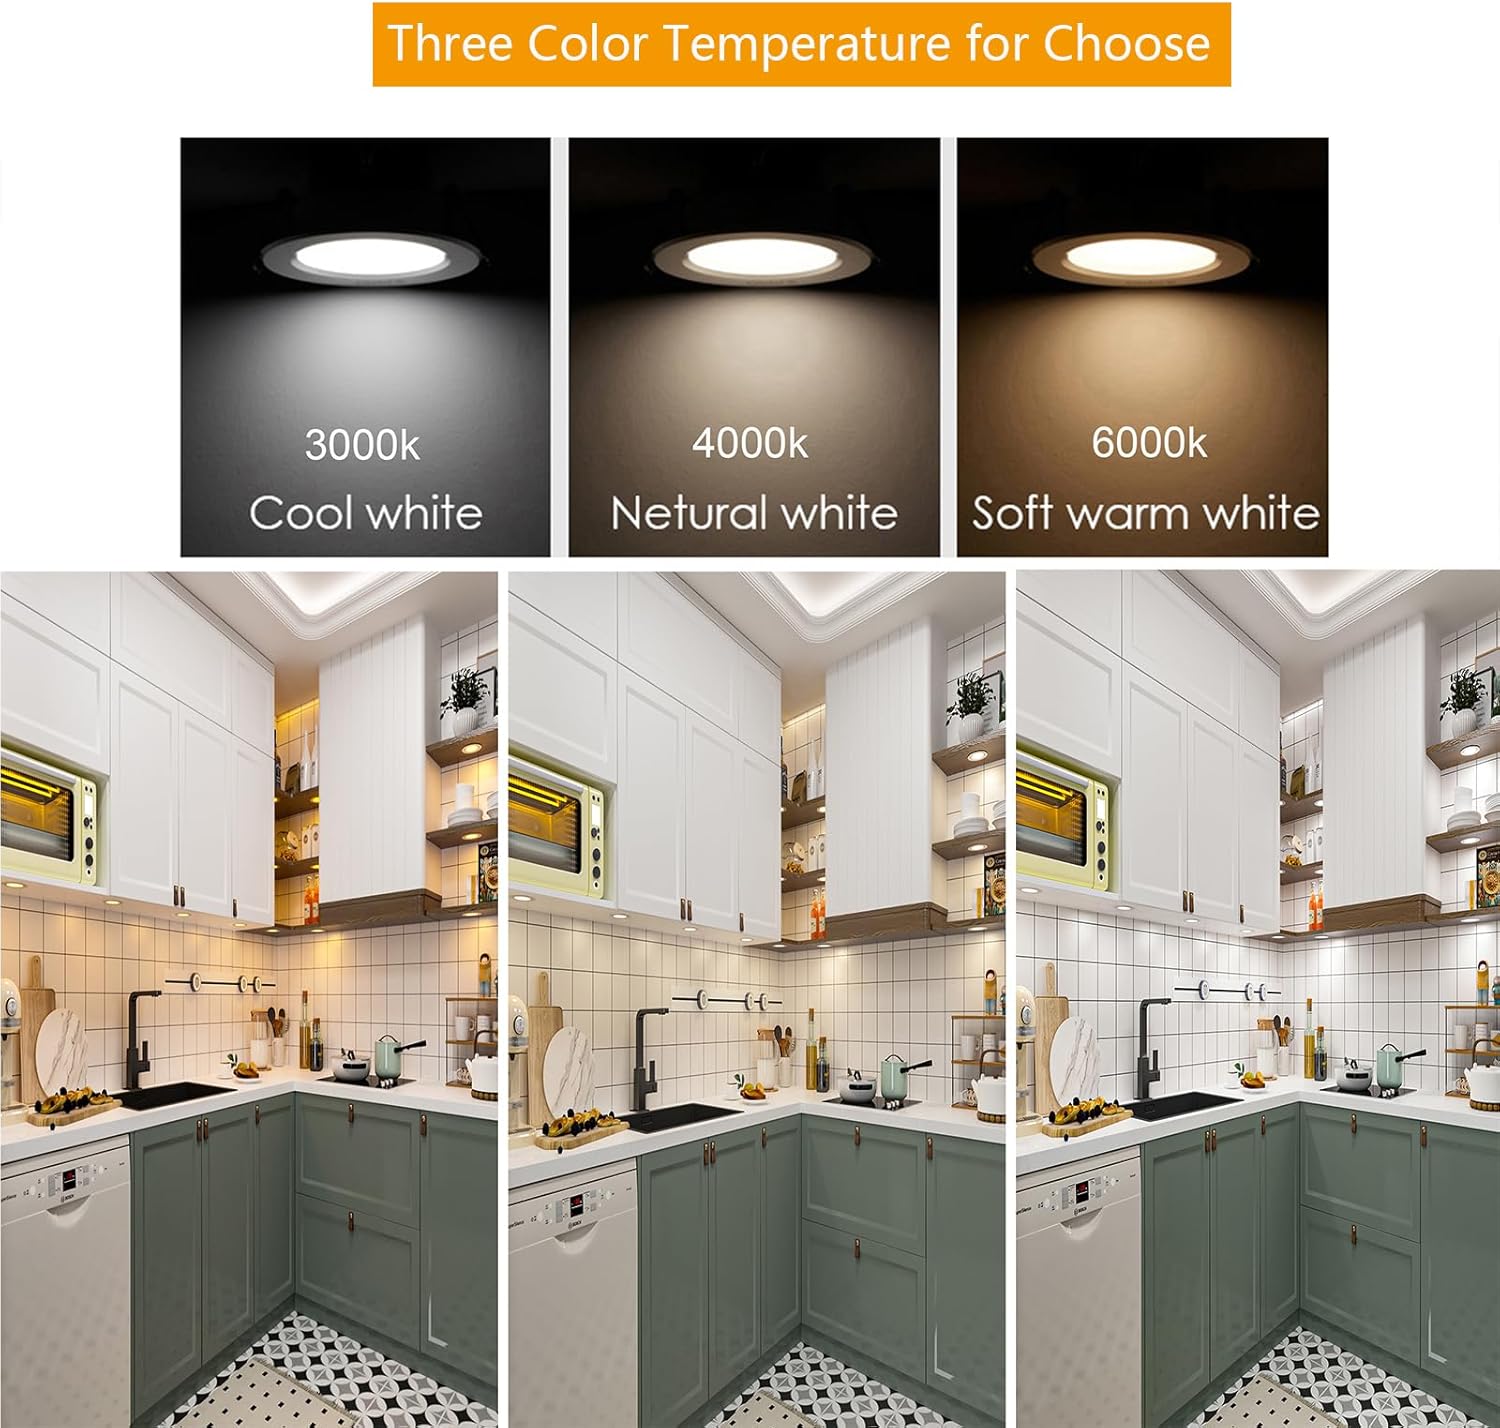
Image: Comparison of available color temperatures (this model is 3000K Warm White).
9. Warranty and Support
For warranty information and customer support, please refer to your purchase documentation or contact LAMPAOUS directly through their official website or the retailer where the product was purchased.
LAMPAOUS is committed to providing efficient, energy-saving, healthy, and comfortable lighting solutions.

Image: LAMPAOUS Brand Logo.


