1. Introduction
Thank you for choosing the BLAUPUNKT CLRD 30 DAB+ FM Clock Radio. This device combines a digital radio with an alarm clock and a convenient USB charging function. This manual will guide you through the setup, operation, and maintenance of your new clock radio to ensure optimal performance and longevity.
2. Safety Information
- Read all instructions carefully before use and retain them for future reference.
- Do not expose the device to rain, moisture, or extreme temperatures.
- Ensure proper ventilation; do not block any ventilation openings.
- Use only the provided power adapter.
- Do not attempt to disassemble or modify the unit. Refer all servicing to qualified personnel.
- Keep the device away from strong magnetic fields.
3. Package Contents
Please check that all items are present in the package:
- BLAUPUNKT CLRD 30 DAB+ FM Clock Radio
- Power Adapter
- User Manual
- Warranty Card

Image: Power adapter for the BLAUPUNKT CLRD 30 clock radio.
4. Product Features
- DAB+ and FM Radio: Enjoy a wide range of digital and analog radio stations with clear reception.
- USB Charging Port: Conveniently charge your smartphone or other USB-powered devices (5V, 2A output).
- Dual Alarm: Set two independent alarm times with options to wake to radio or buzzer.
- Snooze Function: Temporarily pause the alarm for a few extra minutes of sleep.
- Sleep Timer: Program the radio to turn off automatically after a set duration (up to 90 minutes).
- Dimmable LCD Display: Large display shows time, date, and radio information with adjustable brightness.
- 6W RMS Audio Output: Delivers clear and balanced sound.
5. Controls and Display
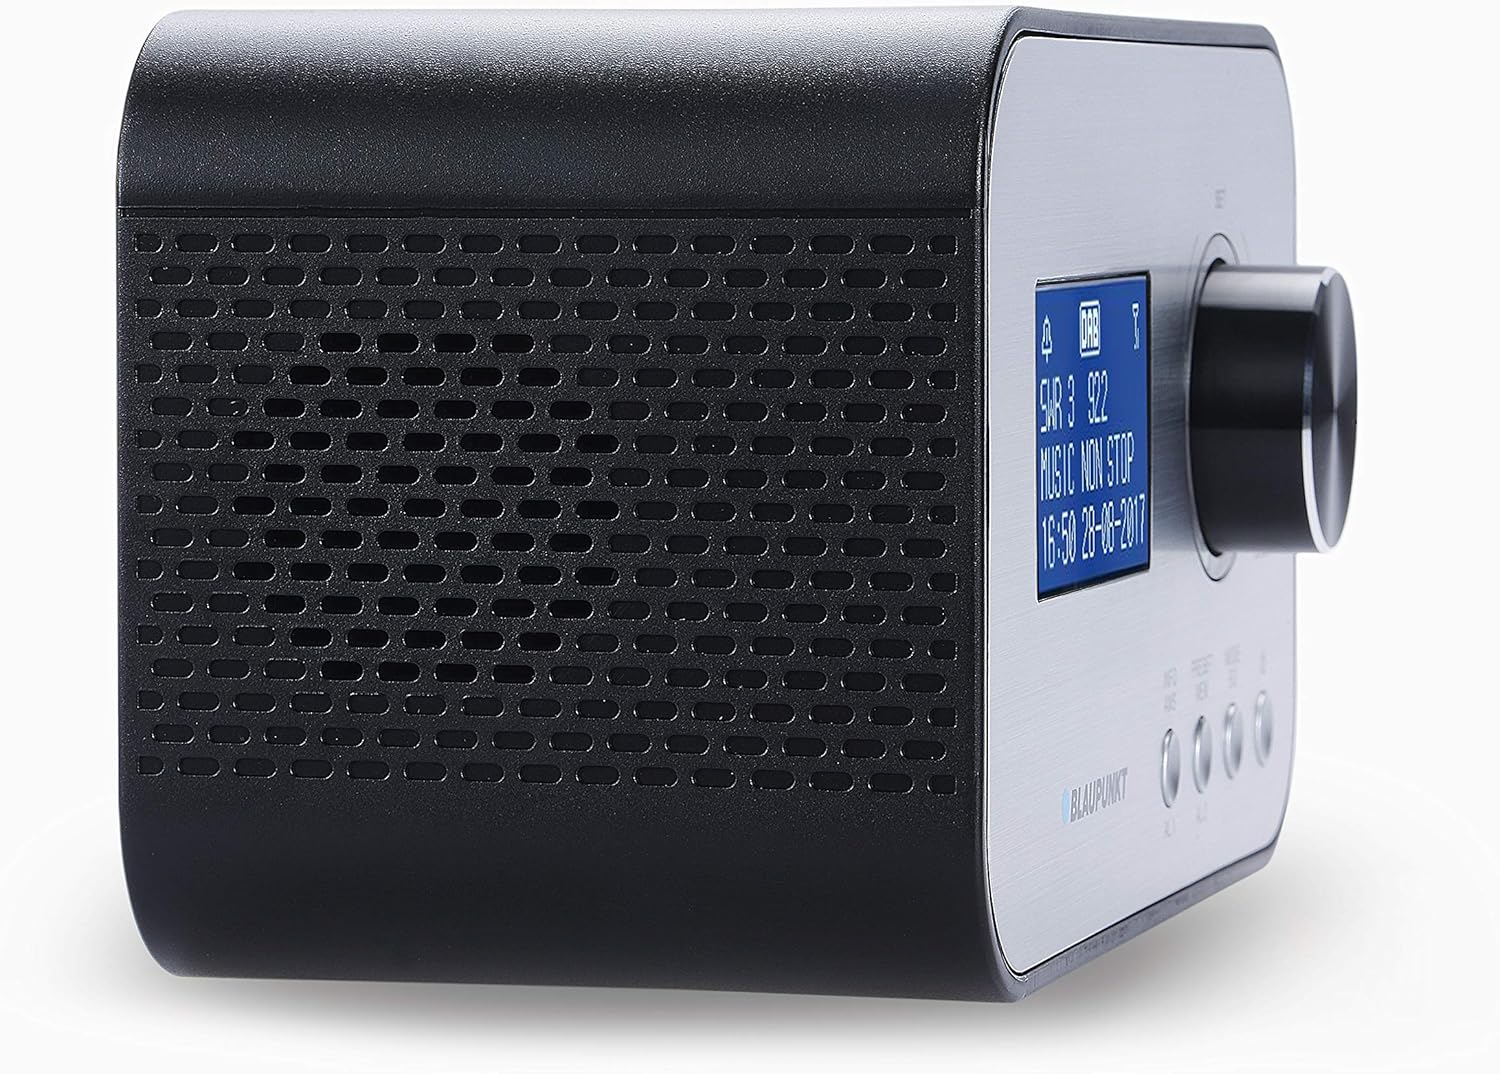
Image: Front and side view of the BLAUPUNKT CLRD 30 clock radio, highlighting the display and main control knob.

Image: Top and side view of the BLAUPUNKT CLRD 30 clock radio, showing the 'SNOOZE / SLEEP / DIMMER' button and other front panel controls.
Front Panel Controls:
- Display: Shows time, date, radio station information, and menu options.
- Control Knob (SET/SELECT/VOLUME): Rotate to navigate menus or adjust volume. Press to confirm selections.
- PRESET/MENU Button: Access preset stations or the main menu.
- MODE/INFO Button: Switch between DAB+, FM, and other modes; display additional information.
- AL1/AL2 Buttons: Set and activate Alarm 1 and Alarm 2.
Top Panel Controls:
- SNOOZE / SLEEP / DIMMER Button: Press to activate snooze, set sleep timer, or adjust display brightness.
Rear Panel Connections:

Image: Rear view of the BLAUPUNKT CLRD 30 clock radio, showing the DC 5V power input and the USB charging port.
- DC 5V Input: Connect the provided power adapter.
- USB Output (CHARGING ONLY): Connect your mobile device for charging.
- Telescopic Antenna: Extend for optimal radio reception.
6. Setup
6.1 Power Connection
- Insert the DC plug of the provided power adapter into the DC 5V input jack on the rear of the clock radio.
- Plug the power adapter into a standard wall outlet.
- The unit will power on and the display will illuminate.
6.2 Antenna
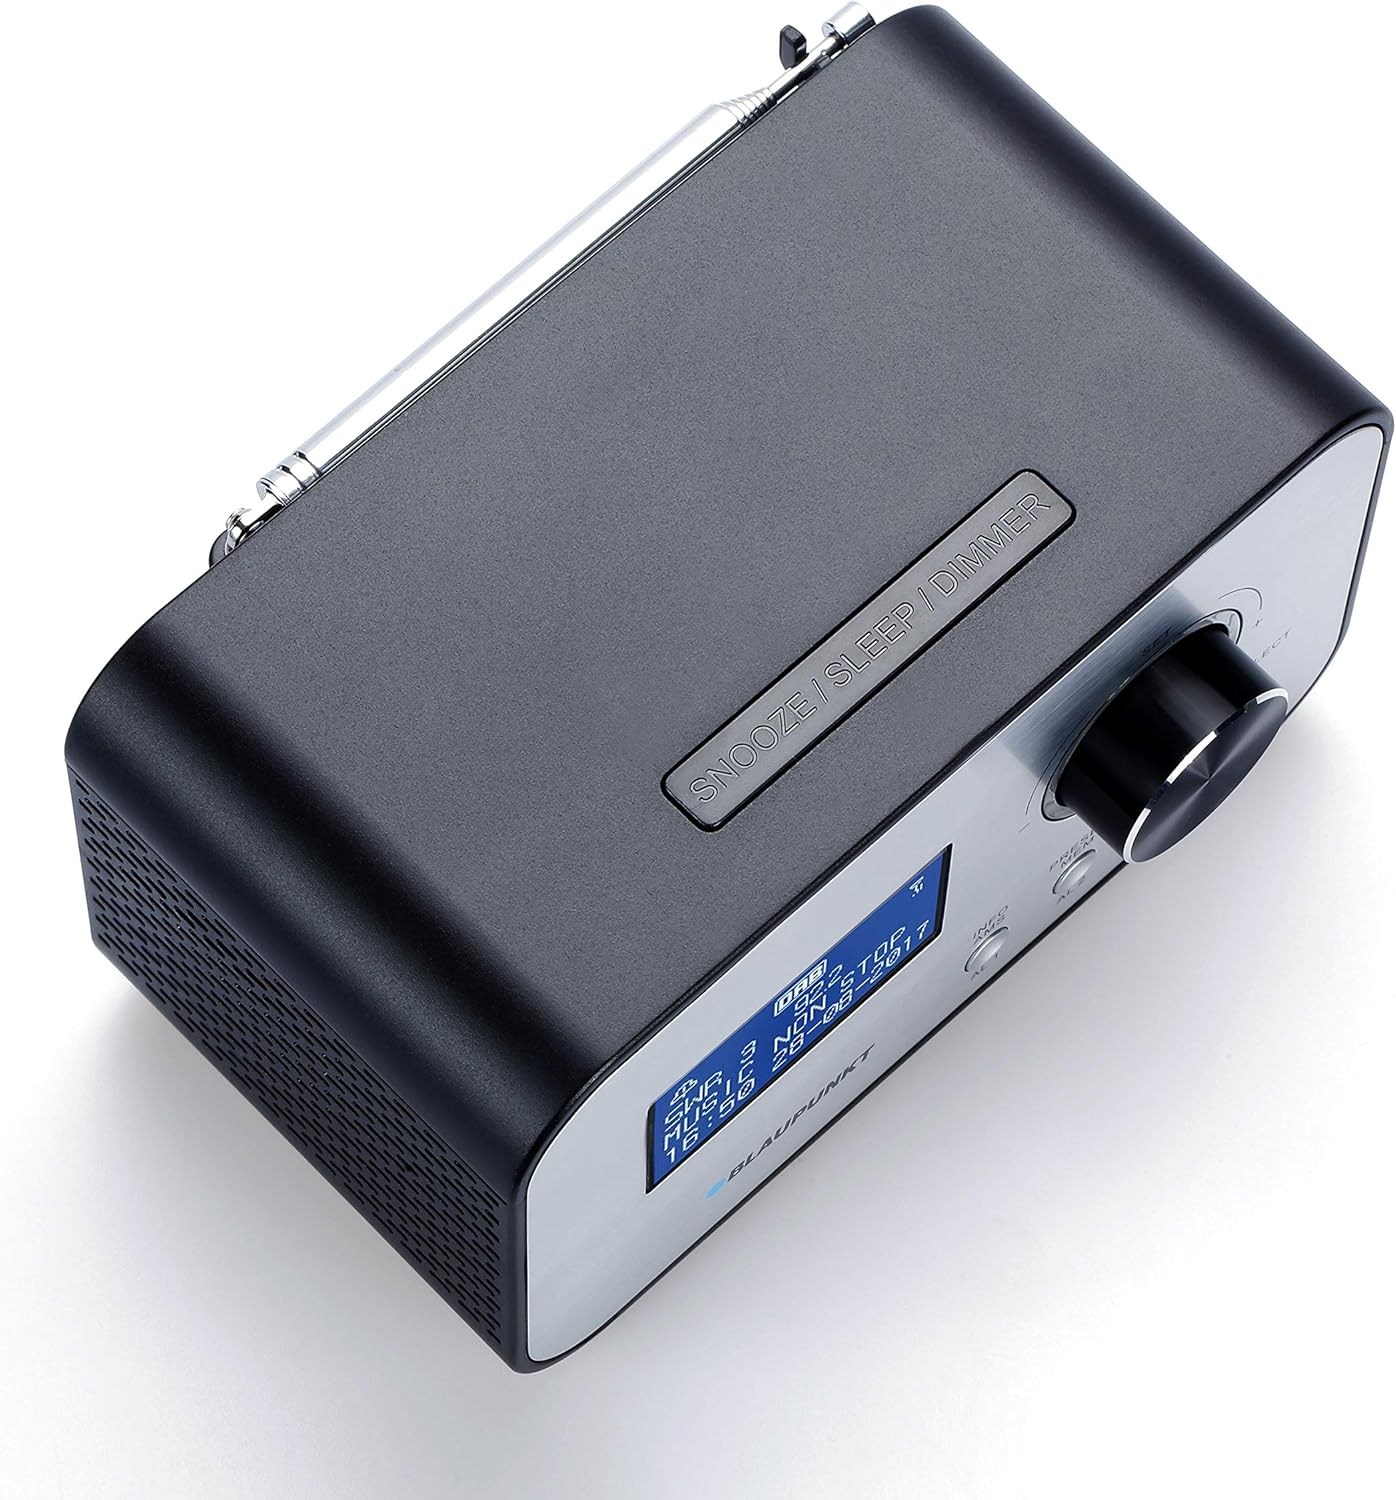
Image: Top view of the BLAUPUNKT CLRD 30 clock radio with its telescopic antenna fully extended for improved reception.
For optimal DAB+ and FM radio reception, fully extend the telescopic antenna located on the rear of the unit. Adjust its position for the best signal quality.
6.3 Initial Setup (Time, Date, Language)
Upon first power-on, the unit may automatically scan for DAB+ stations and set the time/date. If not, or if you wish to adjust settings:
- Press the PRESET/MENU button to enter the main menu.
- Rotate the Control Knob to navigate to 'System Settings' or 'Time/Date' and press the knob to select.
- Follow the on-screen prompts to set the time, date, and preferred language.
- For language, select English to ensure all menu options are understandable.
7. Operating Instructions
7.1 Radio Operation (DAB+/FM)
- Press the MODE/INFO button to switch between DAB+ and FM radio modes.
- DAB+ Radio: The radio will automatically scan for available DAB+ stations. Rotate the Control Knob to browse stations and press to select.
- FM Radio: Rotate the Control Knob to manually tune to FM frequencies. Press and hold the knob for an automatic scan to the next available station.
- Adjust the volume by rotating the Control Knob during playback.
7.2 Setting Alarms (AL1/AL2)
- Press either the AL1 or AL2 button to enter alarm setup for the respective alarm.
- Rotate the Control Knob to adjust the hour and minute, pressing the knob to confirm each setting.
- Select the alarm source (Buzzer or Radio). If Radio, select the desired station.
- Set the alarm volume. Note that the minimum volume setting might be louder than expected for some users.
- Choose the alarm frequency (Daily, Weekdays, Weekends, Once).
- Confirm settings to activate the alarm. An alarm icon will appear on the display.
7.3 Snooze Function
When an alarm sounds, press the SNOOZE / SLEEP / DIMMER button to temporarily silence the alarm. The alarm will sound again after a short interval (typically 9 minutes).
7.4 Sleep Timer
- While the radio is playing, press the SNOOZE / SLEEP / DIMMER button repeatedly to cycle through sleep timer options (e.g., 15, 30, 45, 60, 90 minutes, OFF).
- The radio will automatically turn off after the selected duration.
7.5 USB Charging
Connect your smartphone or other USB-powered device to the USB output port on the rear of the clock radio using a compatible USB cable. The port provides 5V/2A output for charging.
7.6 Display Dimmer
Press the SNOOZE / SLEEP / DIMMER button (when no alarm is active) to adjust the brightness of the LCD display. Cycle through available brightness levels to find your preferred setting. If the display appears too bright or too dim, adjust it using this button.
8. Maintenance
- Disconnect the power adapter before cleaning.
- Wipe the unit with a soft, dry cloth. Do not use abrasive cleaners or solvents.
- Keep the ventilation openings clear of dust.
9. Troubleshooting
- No Power: Ensure the power adapter is securely connected to both the unit and a working wall outlet.
- Poor Radio Reception: Fully extend and adjust the telescopic antenna. Try repositioning the unit to improve signal.
- Alarm Not Sounding: Check that the alarm is activated (alarm icon on display) and the alarm volume is set appropriately. Ensure the time and alarm time are correct.
- Display Too Bright/Dim: Use the SNOOZE / SLEEP / DIMMER button to cycle through brightness levels.
- USB Charging Not Working: Ensure the device is properly connected and the USB cable is functional. The USB port is for charging only, not data transfer.
- Difficulty with Menu Navigation: The menu system is primarily controlled by the Control Knob (rotate to navigate, press to select) and the PRESET/MENU button to access. If the language is incorrect, navigate to 'System Settings' to change it to English.
10. Specifications
| Brand: | BLAUPUNKT |
| Model Number: | CLRD 30 BK |
| Dimensions (L x W x H): | 17 x 11.5 x 10.2 cm |
| Weight: | 550 grams |
| Material: | Plastic |
| Connectivity Technology: | USB |
| Tuner Technology: | DAB+ |
| Power Source: | AC (Adapter included) |
| Supported Radio Bands: | DAB+/FM |
| USB Output: | 5V, 2A (Charging Only) |
11. Warranty and Support
This product comes with a warranty. Please refer to the included warranty card for details regarding coverage and duration. For technical support or service inquiries, you may contact:
- Service Hotline: 00 800 1300 1400 (Free call)
- Email: blaupunkt@gt-support.de
Please have your model number (CLRD 30 BK) and purchase information ready when contacting support.


