
Introduction
This manual provides essential information for the safe and efficient operation of your Oneconcept 2-in-1 Electric Rotisserie and BBQ Grill. Please read these instructions carefully before assembly and use, and retain them for future reference. This appliance combines the functionality of an electric rotisserie and a traditional charcoal barbecue grill, offering versatile outdoor cooking options.
Safety Information
WARNING: Failure to follow these safety instructions may result in fire, electric shock, or injury.
- Always use the grill outdoors in a well-ventilated area. Never use indoors or in enclosed spaces.
- Keep children and pets away from the grill during use and while it is cooling down.
- Do not touch hot surfaces. Use heat-resistant gloves or tools.
- Ensure the electrical motor and power cord are kept away from water and heat sources.
- Only use charcoal or briquettes as fuel. Do not use gasoline, alcohol, or other highly flammable liquids to ignite or re-ignite charcoal.
- Ensure the grill is placed on a stable, level, non-combustible surface.
- Unplug the rotisserie motor from the power outlet when not in use or before cleaning.
- Do not overload the rotisserie spit beyond the maximum weight capacity of 27 kg.
- Allow the grill to cool completely before moving or cleaning.
Product Components
Your Oneconcept 2-in-1 Electric Rotisserie and BBQ Grill includes the following main components:
- Main grill body with charcoal basin
- Four wheels with integrated brakes
- Electric rotisserie motor (15W)
- Rotisserie spit with meat forks
- Adjustable height supports for the rotisserie spit
- Two barbecue grill grates

Figure 1: Overview of the Oneconcept 2-in-1 Electric Rotisserie and BBQ Grill.
Assembly Instructions
The Oneconcept 2-in-1 Electric Rotisserie and BBQ Grill is designed for straightforward assembly. Follow the included diagrammatic instructions for detailed steps. Ensure all parts are present and undamaged before beginning assembly.
- Attach the four wheels to the legs of the main grill body. Ensure the brakes are functional.
- Place the charcoal basin inside the main grill body.
- Install the two barbecue grill grates onto their designated supports within the grill body.
- Mount the rotisserie support posts on either side of the grill.
- Attach the electric rotisserie motor to its designated bracket on one of the support posts.
- Insert the rotisserie spit through the support posts and into the motor's drive mechanism.
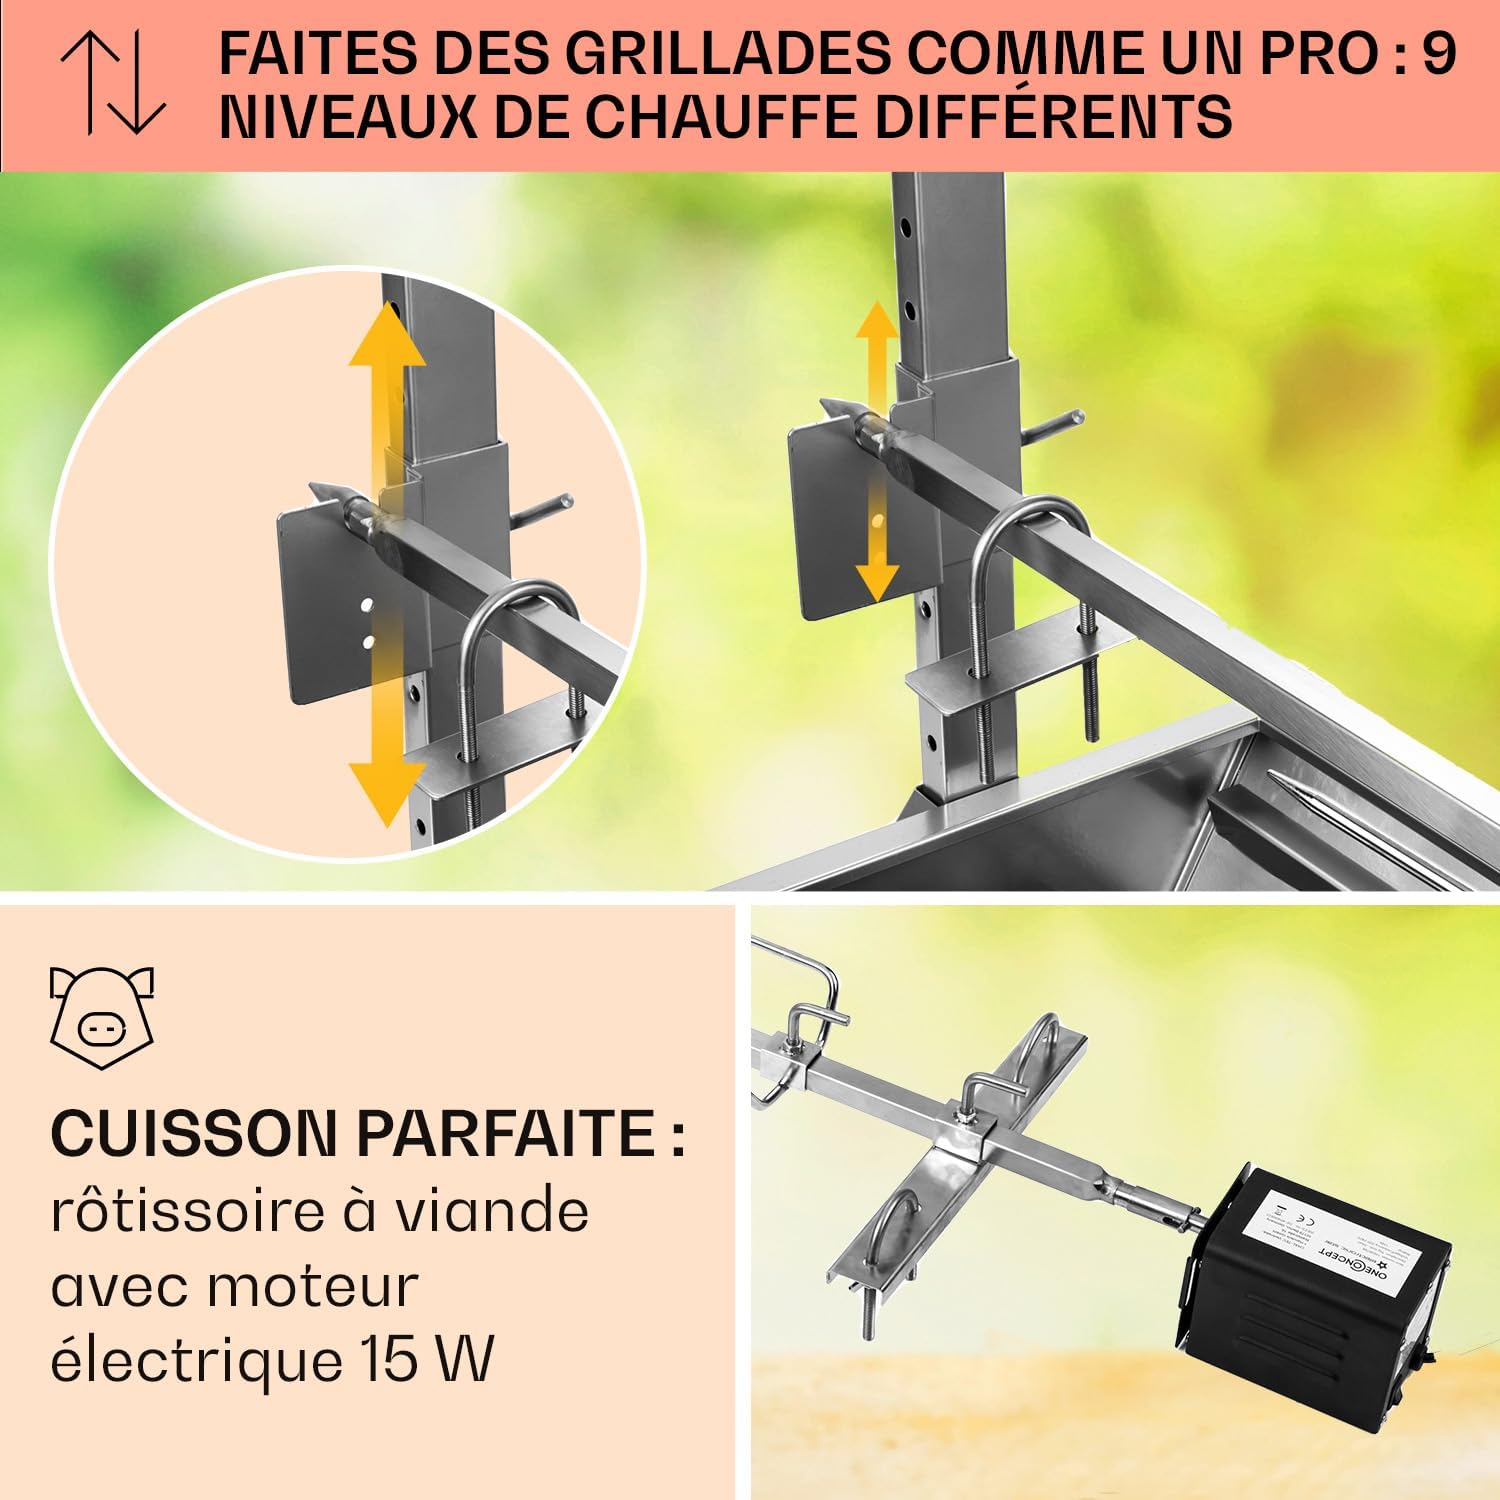
Figure 2: Detail of the rotisserie height adjustment mechanism.
Operating Instructions
1. Charcoal Preparation
Before cooking, it is recommended to perform an initial burn-off. Load the charcoal basin with charcoal and allow it to burn for at least 30 minutes without food to remove any manufacturing residues. For optimal results, allow the charcoal to ash over before placing food on the grill or rotisserie.
2. Grilling Function
The grill features two separate grill grates, providing a generous cooking surface of 83 x 43 cm. This allows for simultaneous grilling of various items.
- Distribute hot charcoal evenly in the basin below the grill grates.
- Place food directly on the grill grates.
- Monitor cooking progress and adjust charcoal distribution as needed for even heat.

Figure 3: Example of food grilling on the barbecue grates.
3. Rotisserie Function
The electric rotisserie is ideal for roasting larger cuts of meat, such as whole pigs, lambs, or large poultry, up to a maximum weight of 27 kg.
- Attaching Meat: Securely attach the meat to the rotisserie spit using the provided meat forks. Ensure the meat is balanced to prevent strain on the motor and ensure even cooking. For smaller items like chicken, additional ties or smaller hooks may be necessary to secure them firmly.
- Height Adjustment: The rotisserie spit can be adjusted to 9 different height levels. Select the appropriate height to control the cooking intensity and distance from the charcoal.
- Motor Operation: Plug in the 15W electric motor. It provides constant rotation for uniform cooking and browning.
- Horizontal Sliding: The rotisserie spit can be slid horizontally, allowing for precise positioning over the heat source.
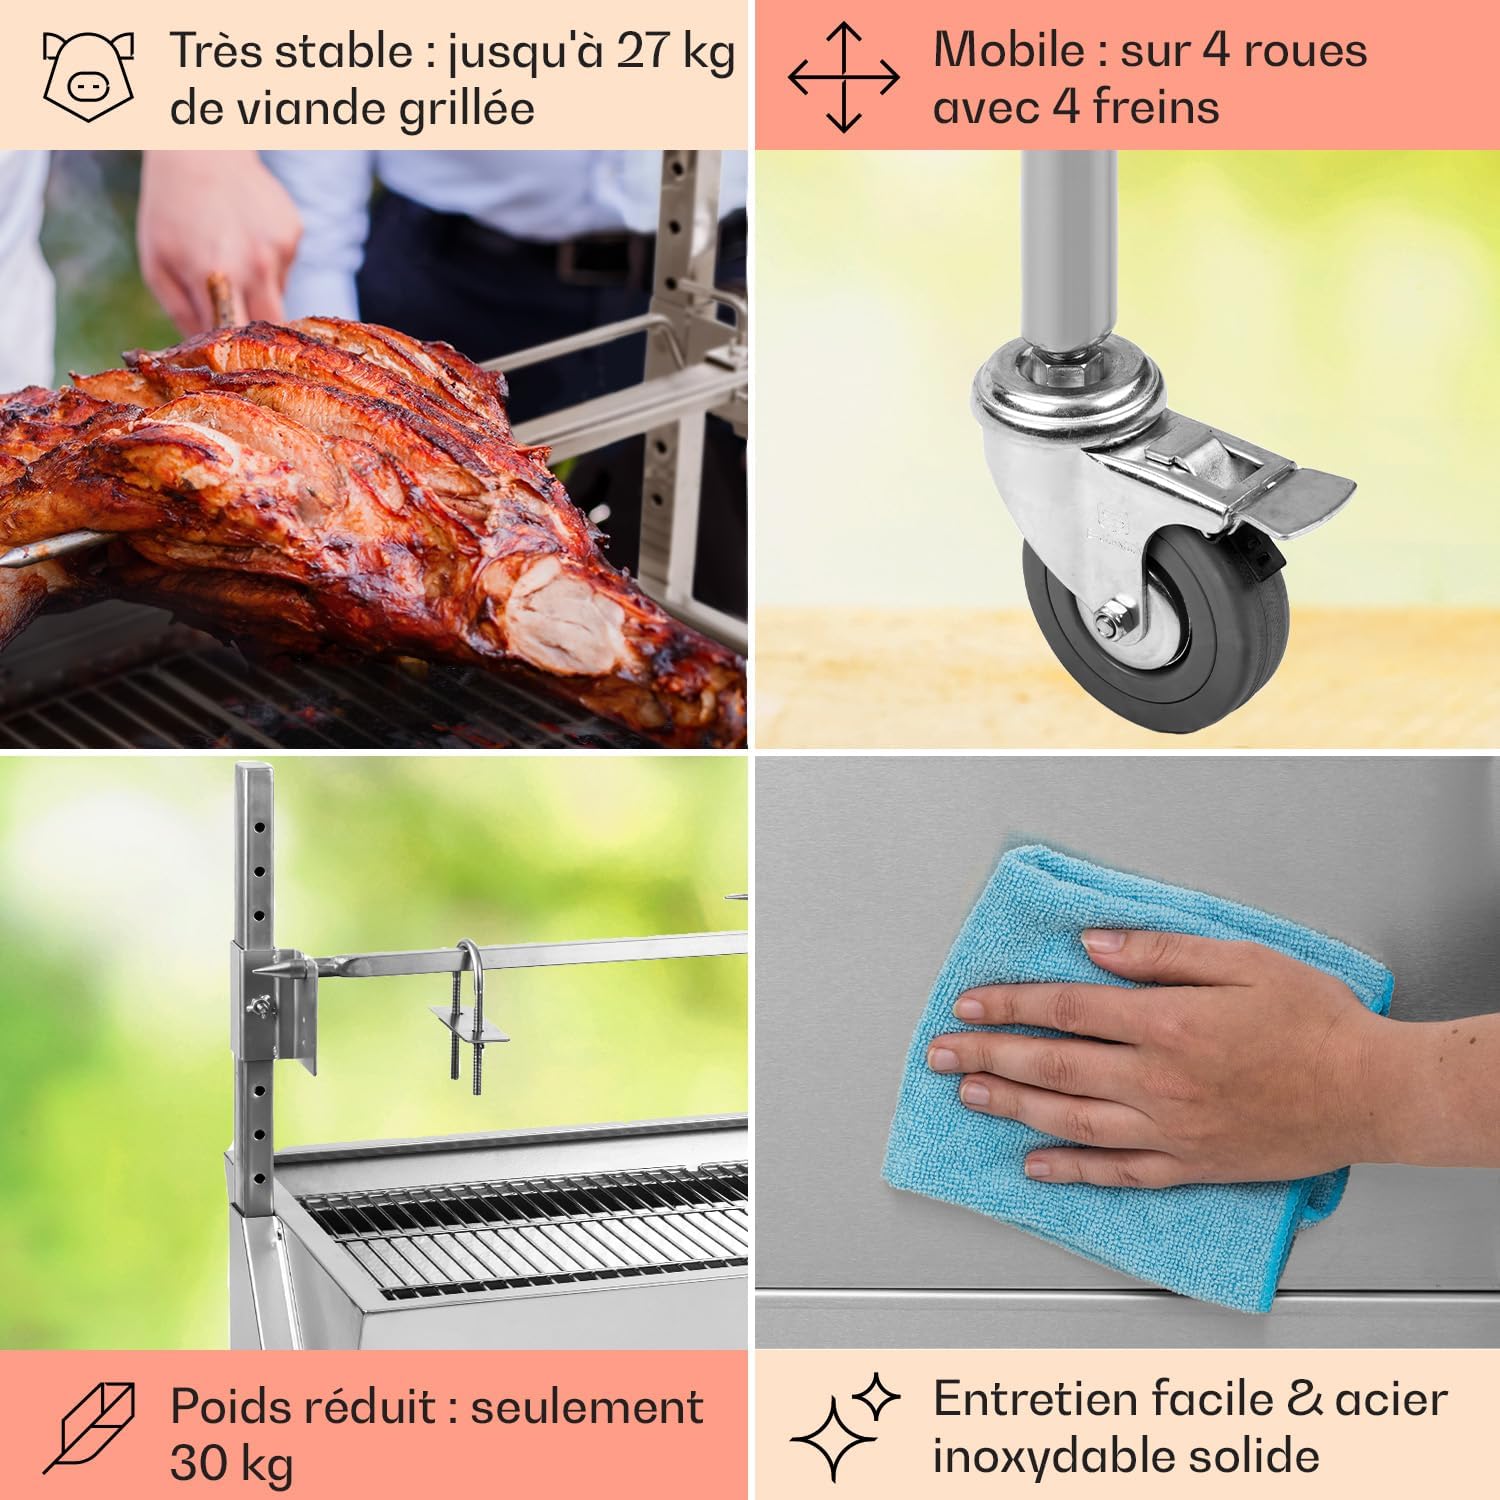
Figure 4: Meat roasting on the electric rotisserie.

Figure 5: Close-up of roasted meat on the rotisserie.
Mobility and Storage
The grill is equipped with four wheels and integrated brakes, making it easy to move and position. Its total weight of 30 kg contributes to its portability. When not in use, ensure the brakes are engaged to keep the grill stationary.
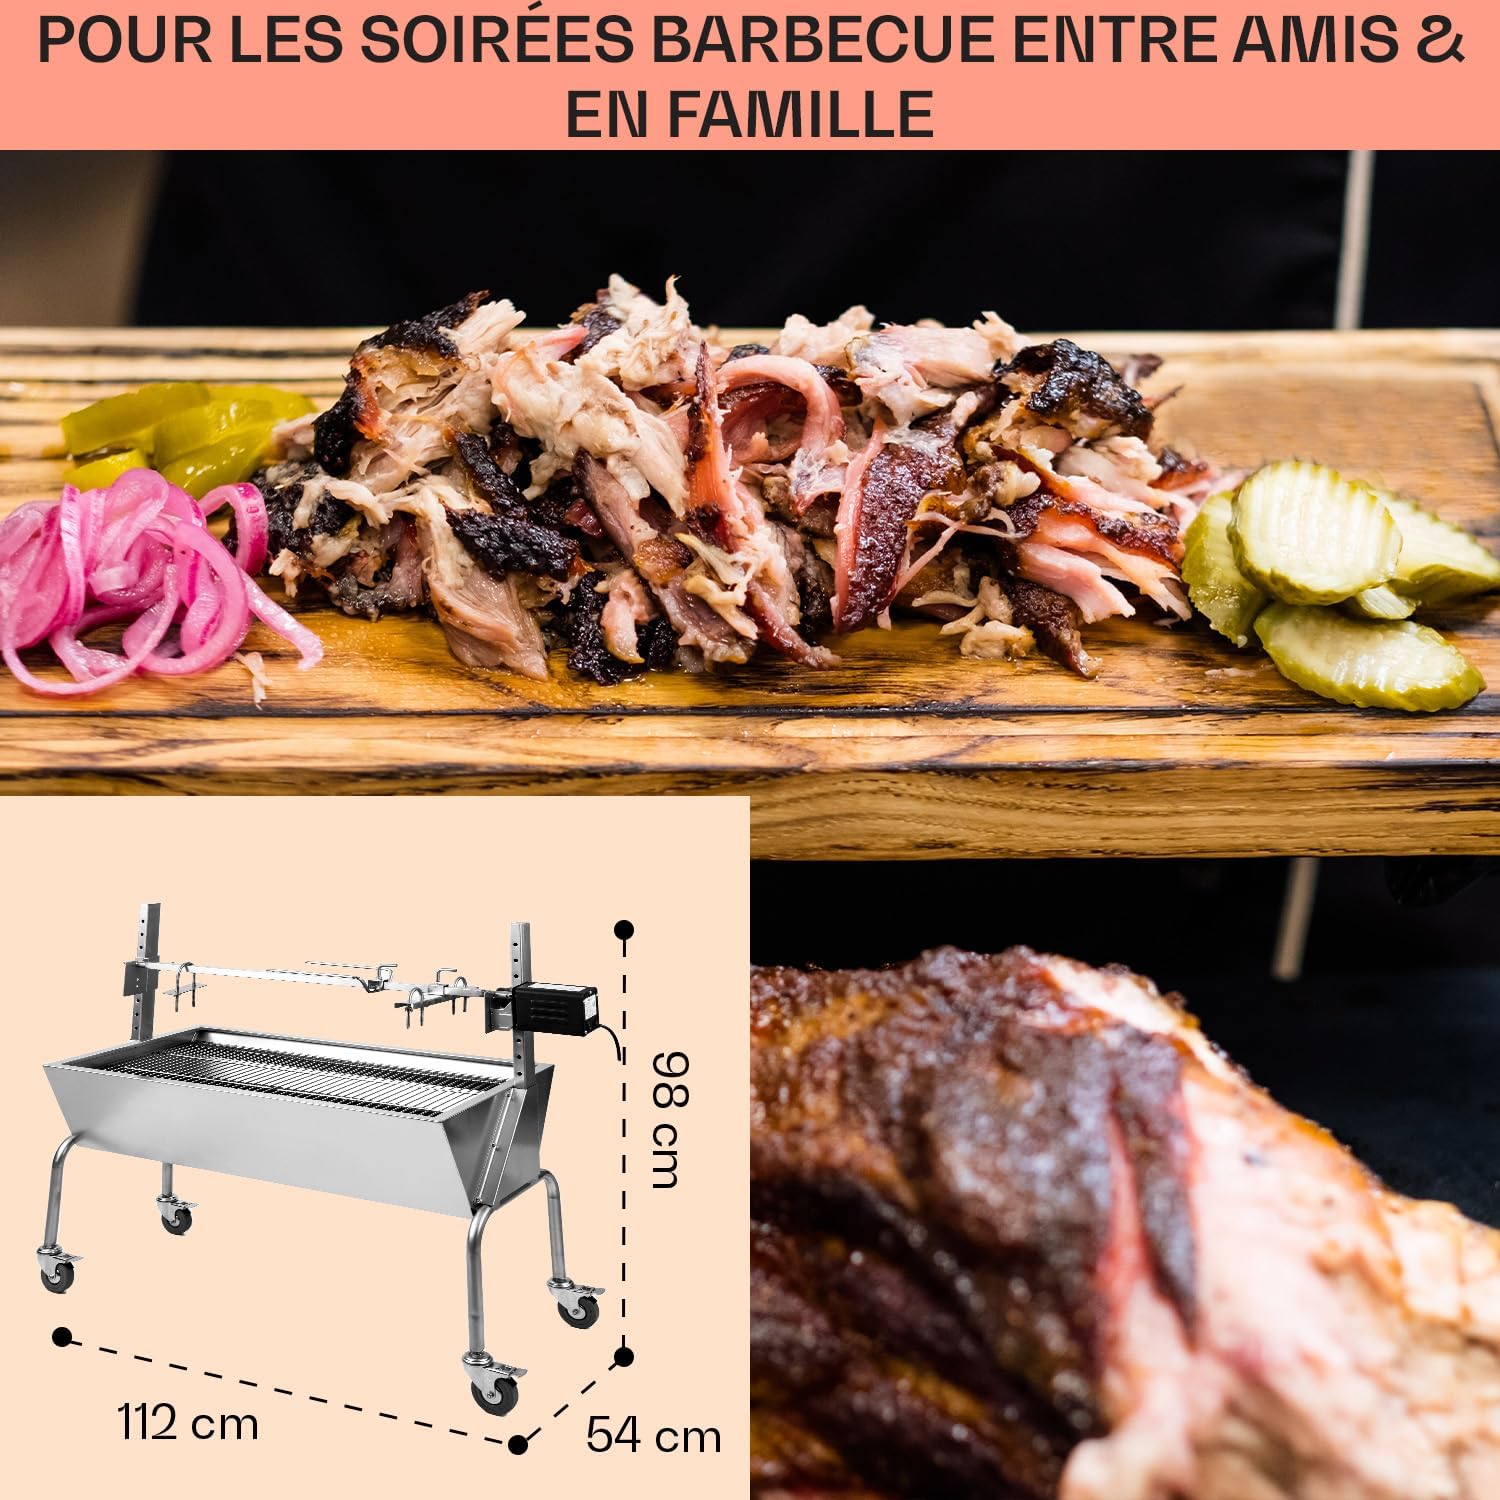
Figure 6: Grill dimensions and wheels for mobility.
Maintenance and Cleaning
The grill is constructed from durable alloy steel and metal, with stainless steel components for easy maintenance.
- After Each Use: Allow the grill to cool completely. Remove ash from the charcoal basin.
- Cleaning Grill Grates and Spit: Scrape off any food residue. Wash with warm, soapy water and a non-abrasive sponge. Rinse thoroughly and dry immediately to prevent rust.
- Cleaning Grill Body: Wipe down exterior surfaces with a damp cloth. For stubborn stains, use a mild detergent. Avoid abrasive cleaners that could damage the finish.
- Charcoal Basin Paint: Some users have reported that the paint on the charcoal basin may peel after initial uses due to high heat. This is a cosmetic issue and does not affect the grill's functionality. Performing an initial burn-off as described in the operating instructions can help mitigate this.
- Storage: Store the grill in a dry, protected area when not in use. A rain cover (if available) is recommended to protect it from the elements.

Figure 7: Cleaning a stainless steel surface.
Troubleshooting
- Rotisserie Motor Not Rotating:
- Ensure the motor is securely plugged into a working power outlet.
- Check if the power switch on the motor is in the 'ON' position.
- Verify that the rotisserie spit is correctly engaged with the motor's drive mechanism.
- Ensure the meat load does not exceed 27 kg and is balanced on the spit. - Difficulty Securing Small Meats (e.g., Chicken) to Spit:
- The provided meat forks are designed for larger cuts. For smaller poultry or irregular shapes, use butcher's twine to truss the meat tightly and secure it to the spit, preventing it from spinning freely. - Paint Peeling on Charcoal Basin:
- This can occur due to high temperatures. It is primarily a cosmetic issue and does not typically affect the structural integrity or performance of the grill. Ensure proper initial burn-off to cure any paint.
Technical Specifications
| Feature | Specification |
|---|---|
| Brand | Oneconcept |
| Model Number | GQ8-2200-dada |
| Color | Silver |
| Dimensions (L x W x H) | 54 x 112 x 98 cm |
| Weight | 30 Kilograms |
| Power (Motor) | 15 Watts |
| Voltage | 240 Volts |
| Material | Alloy Steel, Metal |
| Cooking Surface | 83 x 43 cm |
| Rotisserie Capacity | Up to 27 kg |
Warranty and Customer Support
For warranty information, please refer to the documentation provided at the time of purchase or contact your retailer. Information regarding the availability of spare parts for this product is currently unavailable.
For any questions, technical assistance, or support, please contact Oneconcept customer service through their official website or the contact details provided with your purchase.