SECRUI M508+D017x2
SECRUI Door Chime Instruction Manual
Model: M508+D017x2
Brand: SECRUI
Introduction
The SECRUI Door Chime is a wireless entry alert system designed to enhance security and convenience for homes, businesses, and offices. This system provides instant alerts when doors or windows are opened, ensuring you are aware of any entry or exit. It features a long operating range, multiple chime options, and adjustable volume levels to suit various environments.
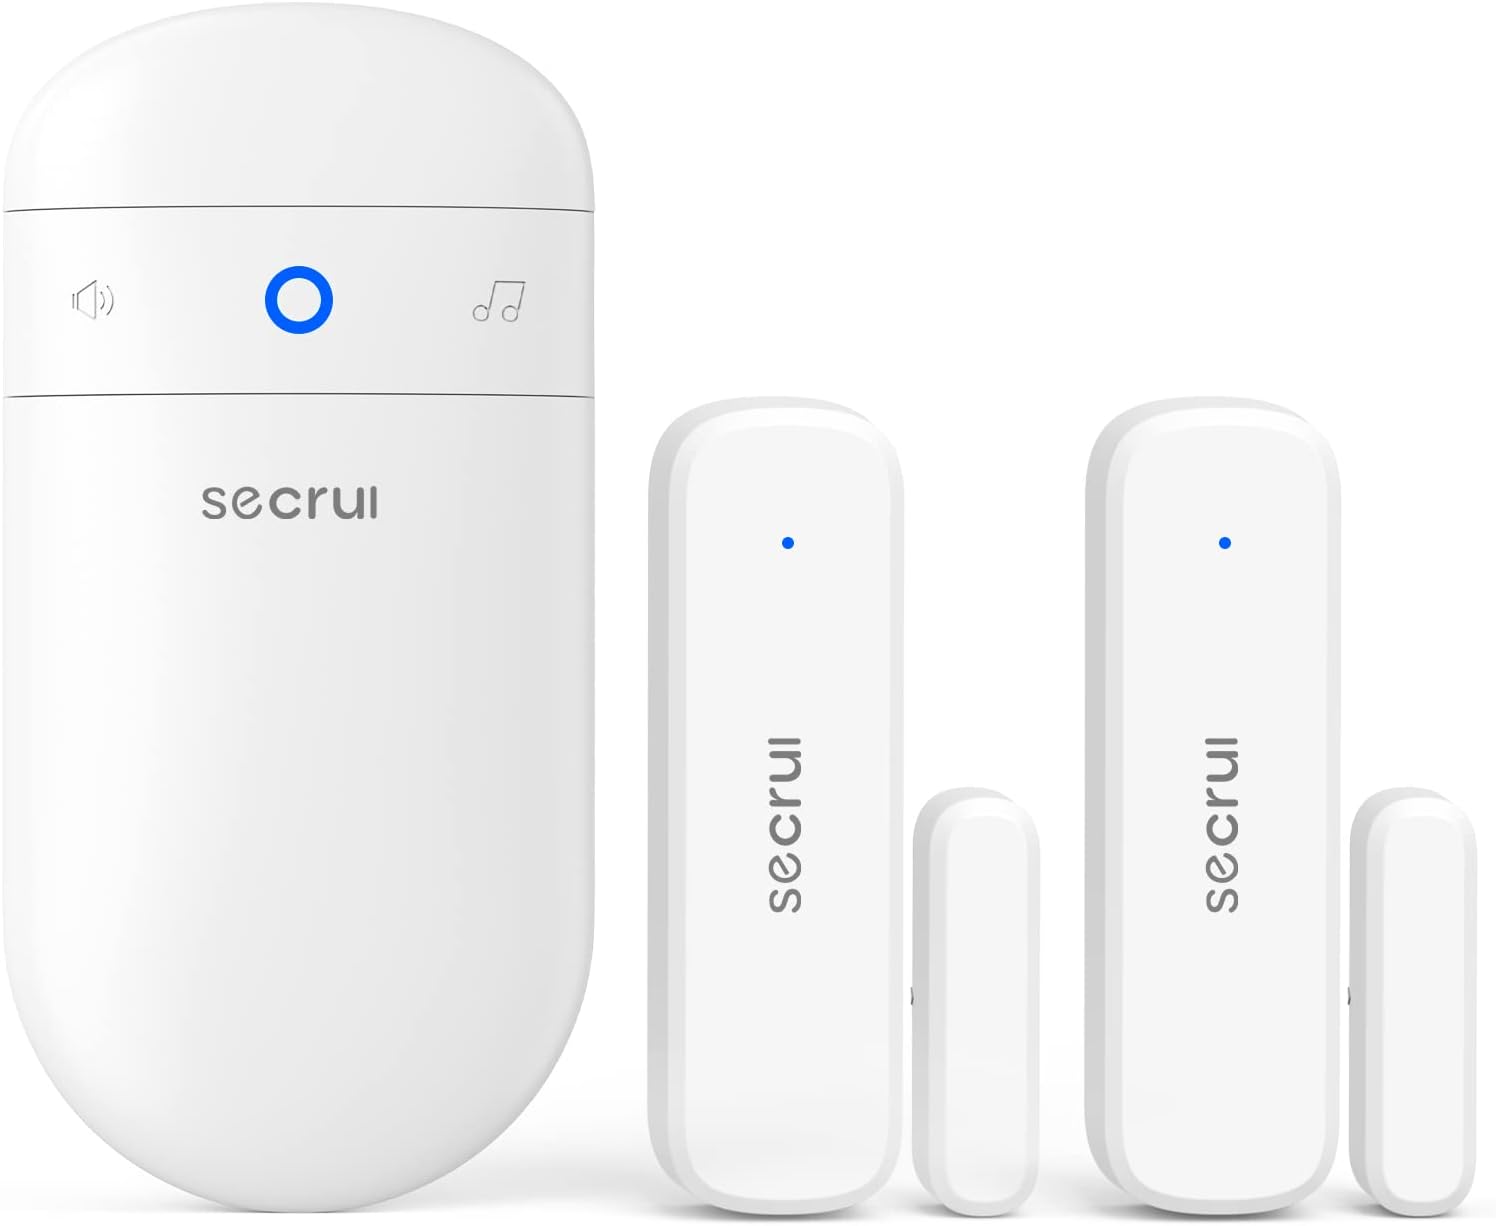
Figure 1: SECRUI Door Chime system including the plug-in receiver and two magnetic door sensors.
Components
Your SECRUI Door Chime package includes the following items:
- 1 × Plug-in receiver
- 2 × Door Sensor (battery included)
- 4 × Adhesive tape
- 4 × Screw
- 4 × Anchor
- 1 × User manual

Figure 2: Dimensions of the receiver and door sensor components.
Setup
The SECRUI Door Chime is designed for easy, out-of-the-box setup. The receiver and sensors are pre-paired at the factory, eliminating the need for complex wiring or professional installation.
Installation Steps:
- Receiver Placement: Simply plug the receiver into any standard AC outlet within the desired operating range (up to 500 feet from the sensors).
- Sensor Attachment: The door sensors consist of two pieces: a larger main unit and a smaller magnetic strip.
- Adhesive Mounting: Peel off the double-sided adhesive from the back of both sensor pieces. Stick one piece to the door frame and the other to the door itself, ensuring they are aligned and close to each other when the door is closed.
- Screw Mounting: For a more permanent installation, use the provided screws and anchors to secure the sensor pieces to the door and frame.
- Alignment: Ensure the two sensor pieces are within 1 inch (2.5 cm) of each other when the door is closed for proper operation.

Figure 3: Visual guide for installing the door sensors using either adhesive tape or screws.
Video 1: Official product video demonstrating the setup and functionality of the SECRUI Door Chime. This video shows how to install the receiver and sensors, and how the system alerts when a door opens.
Operating Instructions
The door chime operates on a simple magnetic principle. When the two parts of the door sensor separate (i.e., the door or window opens), the magnetic link is broken, triggering the receiver to play a selected chime.
Key Features:
- 52 Chime Options: Choose from a variety of 52 different chimes to personalize your alert sound.
- 5 Volume Levels: Adjust the volume from silent (mute mode) to 120 dB to suit your environment and needs.
- LED Indicators: The receiver features LED indicators that flash along with the chime, providing a visual alert, which is especially useful in mute mode or for the hearing impaired.
- Long Operating Range: The high-frequency electronic technology allows for an operating range of up to 500 feet, ensuring reliable alerts across your property.
Adjusting Settings:
Refer to the included user manual for detailed instructions on how to change chime melodies, adjust volume levels, and pair additional sensors if needed. The manual provides clear steps for each function.
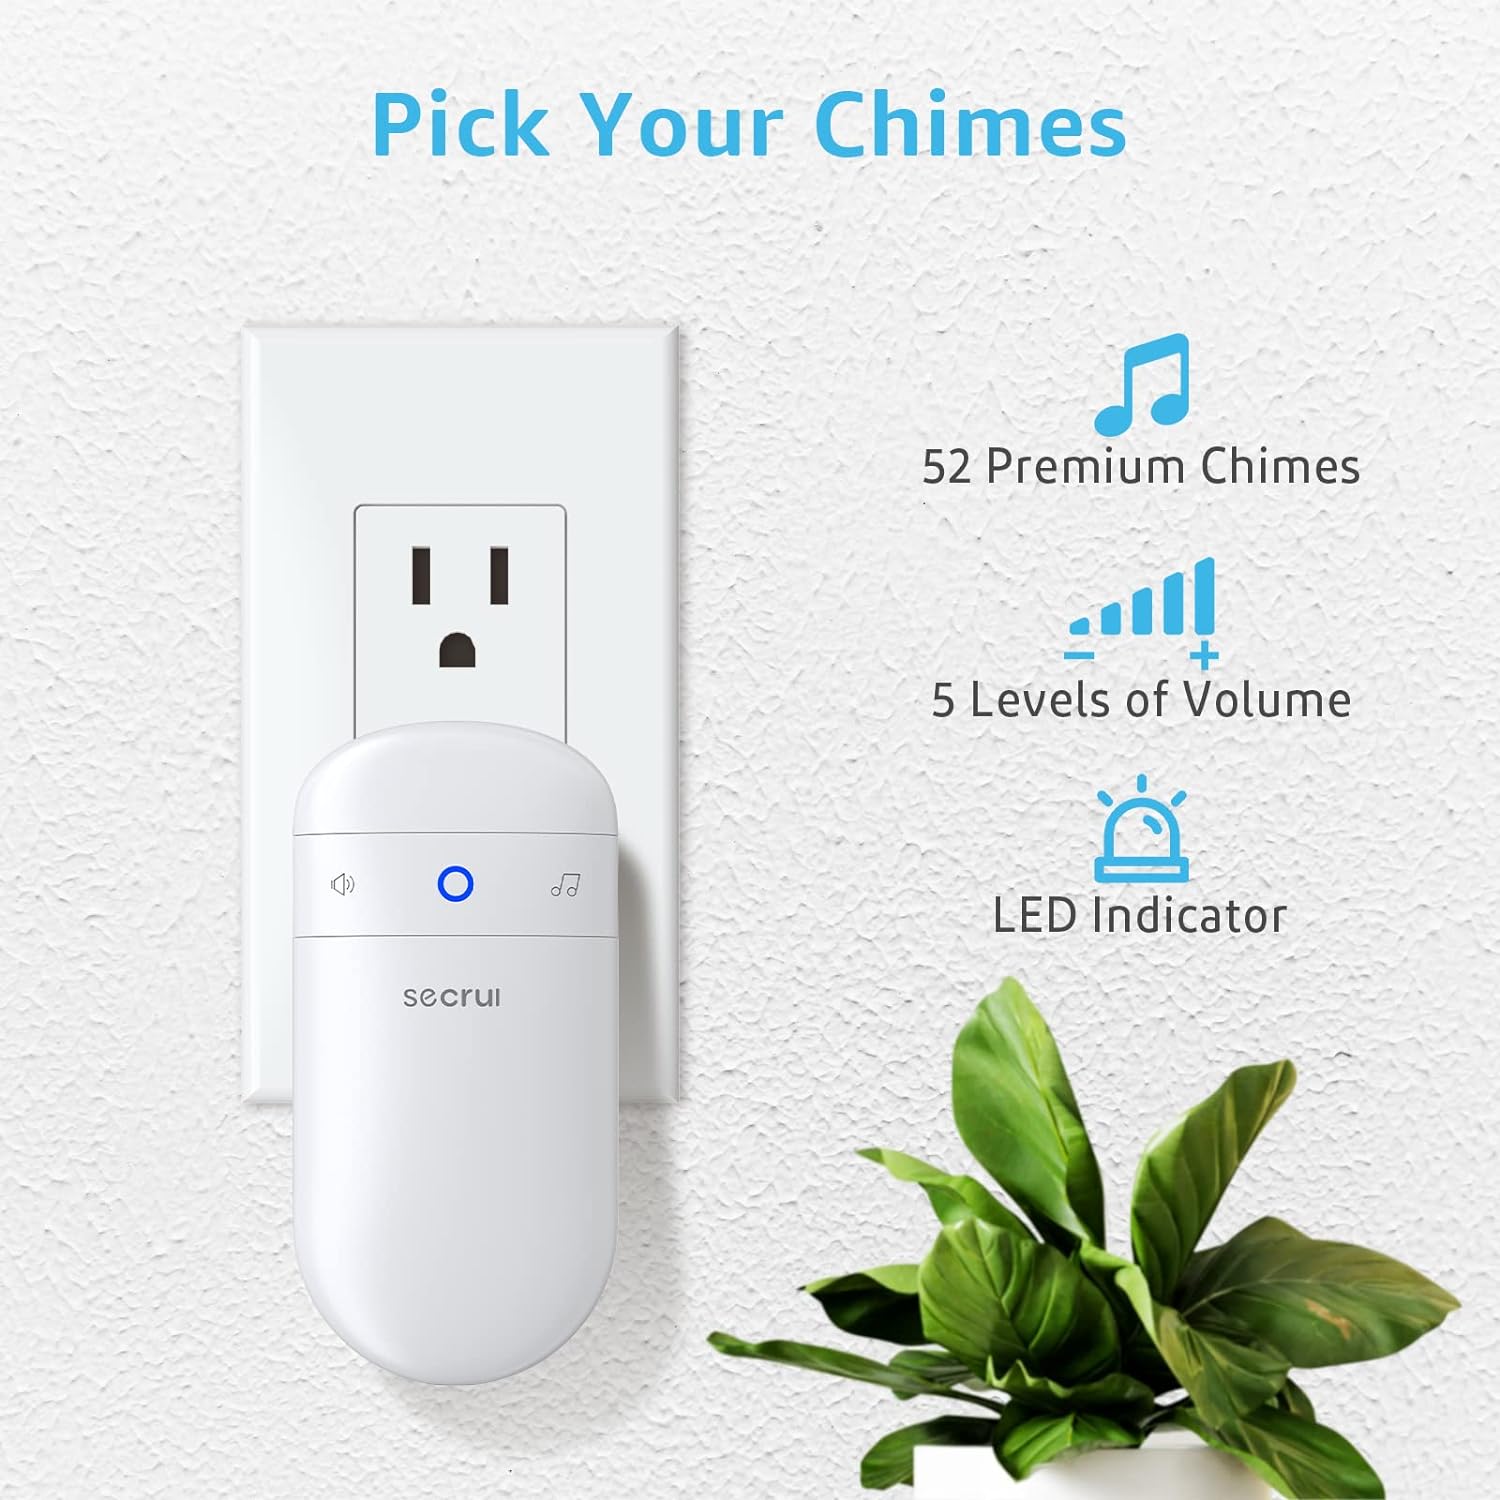
Figure 4: The receiver offers a wide selection of chimes and volume settings.

Figure 5: Illustration of the magnetic sensor operation: separation triggers the chime.
Maintenance
To ensure continuous operation of your SECRUI Door Chime, regular maintenance, particularly battery replacement for the sensors, is important.
Battery Replacement:
The door sensors require 12V 23A Alkaline batteries. When the sensor's LED indicator no longer flashes or the chime becomes unreliable, it's time to replace the battery.
- Carefully open the back cover of the door sensor unit.
- Remove the old 12V 23A battery.
- Insert a new 12V 23A Alkaline battery, ensuring correct polarity.
- Close the back cover securely.
It is recommended to use high-quality alkaline batteries for optimal performance and longevity.
Troubleshooting
If you encounter issues with your SECRUI Door Chime, try the following troubleshooting steps:
- No Chime Sound:
- Ensure the receiver is properly plugged into a working outlet.
- Check the volume level on the receiver; it might be set to mute.
- Verify the sensor battery is not depleted. Replace if necessary.
- Confirm the sensor pieces are correctly aligned and within range when the door is closed.
- Intermittent Alerts:
- The sensor pieces might be too far apart. Adjust their position to be closer.
- Interference from other wireless devices or thick walls might reduce the operating range. Try relocating the receiver or sensors.
- Low battery in the sensor can cause inconsistent alerts. Replace the battery.
- False Alarms:
- Ensure the sensor pieces are firmly attached and do not shift with vibrations.
- Check for any magnetic interference near the sensor installation area.
- Cannot Change Chime/Volume:
- Refer to the user manual for the correct button sequence to adjust settings.
- If the issue persists, try resetting the receiver (refer to manual for reset procedure).
For further assistance, please contact SECRUI customer support.
Specifications
| Manufacturer | SECRUI |
| Model Number | M508+D017x2 |
| Item Weight | 6.3 ounces |
| Product Dimensions | 4.5 x 2.3 x 1.7 inches |
| Power Source | AC & Battery-Powered |
| Voltage | 120 Volts (AC) |
| Sound Level | 120 dB |
| Operating Range | Up to 500 feet |
| Chime Options | 52 |
| Volume Levels | 5 |
| Sensor Battery Type | 12V 23A Alkaline |
| Installation Method | Screw-In & Self-Adhesive |
Warranty and Support
For detailed warranty information and customer support, please refer to the official SECRUI User Manual or visit the SECRUI brand store.
- Official User Manual (PDF): Download PDF
- SECRUI Brand Store: Visit Store
Ask a question about this manual
Ask about setup, troubleshooting, compatibility, parts, safety, or missing instructions. Manuals+ will review the question and use this page’s manual context to help answer it.