
1. Introduction
This manual provides detailed instructions for the safe installation, operation, and maintenance of the Hylele 400W LED Area Street Parking Lot Light. This high-efficiency fixture is designed for commercial and outdoor applications, offering superior brightness and durability. Please read this manual thoroughly before installation and retain it for future reference.
2. Safety Information
WARNING: Risk of electric shock. Disconnect power before installation or servicing. Installation should be performed by a qualified electrician in accordance with all applicable national and local electrical codes.
- Ensure the power supply is turned off at the circuit breaker before beginning any work.
- Verify the voltage supply matches the fixture's requirements (277 Volts).
- Do not operate the fixture if any part is damaged.
- Avoid direct eye exposure to the light source when the fixture is illuminated.
- Wear appropriate personal protective equipment (PPE) during installation, including gloves and safety glasses.
- Ensure the mounting structure can adequately support the weight of the fixture (approximately 23 pounds).
3. Package Contents
Carefully unpack the box and ensure all components are present and undamaged. If any parts are missing or damaged, contact Hylele customer support immediately.
- 1x 400W Parking lot light lamp body with 1 build-in wire
- 1x SF bracket, pre-installed on the lamp body (for round light pole mounting)
- 2x Screws, pre-fixed on the SF bracket (for securing during installation)

Figure 3.1: Product and Packaging
4. Installation
The Hylele 400W LED Area Street Parking Lot Light is designed for easy installation on a round light pole (Φ 60-67mm) using the included Slip Fitter (SF) bracket. Follow these steps for proper installation:
- Prepare the Mounting Location: Ensure the light pole is sturdy and capable of supporting the fixture's weight. The SF bracket is suitable for poles with a diameter between 60mm and 67mm (approximately 2.36 to 2.64 inches).
- Wiring: Connect the fixture's wires to the main power supply. The built-in wire has three conductors: Black (L - Live), White (N - Neutral), and Green (GND - Ground). Ensure all connections are secure and insulated according to local electrical codes.
- Slide onto Pole: Loosen the screws on the SF bracket. Carefully slide the SF bracket onto the top of the round light pole.
- Adjust Angle: The SF bracket allows for 180-degree rotation. Adjust the angle of the light fixture to achieve the desired illumination direction. The two pre-fixed screws on the bracket can be slightly adjusted to help secure the position.
- Secure the Fixture: Once the desired angle is set, tighten the screws on the SF bracket firmly to secure the fixture to the pole.

Figure 4.1: Easy Mounting Steps
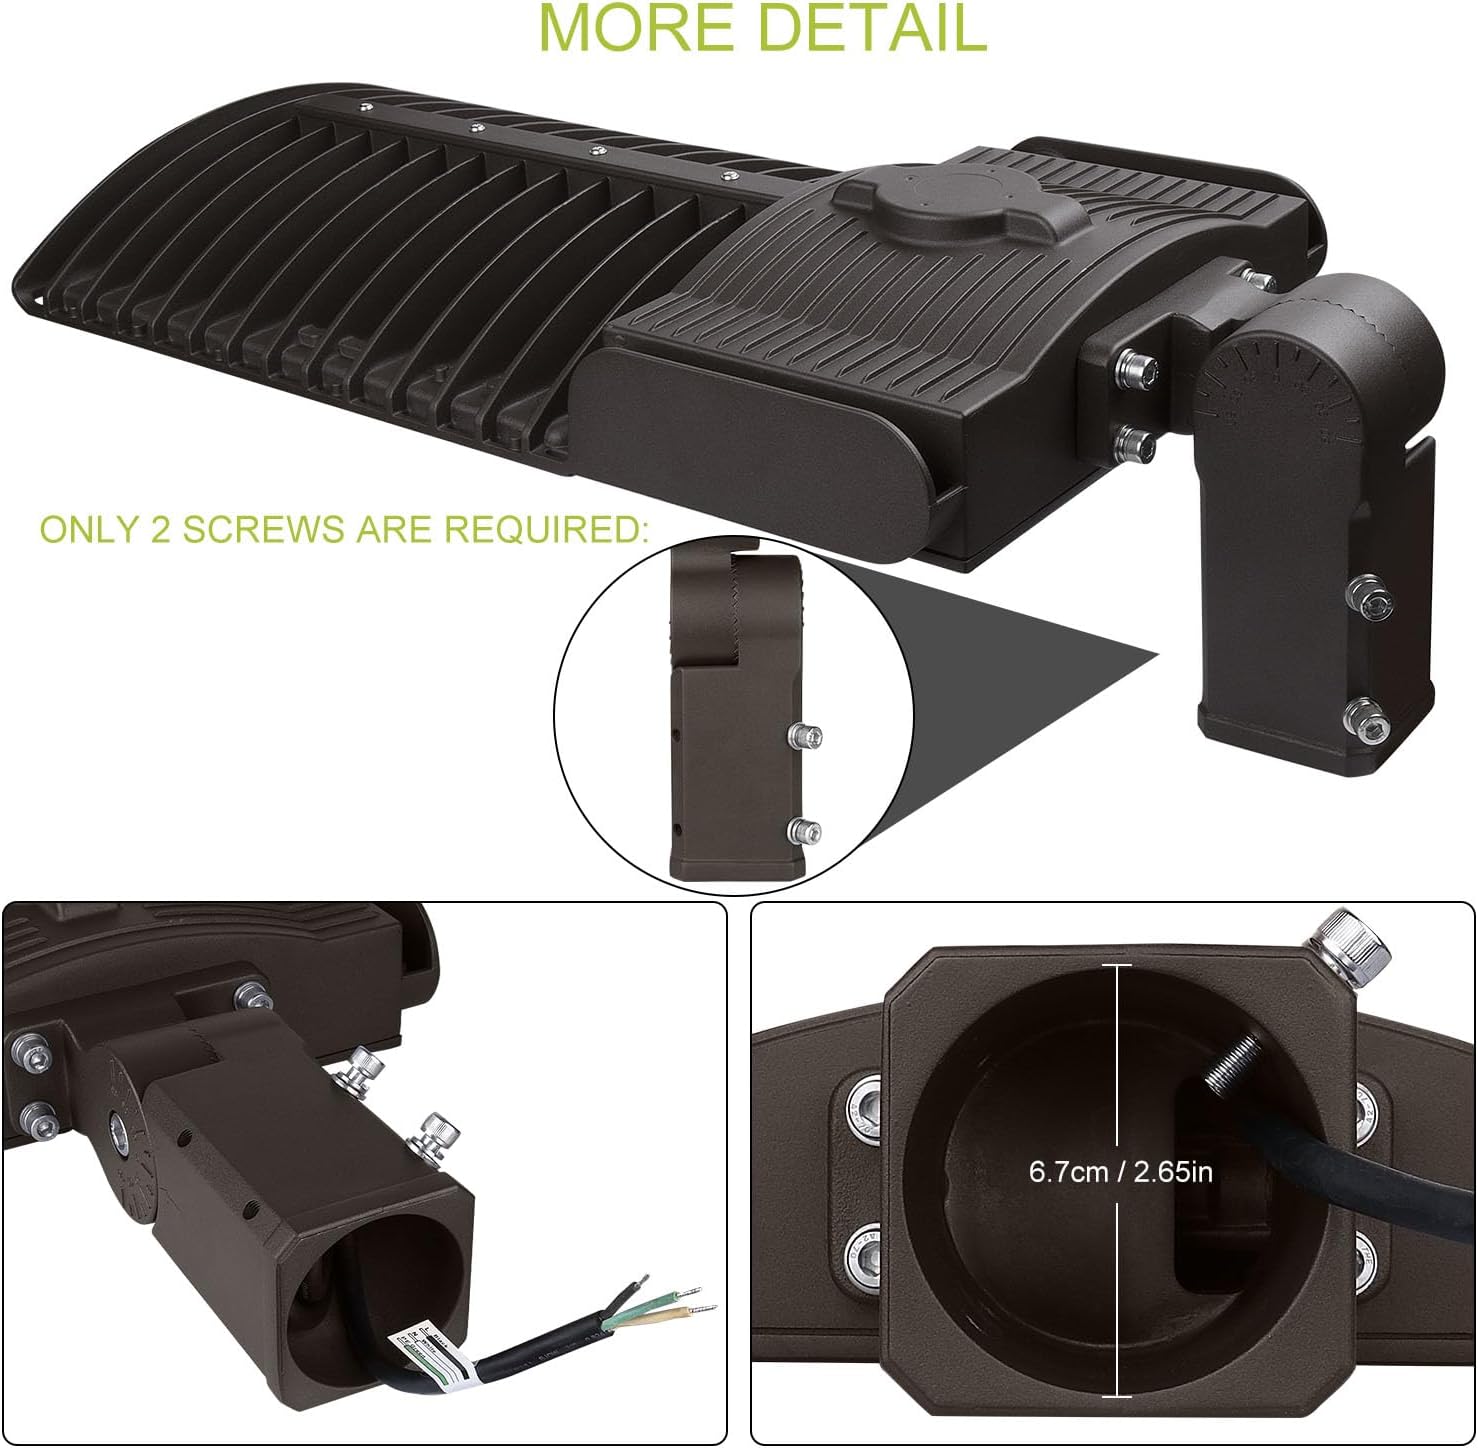
Figure 4.2: Slip Fitter Bracket Detail

Figure 4.3: Product Dimensions

Figure 4.4: Illumination Performance at Various Heights
5. Operating Instructions
Once properly installed and wired, the Hylele 400W LED Area Street Parking Lot Light operates by connecting to a standard electrical circuit. Operation is typically controlled via an external switch or a connected control system (e.g., app-controlled if integrated into a smart lighting system, or a simple push button switch). Ensure the power supply is stable and within the specified voltage range for optimal performance.
6. Maintenance
Regular maintenance helps ensure the longevity and optimal performance of your LED light fixture.
- Cleaning: Periodically clean the lens and housing with a soft, damp cloth to remove dirt, dust, and debris. Do not use abrasive cleaners or solvents. Ensure the fixture is off and cool before cleaning.
- Inspection: Annually inspect the fixture for any signs of physical damage, loose connections, or wear on the wiring. Address any issues promptly.
- Heat Dissipation: Ensure the heat dissipation fins are clear of obstructions to allow for proper airflow and prevent overheating.
7. Troubleshooting
If the fixture is not operating as expected, consider the following common issues and solutions:
- Light does not turn on:
- Check the power supply at the circuit breaker.
- Verify all electrical connections are secure and correctly wired.
- Ensure the external switch or control system is functioning correctly.
- Light flickers or dims:
- Check for loose wiring connections.
- Ensure the input voltage is stable and within the specified range.
- Confirm the fixture is not overheating due to obstructed heat fins.
- Reduced brightness:
- Clean the lens surface to remove any accumulated dirt or debris.
- Verify the power supply is consistent.
If issues persist after attempting these solutions, contact Hylele customer support for assistance.
8. Specifications
| Feature | Specification |
|---|---|
| Brand | Hylele |
| Model Number | PartialUpdate |
| Wattage | 400 watts |
| Brightness | 56000 Lumens |
| Color Temperature | 5700 Kelvin (Cool White) |
| Efficiency | 140lm/w |
| Voltage | 277 Volts |
| Material | Die Cast Aluminum |
| Product Dimensions | 27.5"L x 12.6"W x 4"H |
| Item Weight | 23 Pounds |
| Water Resistance Level | IP65 Waterproof |
| Average Life | 50000 Hours |
| Mounting Type | Slip Fitter, Pole Mount (Φ 60-67mm) |
| Certifications | ETL Listed |

Figure 8.1: Product Features Overview
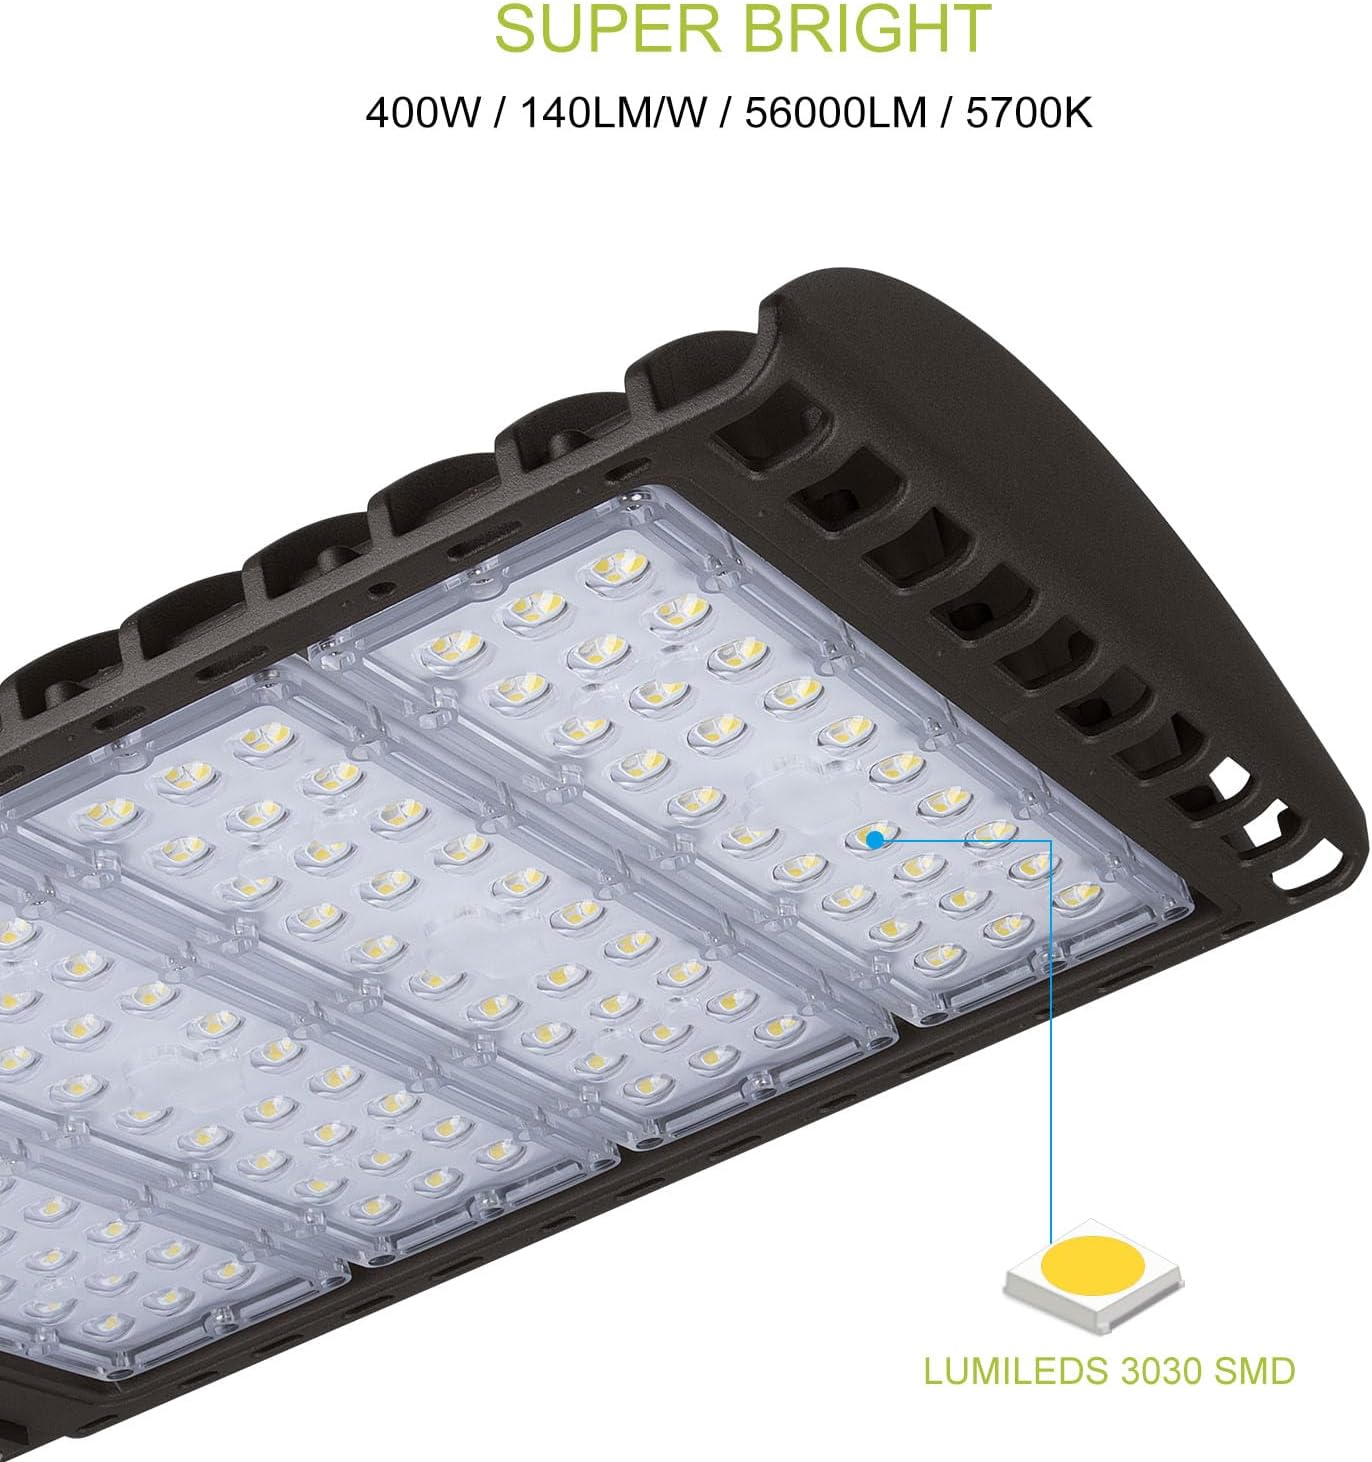
Figure 8.2: LED Chip Detail and Brightness Specifications

Figure 8.3: IP65 Waterproof and Environmental Resistance
9. Warranty and Support
Hylele provides a 5-year solution for lighting projects and product-related issues. All lamps are produced and certified in accordance with international industry standards and are ETL listed.
For technical support, warranty claims, or any product-related inquiries, please contact Hylele customer service. You may also consider purchasing extended protection plans for additional coverage:
- 3-Year Protection Plan
- 4-Year Protection Plan
- Complete Protect (monthly plan covering eligible purchases)