1. Introduction
Thank you for choosing the Whirlpool MWP251B Microwave Oven. This manual provides essential information for the safe and efficient operation, maintenance, and troubleshooting of your new appliance. Please read these instructions carefully before using the microwave oven and keep them for future reference.
2. Safety Instructions
To reduce the risk of fire, electric shock, injury to persons, or exposure to excessive microwave energy when using your appliance, follow basic precautions, including the following:
- Read all instructions before using the appliance.
- Do not attempt to operate this oven with the door open since this can result in harmful exposure to microwave energy.
- Do not place any object between the oven front face and the door or allow soil or cleaner residue to accumulate on sealing surfaces.
- Do not operate the oven if it is damaged. It is particularly important that the oven door closes properly and that there is no damage to the: (1) door (bent), (2) hinges and latches (broken or loosened), (3) door seals and sealing surfaces.
- The oven should not be adjusted or repaired by anyone except properly qualified service personnel.
- Ensure the appliance is properly grounded.
- Do not heat liquids or other foods in sealed containers as they are liable to explode.
- Only use utensils suitable for microwave ovens.
- Clean the oven regularly and remove any food deposits.
3. Setup and Installation
- Unpacking: Carefully remove the microwave oven and all packing materials from the carton. Check the oven for any damage, such as dents or a misaligned door. Do not install if damaged.
- Placement: Place the microwave oven on a flat, stable surface that can support its weight and the heaviest food item likely to be cooked in it. Ensure there is adequate ventilation space: at least 20 cm (8 inches) above the oven, 10 cm (4 inches) at the rear, and 5 cm (2 inches) on each side. Do not block any ventilation openings.
- Power Connection: Plug the power cord into a standard grounded electrical outlet. Ensure the voltage and frequency match the ratings on the appliance's rating label. Do not use extension cords.
- Turntable Installation:
- Place the rotating ring inside the oven cavity.
- Place the glass turntable plate on top of the rotating ring, ensuring it sits securely in the center.

Figure 1: Front view of the Whirlpool MWP251B Microwave Oven, showing the control panel and door handle.
4. Operating Instructions
4.1 Control Panel Overview
The control panel features a digital display, function buttons, and a dial for setting time and power levels. Familiarize yourself with the layout before operation.
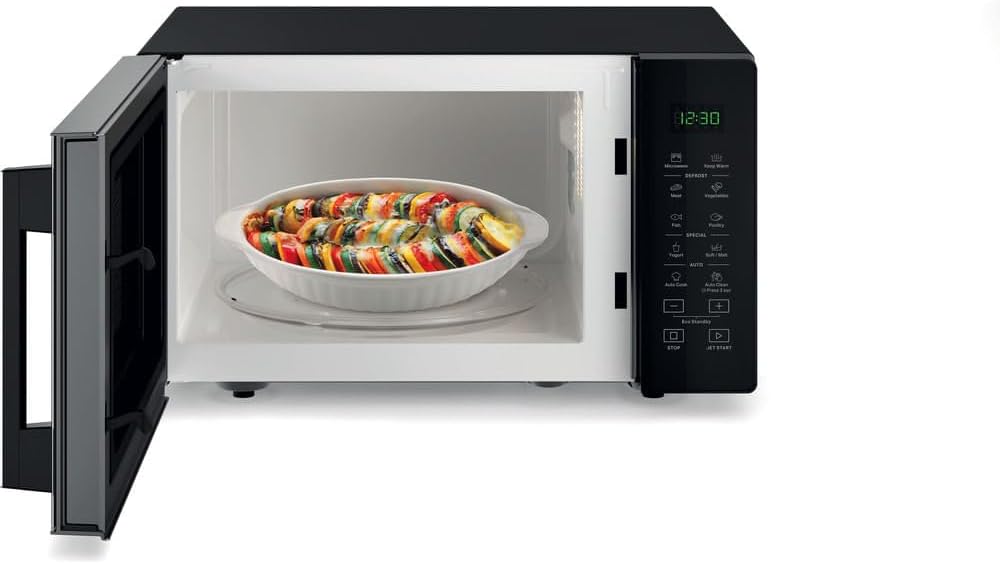
Figure 2: Interior view of the Whirlpool MWP251B Microwave Oven with the door open, showing the glass turntable and oven cavity.
4.2 Basic Microwave Cooking
- Place food in a microwave-safe container on the glass turntable.
- Close the oven door securely.
- Press the "Microwave" button.
- Use the dial to set the desired cooking time.
- Press "JET START" to begin cooking. To adjust power, press "Microwave" again after setting time and use the dial to select power level (e.g., 900W for full power).
4.3 Defrost Function
The defrost function allows for quick and efficient thawing of various food types.
- Place the frozen food in a microwave-safe container.
- Press the "DEFROST" button.
- Select the food type (e.g., Meat, Fish, Poultry, Vegetables) using the corresponding buttons or dial.
- Enter the weight of the food using the dial. The oven will automatically calculate the defrosting time.
- Press "JET START" to begin defrosting.
4.4 Special Functions
- Yogurt Function: This microwave includes a dedicated function for preparing yogurt. Refer to the specific instructions on the control panel or a separate recipe guide for optimal results.
- Automatic Recipes (Auto Cook): The oven comes with pre-programmed settings for various dishes. Press the "Auto Cook" button and select the desired recipe number or category. The oven will automatically set the cooking time and power level.
- Timer: Use the "Timer" function to set a countdown for other kitchen tasks. This does not activate the microwave.
5. Maintenance and Cleaning
Regular cleaning and proper maintenance will ensure the longevity and efficient operation of your microwave oven.
- Interior Cleaning: After each use, wipe the interior with a damp cloth to remove food splatters. For stubborn stains, place a bowl of water with lemon slices inside and microwave for 2-3 minutes. The steam will loosen the grime, making it easier to wipe clean.
- Exterior Cleaning: Clean the exterior surfaces with a soft, damp cloth. Avoid abrasive cleaners or scouring pads.
- Door Seals: Regularly clean the door seals and adjacent parts with a damp cloth to ensure proper sealing and prevent microwave energy leakage.
- Turntable: The glass turntable and rotating ring can be removed and washed in warm, soapy water or in a dishwasher.
- Automatic Cleaning Function (Auto Clean): This model features an automatic cleaning function. Consult the control panel or a separate guide for specific instructions on how to use this feature effectively.
- Do Not Use: Never use harsh detergents, abrasive cleaners, or metal scouring pads on any part of the microwave oven.
6. Troubleshooting
If you encounter problems with your microwave oven, refer to the following table for common issues and solutions.
| Problem | Possible Cause | Solution |
|---|---|---|
| Oven does not start | Door not closed properly. Power cord not plugged in. Fuse blown or circuit breaker tripped. | Ensure door is firmly closed. Plug in the power cord. Check household fuse or reset circuit breaker. |
| Food not heating | Incorrect cooking time/power level. Microwave-safe dish not used. | Adjust cooking time and power. Use only microwave-safe cookware. |
| Turntable not rotating | Turntable not properly placed. Debris under turntable. | Ensure turntable and rotating ring are correctly positioned. Clean any debris from under the turntable. |
| Unusual noise during operation | Food container touching oven walls. Turntable not centered. | Ensure food container is not too large. Reposition turntable. |
If the problem persists after trying these solutions, please contact customer support.
7. Specifications
- Model: MWP251B
- Brand: Whirlpool
- Capacity: 25 Liters
- Microwave Power: 900 Watts
- Product Dimensions (D x W x H): 41.4 x 48.31 x 28.09 cm (16.3 x 19.02 x 11.06 inches)
- Weight: 13 kg (28.66 lbs)
- Color: Black
- Material: Glass, Metal
- Special Features: Timer, Yogurt Function, Automatic Recipes, Automatic Cleaning Function
- Installation Type: Freestanding
8. Warranty and Support
For warranty information and customer support, please refer to the warranty card included with your product or visit the official Whirlpool website. Keep your proof of purchase for any warranty claims.
For technical assistance or service, please contact Whirlpool customer service directly.


