1. Introduction
This manual provides essential information for the safe and effective use of your Nedis Personal Security Alarm Dialer PSTN 3. Please read these instructions carefully before installation and operation, and retain them for future reference. This device is designed to provide a quick and reliable way to contact pre-programmed emergency numbers in situations requiring immediate assistance.
2. Safety Information
- Ensure the device is connected to a standard PSTN (Public Switched Telephone Network) line.
- Use only the provided power adapter. Using an incorrect adapter may damage the device and void the warranty.
- Do not expose the device or remote controls to water, moisture, or extreme temperatures.
- Do not attempt to open or repair the device yourself. Refer all servicing to qualified personnel.
- Keep the device and its components out of reach of children.
- Regularly test the system to ensure proper functionality.
3. Package Contents
Carefully unpack the box and ensure all items listed below are present and in good condition.
- Main Dialer Unit
- Power Adapter
- RJ-11 Phone Cable
- Remote Control / Panic Button (x2) with Lanyards
- Mounting Screws (x2)
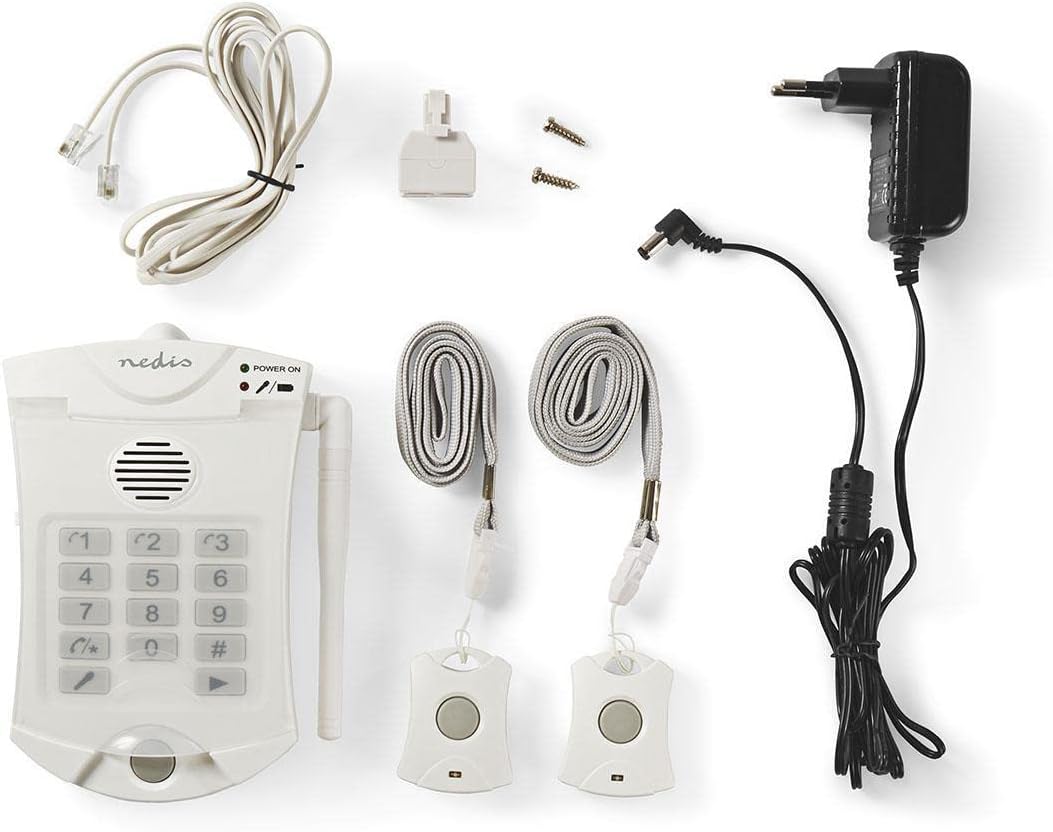
Image 3.1: Overview of all included components.
4. Product Overview
The Nedis Personal Security Alarm Dialer consists of a main unit and two remote panic buttons. The main unit connects to your telephone line and power supply, allowing it to dial pre-programmed numbers. The remote panic buttons activate the dialing sequence wirelessly.
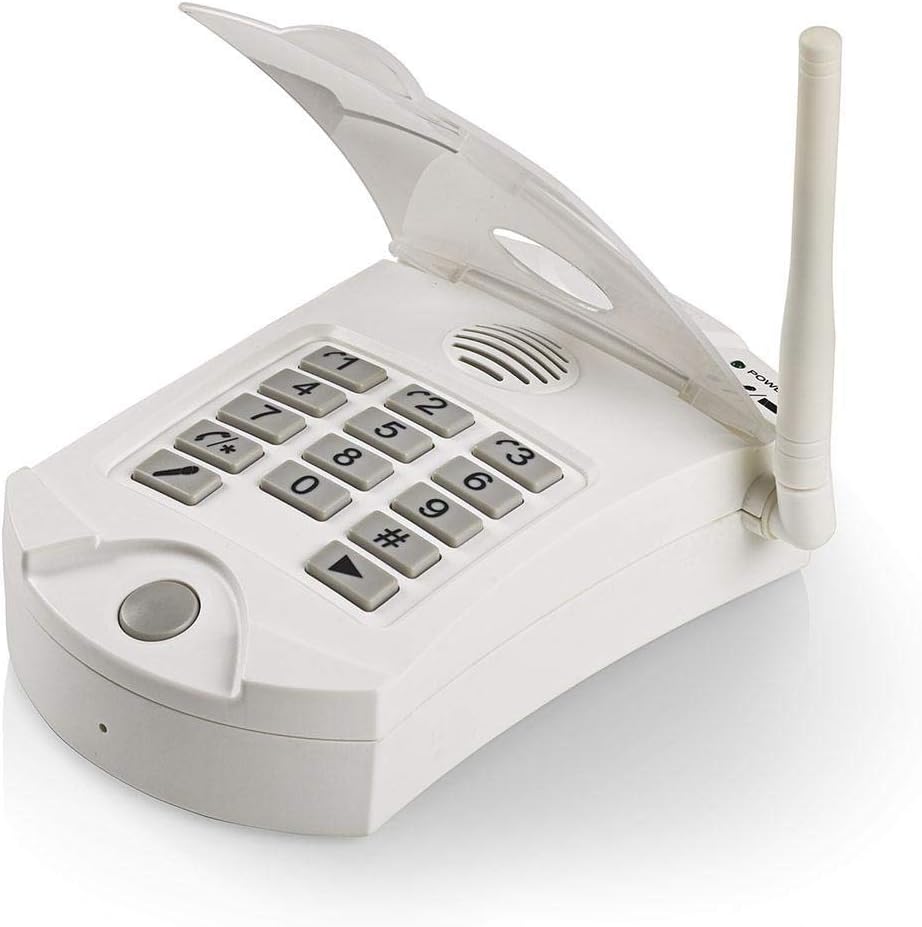
Image 4.1: Main Dialer Unit (Keypad Open)

Image 4.2: Main Dialer Unit (Keypad Closed)

Image 4.3: Remote Control / Panic Button
5. Setup
5.1. Connecting the Main Unit
- Connect to Phone Line: Locate the RJ-11 phone jack on the side or back of the main unit. Connect one end of the provided RJ-11 phone cable to this jack and the other end to your telephone wall socket.
- Connect Power: Plug the small connector of the power adapter into the DC IN port on the main unit. Plug the power adapter into a standard electrical outlet. The 'POWER ON' indicator light on the main unit should illuminate.
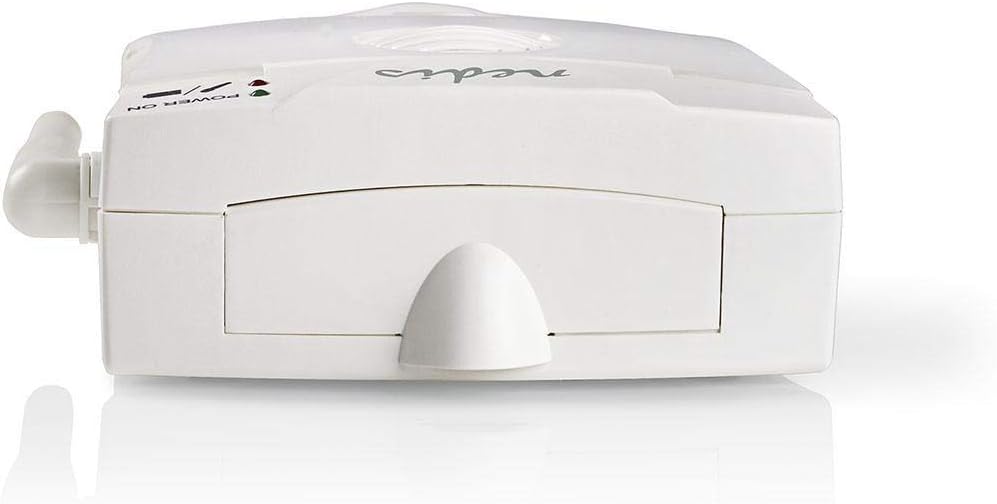
Image 5.1: Phone Line Connection Port
5.2. Mounting the Main Unit (Optional)
The main unit can be placed on a flat surface or mounted to a wall using the provided screws. If wall mounting, ensure the location is within reach of a power outlet and phone line, and allows for good reception with the remote panic buttons.
5.3. Remote Control / Panic Button Batteries
The remote panic buttons typically come with pre-installed batteries. If they are not functioning, refer to the Maintenance section for battery replacement instructions.
6. Operation
6.1. Programming Emergency Numbers
The device allows you to pre-program up to 3 emergency telephone numbers. These numbers will be dialed sequentially when the alarm is triggered.
- Open the keypad cover on the main unit.
- Press the 'SET' button (usually indicated by a gear icon or similar). The display or an indicator light may show that the unit is in programming mode.
- Enter the first emergency number using the keypad (e.g., 112, 911, or a family member's number).
- Press the '#' button to confirm the number.
- Repeat steps 3 and 4 for the second and third emergency numbers.
- Press the 'SET' button again to exit programming mode.
Note: Ensure the numbers include any necessary prefixes for external calls (e.g., '0' for an outside line if applicable).
6.2. Using the Panic Button
In an emergency, press and hold the large button on the remote control / panic button for approximately 2-3 seconds. The main unit will:
- Emit an audible alarm (if enabled).
- Begin dialing the first pre-programmed emergency number.
- If the first number is busy or unanswered after a set number of rings, it will hang up and dial the second number, and so on, until a connection is made.
- When a call is answered, the unit will play a pre-recorded message (if configured) or allow two-way communication through its built-in microphone and speaker.
6.3. Cancelling an Alarm Call
To stop an active alarm call, press the 'CANCEL' button (often indicated by a phone hang-up icon) on the main unit's keypad.
6.4. Testing the System
It is crucial to regularly test your alarm system. Inform the person whose number you are calling that you are conducting a test. Press the panic button and verify that the call is placed and received correctly.
7. Maintenance
7.1. Cleaning
Wipe the device with a soft, dry cloth. Do not use abrasive cleaners or solvents.
7.2. Remote Control Battery Replacement
When the battery in a remote panic button is low, its indicator light may flash or it may fail to activate the main unit. To replace the battery:
- Carefully open the battery compartment on the back of the remote control (you may need a small screwdriver).
- Remove the old battery. Note its type and polarity.
- Insert a new battery of the same type, ensuring correct polarity.
- Close the battery compartment securely.
Note: Dispose of old batteries according to local regulations.
8. Troubleshooting
| Problem | Possible Cause | Solution |
|---|---|---|
| Unit does not power on. | No power supply; faulty adapter. | Check power adapter connection and wall outlet. Ensure the adapter is working. |
| Remote button does not trigger alarm. | Low battery in remote; out of range; remote not paired. | Replace remote battery. Move closer to the main unit. Refer to pairing instructions (if applicable, check product specific manual for pairing). |
| Alarm triggers but no call is made. | Phone line disconnected; incorrect numbers programmed; phone line issue. | Check RJ-11 phone cable connection. Verify programmed numbers. Test phone line with a regular phone. |
| Call is made but no one answers/hears message. | Recipient not available; low volume on unit; faulty microphone/speaker. | Ensure recipients are aware of the system. Adjust volume on the main unit. Test two-way communication. |
9. Specifications
- Brand: NEDIS
- Model Number: ALRMPD10WT2 (5412810274574)
- Color: White
- Power Source: Wired Electric (AC Adapter)
- Compatible Devices: Telephone (PSTN)
- Control Method: Remote
- Remote Control Range: Up to 60 meters (open area)
- Programmable Numbers: 3
10. Warranty and Support
Nedis products are manufactured to high quality standards. This product is covered by a warranty period, the terms of which are available on the official Nedis website or from your retailer. In case of issues or for technical support, please refer to the contact information provided with your purchase or visit the official Nedis support website.