Introduction
The Digoo DC-K4 is a versatile and modern 3D LED digital clock designed for both wall mounting and desktop use. It features a large, clear display with dual color options (White & Warm White), an alarm function with snooze, and adjustable brightness levels. This manual provides detailed instructions for setting up, operating, and maintaining your DC-K4 clock.

Image: Front view of the Digoo DC-K4 clock with its large 3D LED display showing time in a combination of yellow and white segments, highlighting its dual-color capability.
Key Features
- Adjustable Brightness: High brightness with 3 intensity levels to accommodate different lighting conditions and preferences.
- Multi-functionality: Combines time display, snooze alarm, and night light features in one device.
- Energy-saving Design: Ultra-low power consumption LED, powered conveniently via a 5V USB connection.
- High Bright LED: Clear white light color, visible from a distance, with no blue light emission.
- Memory Function: Built-in lithium battery (CR2032) provides time memory function, retaining settings during power outages.
- Dual Color Display: Features both White and Warm White LED segments for a unique visual effect.
- 12/24 Hour Format: User-selectable time display format.
- Night Mode: Automatic dimming during specified night hours (default: 18:00 to 6:00).
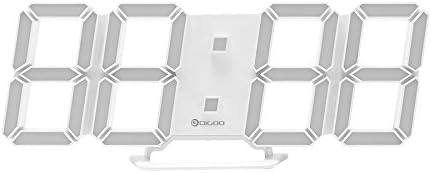
Image: Front view of the Digoo DC-K4 clock with its large 3D LED display showing time in white segments, demonstrating one of its dual-color display options.
Package Contents
Please check the package carefully to ensure all items are present and in good condition:
- 1 x Digoo DC-K4 Dual Color Multi-Function Large 3D LED Digital Wall Clock Alarm Clock
- 1 x Digoo DC-K4 1M USB Cable
- 1 x Digoo DC-K4 Full English Manual (This document)
- 1 x Digoo DC-K4 Original Color Gift Packaging
Setup
Power Connection
Connect the provided 1M USB cable to the DC-K4 clock's power input port. Plug the other end of the USB cable into a 5V 1A USB power adapter (not included) or a compatible USB port on a computer or power bank. The clock will power on and display the time.
Initial Time Setting
Upon first power-up or after a long power disconnection, you may need to set the correct time. Refer to the "Operating Instructions" section for details on setting the time, alarm, and other functions.
Mounting Options
The DC-K4 clock can be placed on a flat surface using its integrated stand or mounted on a wall using the keyhole slots on the back.

Image: Rear view of the Digoo DC-K4 clock, illustrating the keyhole slots for wall mounting and the circular cover for the memory battery compartment.
Operating Instructions
The DC-K4 clock typically has control buttons on its side or back. While specific button labels are not provided, common functions are usually controlled by "SET", "UP", and "DOWN" buttons.
Setting Time and Date (General Guide)
- Press the SET button once to enter time setting mode. The hour digits will likely flash.
- Use the UP and DOWN buttons to adjust the hour.
- Press SET again to move to minute setting. Adjust minutes with UP and DOWN.
- Continue pressing SET to cycle through other settings like 12/24 hour format, and potentially date (if applicable).
- Press SET one last time or wait a few seconds for the settings to save and exit the setting mode.
Alarm Function
- Press the ALARM or MODE button (if available) to enter alarm setting mode.
- Adjust the alarm hour and minute using the UP and DOWN buttons.
- Activate or deactivate the alarm. An alarm icon will typically appear on the display when active.
Snooze Function
When the alarm sounds, press any button (often the SNOOZE or SET button) to activate the snooze function. The alarm will temporarily stop and sound again after the preset snooze interval (5-60 minutes, adjustable). To turn off the alarm completely, press and hold the alarm button or unplug the device briefly.
Brightness Adjustment
The DC-K4 offers 3 levels of brightness. Look for a dedicated BRIGHTNESS or DIMMER button, or use the UP/DOWN buttons in normal time display mode to cycle through the brightness levels.
Night Mode
The clock features an automatic night mode that dims the display during specified hours to prevent excessive brightness at night. The default night mode period is 18:00 (6 PM) to 6:00 (6 AM). This setting may be adjustable through the clock's menu.
Maintenance
Cleaning
To clean the clock, gently wipe the surface with a soft, dry, or slightly damp cloth. Do not use abrasive cleaners, solvents, or strong chemicals, as these can damage the display or casing.
Memory Battery Replacement
The DC-K4 has a built-in lithium battery (CR2032 3V) for memory function, which retains time settings during power outages. If the clock consistently loses time or settings after being unplugged, the memory battery may need replacement.
- Locate the battery compartment on the back of the clock (refer to the image below).
- Open the battery compartment cover, typically by twisting or sliding it.
- Carefully remove the old CR2032 battery.
- Insert a new CR2032 3V lithium battery with the positive (+) side facing up.
- Close the battery compartment cover securely.
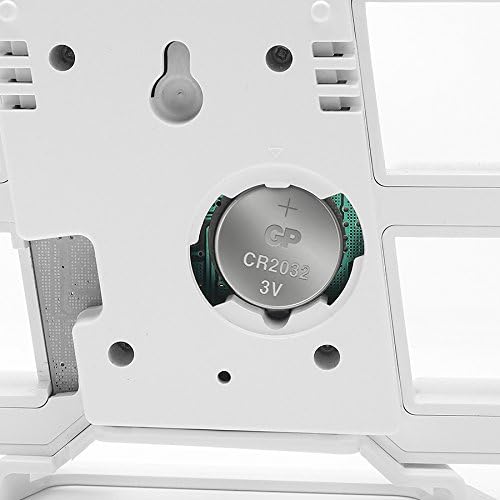
Image: A close-up view of the battery compartment on the back of the Digoo DC-K4 clock, clearly showing a CR2032 3V lithium battery installed.
Troubleshooting
| Problem | Possible Cause | Solution |
|---|---|---|
| Clock does not power on. | No power supply or faulty USB cable/adapter. | Ensure the USB cable is securely connected. Try a different USB port or power adapter. |
| Display is dim or flickering. | Brightness setting is too low; power supply issue. | Adjust brightness level. Check power connection and try a different adapter. |
| Clock loses time or settings after unplugging. | Memory battery (CR2032) is dead or missing. | Replace the CR2032 memory battery as described in the Maintenance section. |
| Alarm does not sound. | Alarm is not set or is deactivated. | Verify alarm settings and ensure the alarm icon is displayed. |
Specifications
| Feature | Detail |
|---|---|
| Model | Digoo DC-K4 |
| Dimensions | 8.71cm x 21.49cm (3.43" x 8.46") |
| Display Color | White & Warm White (Dual Color) |
| Brightness Levels | 3 Levels |
| Time Format | 12 / 24 Hours Selectable |
| Snooze Duration | 5-60 minutes (Adjustable) |
| Night Mode | Default: 18:00~6:00 |
| LED Light Beads | 54 LED Light Beads |
| Voltage | 5V 1A |
| Power Source | USB Cable (Corded Electric) |
| Memory Function | Built-in Lithium Battery (CR2032 3V) |
| UPC | 741935896688 |
Warranty and Support
For warranty information or technical support, please refer to the purchase documentation or contact the retailer/manufacturer directly. Keep your proof of purchase for any warranty claims.
For further assistance, please visit the AUYSHOP support website or contact their customer service department.