1. Introduction
This manual provides essential information for the safe and efficient installation, operation, and maintenance of your Speedaire 13X534 Auto Drain Valve. Please read this manual thoroughly before attempting to install or operate the device. Keep this manual for future reference.
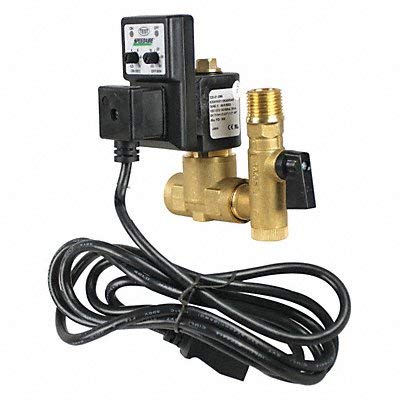
Image showing the Speedaire 13X534 Auto Drain Valve, highlighting its compact design and brass body.
2. Safety Information
WARNING: Failure to follow these safety instructions may result in electric shock, fire, serious injury, or death.
- Always disconnect power before installing, servicing, or performing maintenance on the drain valve.
- Ensure the air system is depressurized before installation or removal of the valve.
- Wear appropriate personal protective equipment (PPE) such as safety glasses.
- Do not exceed the maximum operating pressure of 300 psi.
- Ensure electrical connections comply with local codes and standards.
- This device is designed for specific applications. Do not modify or use for purposes other than its intended use.
- Keep children and unauthorized personnel away from the operating area.
3. Package Contents
Verify that all items are present and undamaged upon unpacking:
- Speedaire 13X534 Auto Drain Valve
- 6 ft Power Cord
- Filter Ball Valve
- Instruction Manual (this document)
4. Setup and Installation
Proper installation is crucial for the performance and longevity of the auto drain valve.
4.1 Mechanical Installation
- Ensure the air compressor or system is completely depressurized and locked out.
- Identify the drain point on your air receiver or filter where condensate collects.
- The valve features a 1/2 inch NPT pipe size. Connect the inlet of the auto drain valve (National Pipe Tapered) to the drain point.
- Connect appropriate drainage piping to the outlet (FNPT) of the valve to safely dispose of condensate. Ensure the drainage path is clear and leads to an approved disposal system.
- Use thread sealant on all threaded connections to prevent leaks.
- Mount the valve in an upright position, ensuring the drain port is at the lowest point for effective condensate removal.
- The body material is brass, providing durability and corrosion resistance.
4.2 Electrical Connection
- Ensure the power source is OFF before making any electrical connections.
- The valve operates on 100-120V AC at 50/60 Hz.
- Connect the provided 6 ft power cord to a suitable grounded electrical outlet. The valve draws 0.4 A.
- The enclosure is rated IP65, providing protection against dust and low-pressure water jets.
5. Operating Instructions
The Speedaire 13X534 is a timed electric auto drain valve designed to automatically discharge condensate from compressed air systems.
5.1 Initial Power-Up
- After mechanical and electrical installation are complete and verified, restore power to the unit.
- The valve will typically perform an initial purge cycle upon power-up.
5.2 Adjusting Drain Cycle and Purge Time
The valve features adjustable settings to optimize condensate removal for your specific system.
- Adjustable Drain Cycle: This setting determines the interval between drain activations. It can be adjusted from 0.5 seconds to 45 minutes. Adjust this based on the rate of condensate accumulation in your system. A higher accumulation rate requires a shorter cycle time.
- Purge Time: This setting controls how long the valve remains open during each drain cycle. It can be adjusted from 0.5 seconds to 10 seconds. Set this to allow sufficient time for all accumulated condensate to be expelled without excessive air loss.
Refer to the control panel on the valve for specific adjustment procedures. Typically, these are set using rotary knobs or digital interfaces.
6. Maintenance
Regular maintenance ensures optimal performance and extends the lifespan of your auto drain valve.
- Daily: Visually inspect the valve for any leaks or unusual operation. Ensure the drainage path is clear.
- Weekly: Manually test the drain function (if equipped with a test button) to ensure it opens and closes correctly.
- Monthly/Quarterly: Disconnect power and depressurize the system. Inspect the filter ball valve for debris and clean if necessary. Check all connections for tightness.
- Operating Temperature: The valve is designed to operate within a temperature range of 14°F to 140°F (-10°C to 60°C). Ensure the operating environment stays within this range.
- Cleaning: Clean the exterior of the valve with a damp cloth. Do not use harsh chemicals or abrasive cleaners.
7. Troubleshooting
If you encounter issues with your Speedaire 13X534 Auto Drain Valve, refer to the following table:
| Problem | Possible Cause | Solution |
|---|---|---|
| Valve does not drain | No power; Clogged valve; Incorrect settings | Check power supply; Disconnect power and clean valve; Adjust drain cycle/purge time. |
| Valve drains continuously | Debris lodged in valve; Faulty valve component | Depressurize system, clean valve; Contact support for replacement. |
| Excessive air loss during drain | Purge time set too long | Reduce purge time setting. |
| Condensate still present after drain cycle | Drain cycle too long; Purge time too short; Valve mounted incorrectly | Shorten drain cycle; Increase purge time; Ensure valve is mounted upright at lowest point. |
If the problem persists after attempting these solutions, please contact Speedaire customer support.
8. Specifications
| Feature | Specification |
|---|---|
| Model Number | 13X534 |
| Type | Timed Electric Auto Drain Valve |
| Pipe Size | 1/2 inch NPT |
| Drain Size | 1/2 inch |
| Drain Rate | 17.5 gpm |
| Adjustable Drain Cycle | 0.5 seconds to 45 minutes |
| Purge Time | 0.5 seconds to 10 seconds |
| Voltage | 100-120V AC |
| Frequency | 50/60 Hz |
| Amperage | 0.4 A |
| Max. Pressure | 300 psi |
| Operating Temperature Range | 14°F to 140°F (-10°C to 60°C) |
| Enclosure Rating | IP65 |
| Body Material | Brass |
| Overall Height | 5 inches |
| Overall Width | 4 1/4 inches |
| Overall Depth | 3 9/16 inches |
| Item Weight | 2 pounds |
| Inlet Connection Type | National Pipe Tapered |
| Outlet Connection Type | FNPT |
| Number of Ports | 2 |
| Specification Met | ASME B16.34 |
| Included Components | 6 ft Power Cord, Filter Ball Valve |
9. Warranty and Support
For warranty information, please refer to the documentation provided at the time of purchase or contact Speedaire customer service. Speedaire is committed to providing reliable products and support.
For technical assistance, troubleshooting not covered in this manual, or to inquire about replacement parts, please contact Speedaire customer support through their official website or the contact information provided with your purchase.