1. Introduction
Thank you for choosing the Volt Polska SinusPRO 800W 12V/230V Pure Sine Wave Inverter. This device is designed to convert 12V DC power from a battery into 230V AC pure sine wave power, suitable for powering sensitive electronic equipment. It also functions as an auxiliary power supply, providing backup power during outages. This manual provides essential information for the safe and efficient operation, installation, and maintenance of your inverter.
2. Safety Instructions
Please read and understand all safety instructions before installing or operating the inverter. Failure to follow these instructions may result in electric shock, fire, serious injury, or property damage.
- Electrical Safety: This unit operates with high voltage. Do not open the casing. Refer all servicing to qualified personnel.
- Ventilation: Ensure adequate ventilation around the inverter. Do not block ventilation openings. Overheating can cause damage or fire.
- Environment: Install the inverter in a dry, cool, and well-ventilated area, away from direct sunlight, heat sources, flammable materials, and corrosive substances. Avoid dusty environments.
- Battery Connection: Connect the inverter directly to a 12V DC battery. Ensure correct polarity (+ to + and - to -). Incorrect connection will damage the inverter and void the warranty.
- Grounding: The inverter must be properly grounded.
- Load Capacity: Do not exceed the inverter's rated output power. Overloading can damage the unit and connected appliances.
- Children: Keep the inverter out of reach of children.
- Emergency: In case of smoke, unusual odors, or abnormal operation, immediately disconnect the power source and contact customer support.
3. Product Overview
The Volt Polska SinusPRO 800W inverter is a versatile power solution featuring a pure sine wave output, suitable for a wide range of applications. It includes a clear display for monitoring operational status and multiple connection points for input and output.
Front Panel and Display

Figure 3.1: Front View of the Inverter
This image displays the front of the Volt Polska SinusPRO 800W inverter. The central feature is a digital display panel that shows input and output voltage, load level, and battery capacity. Below the display, the 'VOLT POLSKA' logo is prominently featured. The overall casing is black, indicating a robust design.
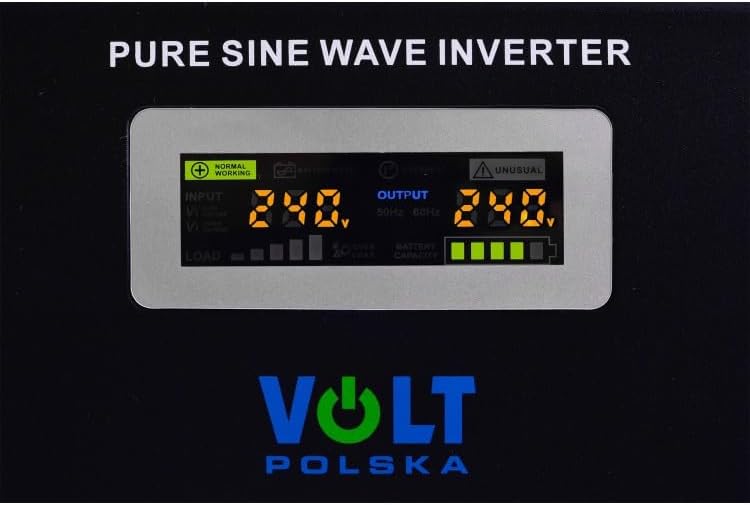
Figure 3.2: Digital Display Close-up
A detailed view of the inverter's digital display. It shows 'NORMAL WORKING' status, 'INPUT' voltage (e.g., 240V), 'OUTPUT' voltage (e.g., 240V), and indicators for 'LOAD' and 'BATTERY CAPACITY'. The display provides real-time operational data for monitoring the inverter's performance.
Rear Panel and Connections

Figure 3.3: Side and Rear View
This image provides a perspective of the inverter's side and rear. It highlights the cooling fan grille on the side, essential for heat dissipation. On the rear, two AC output sockets are visible, along with the main power input cable and battery connection terminals.
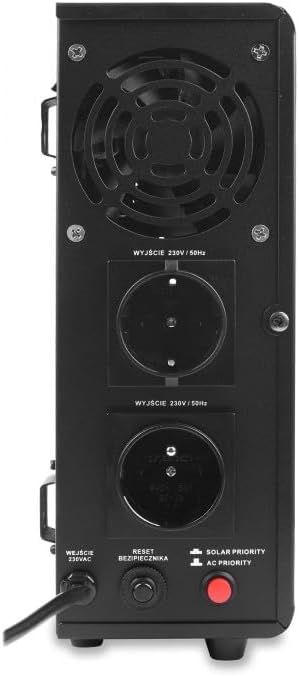
Figure 3.4: Detailed Rear Panel
A close-up of the inverter's rear panel. It features a large cooling fan, two 230V/50Hz AC output sockets, an AC input connection, a reset button for the circuit breaker, and two priority switches: 'SOLAR PRIORITY' and 'AC PRIORITY'. These controls allow users to configure the power source preference.
4. Setup
Proper setup is crucial for the safe and efficient operation of your inverter.
4.1 Unpacking and Inspection
- Carefully remove the inverter from its packaging.
- Inspect the unit for any signs of damage during transit. If damage is found, do not operate the inverter and contact your supplier.
- Ensure all accessories are present.
4.2 Placement
- Choose a location that is dry, cool, and well-ventilated.
- Maintain at least 10 cm (4 inches) of clear space around all sides of the inverter for proper airflow.
- Avoid placing the inverter near heat-emitting appliances or in direct sunlight.
- Mount the inverter securely on a stable, non-flammable surface.
4.3 Battery Connection (12V DC Input)
WARNING: Ensure the inverter is OFF before connecting to the battery. Wear appropriate personal protective equipment (PPE) such as gloves and eye protection.
- Connect the positive (+) terminal of the 12V battery to the positive (+) terminal of the inverter.
- Connect the negative (-) terminal of the 12V battery to the negative (-) terminal of the inverter.
- Ensure all connections are tight and secure to prevent loose connections, which can cause overheating and damage.
4.4 AC Input Connection (230V)
If using the inverter as an auxiliary power supply with AC input:
- Plug the inverter's AC input cable into a standard 230V AC wall outlet.
- Ensure the wall outlet is properly grounded and capable of handling the inverter's charging current.
4.5 Load Connection (230V AC Output)
- Plug your 230V AC appliances into the AC output sockets on the rear panel of the inverter.
- Ensure the total power consumption of all connected appliances does not exceed the inverter's rated output power (500W continuous, 800VA apparent).
5. Operating Instructions
5.1 Powering On/Off
- After all connections are secure, press the power button (if available, otherwise the main switch) to turn on the inverter.
- The display will illuminate, showing the current status.
- To turn off, press the power button again or disconnect the battery.
5.2 Understanding the Display
The digital display provides real-time information:
- Input Voltage: Shows the DC voltage from the battery.
- Output Voltage: Displays the AC voltage being supplied to your appliances (should be around 230V).
- Load Level: Indicates the percentage of the inverter's capacity currently being used.
- Battery Capacity: Shows the remaining charge in the connected battery.
- Status Indicators: 'NORMAL WORKING' indicates proper operation. 'UNUSUAL' or other error codes indicate a fault.
5.3 Priority Settings (Rear Panel)
The inverter features two priority switches on the rear panel:
- SOLAR PRIORITY: When selected, the inverter will prioritize power from a connected solar charging system (if applicable) or battery. AC input will be used as a backup.
- AC PRIORITY: When selected, the inverter will prioritize power from the AC input (grid). Battery power will be used as a backup during AC power outages.
Select the appropriate priority mode based on your power source availability and preference.
6. Maintenance
Regular maintenance ensures the longevity and reliable operation of your inverter.
- Cleaning: Keep the inverter clean and free from dust. Use a dry, soft cloth to wipe the exterior. Do not use liquid cleaners or solvents.
- Ventilation: Periodically check that the ventilation openings and cooling fan are clear of obstructions. Dust accumulation can impair cooling.
- Connections: Regularly inspect all electrical connections (battery, AC input, AC output) to ensure they are tight and free from corrosion.
- Battery Care: If using a lead-acid battery, ensure it is properly maintained according to the battery manufacturer's instructions. Keep battery terminals clean.
- Storage: If storing the inverter for an extended period, disconnect it from all power sources and store it in a cool, dry place. Ensure batteries are charged before storage and recharged periodically.
7. Troubleshooting
This section addresses common issues you might encounter with your inverter.
7.1 No Power Output / Inverter Not Turning On
- Check Battery Connection: Ensure the 12V battery is properly connected with correct polarity and tight terminals.
- Check Battery Charge: The battery might be discharged. Recharge the battery or connect to AC input if using the charging function.
- Check Power Switch: Ensure the inverter's power switch is in the 'ON' position.
- Check Internal Fuse/Breaker: If the inverter has an accessible fuse or reset button (like the one on the rear panel), check if it has tripped. Reset if necessary.
7.2 Overload Warning / Shutdown
- Reduce Load: The total power consumption of connected appliances exceeds the inverter's capacity. Disconnect some appliances.
- Check Appliance Start-up Current: Some appliances (e.g., motors, refrigerators) have a high start-up (surge) current. Ensure the inverter's surge capacity can handle it.
- Cool Down: If the inverter shut down due to overheating, allow it to cool down before restarting. Ensure proper ventilation.
7.3 Abnormal Output Voltage / Frequency
- Check Battery Voltage: Low battery voltage can affect output quality. Recharge the battery.
- Check Connections: Loose or corroded connections can cause voltage drops.
- Contact Support: If the issue persists, the inverter may require professional servicing.
For issues not covered here, please contact Volt Polska customer support.
8. Specifications
Technical specifications for the Volt Polska SinusPRO 800W 12V/230V Pure Sine Wave Inverter.
| Feature | Specification |
|---|---|
| Brand | Volt Polska |
| Model Number | 3SP080012W |
| Input Voltage | 12V DC |
| Output Voltage | 230V AC |
| Output Frequency | 50Hz |
| Output Waveform | Pure Sine Wave |
| Rated Power (Continuous) | 500 Watts |
| Apparent Power (VA) | 800 VA |
| Total AC Outlets | 2 |
| Power Source | Battery (DC) / AC Input (for charging/bypass) |
| Item Weight | 4.7 Kilograms |
9. Warranty and Support
Volt Polska products are manufactured to high-quality standards. For warranty information, please refer to the warranty card included with your product or visit the official Volt Polska website. If you encounter any issues or require technical assistance, please contact Volt Polska customer support directly. Ensure you have your model number (3SP080012W) and purchase details available when contacting support.