1. Product Overview
This manual provides instructions for the installation, operation, and maintenance of the Ledytech 23W 7.08-inch LED Ceiling Light Replacement Panel Board Retrofit Kit. This kit is designed to replace traditional incandescent or fluorescent bulbs in existing ceiling light fixtures, offering energy efficiency and a long lifespan.
The LED panel operates at 23W, providing 2624 lumens of 5000K daylight white light. It features a 120-degree beam angle and is dimmable, compatible with most standard dimmer switches (dimmer switch not included).
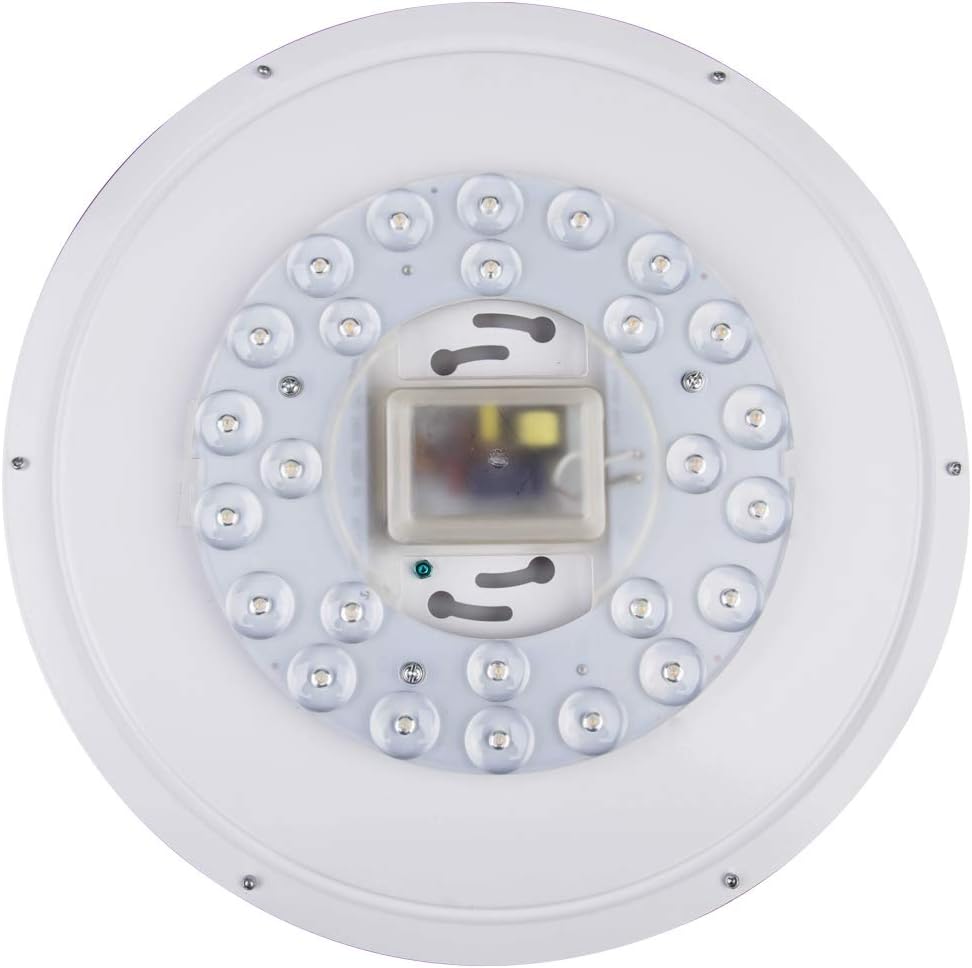
Figure 1: Front view of the Ledytech 23W LED Ceiling Light Replacement Panel, showing the array of LED chips.
2. Safety Information
- Electrical Safety: Always turn off power at the circuit breaker before installation, maintenance, or removal of the fixture. Failure to do so may result in electric shock or serious injury.
- Qualified Electrician: If you are unsure about the installation process, consult a qualified electrician.
- ETL Listed: This device is ETL listed, ensuring it meets recognized safety standards.
- FCC Compliance: This device complies with Part 15 of the FCC Rules. Operation is subject to the following two conditions: (1) This device may not cause harmful interference, and (2) this device must accept any interference received, including interference that may cause undesired operation.
- Indoor Use Only: This product is designed for indoor use only. Do not expose to water or moisture.
- Voltage: Ensure the input voltage is AC120V 60Hz, as specified for this product.
3. Package Contents
Verify that all components are present and undamaged before proceeding with installation.
- 1x 23W LED Ceiling Light Retrofit Set
- 3x Wire Nuts
- 2x 1-1/2'' Electric Box Screws
- 1x Installation Manual (this document)
4. Installation Instructions
Follow these steps carefully to install your Ledytech LED retrofit kit. Ensure power is OFF at the circuit breaker before starting.
4.1 Preparation
- Turn off the power to the light fixture at the circuit breaker.
- Remove the existing light bulb(s) and any old fixture components that are being replaced.
- Ensure the mounting surface is clean and dry.
4.2 Mounting the LED Panel
The LED panel can be mounted using its integrated magnets or with screws for a more secure attachment.
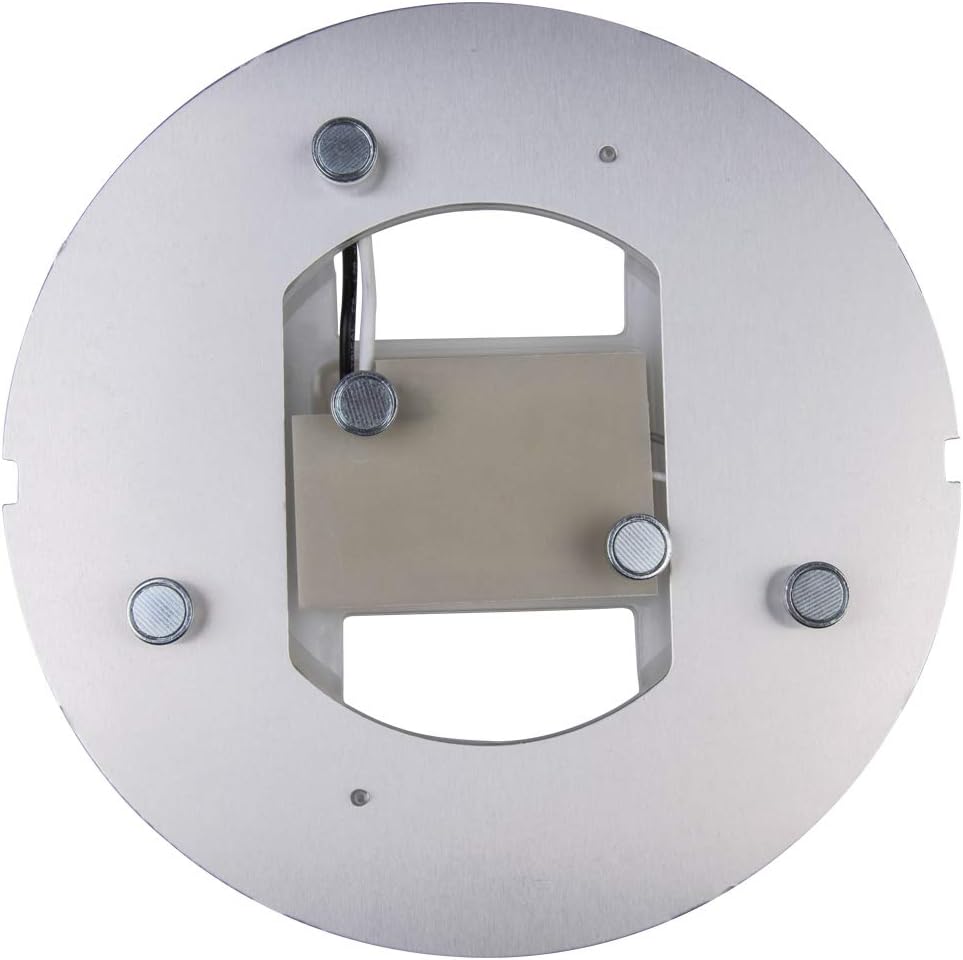
Figure 2: Back view of the LED panel, highlighting the four magnetic mounting points.
- Magnetic Mounting: If your fixture has a metal base, align the LED panel's magnets with the metal surface and gently press to secure. Ensure it is firmly attached.
- Screw Mounting: For non-metallic surfaces or added security, use the provided 1-1/2'' electric box screws. Align the screw holes on the LED panel with appropriate mounting points in your fixture and fasten securely.
4.3 Electrical Connection

Figure 3: Close-up of the LED driver board, showing input and output wiring connections.
- Identify the live (black), neutral (white), and ground (green/bare copper) wires from your ceiling fixture.
- Connect the black wire from the LED panel to the live (black) wire from the fixture using a wire nut.
- Connect the white wire from the LED panel to the neutral (white) wire from the fixture using a wire nut.
- Ensure all connections are secure and insulated with wire nuts. Tuck wires neatly into the electrical box.
- If your fixture has a ground wire, ensure it is properly connected to the fixture's ground. The LED panel itself typically does not require a separate ground connection as it is double insulated, but always follow local electrical codes.
4.4 Final Steps
- Carefully position the LED panel and driver board within the fixture housing, ensuring no wires are pinched.
- Reattach the diffuser or cover of your ceiling light fixture.
- Restore power at the circuit breaker.
- Test the light to ensure proper operation.
5. Operating Instructions
The Ledytech LED Ceiling Light Retrofit Kit operates like a standard light fixture once installed.
- Turning On/Off: Use your existing wall switch to turn the light on or off.
- Dimming Function: This LED panel is dimmable. If connected to a compatible standard dimmer switch (not included), you can adjust the brightness level. Ensure your dimmer switch is rated for LED lighting.
6. Care and Maintenance
To ensure the longevity and optimal performance of your LED light, follow these simple care instructions:
- Cleaning: Disconnect power before cleaning. Use a soft, dry, or slightly damp cloth to wipe the surface of the LED panel. Do not use abrasive cleaners, solvents, or harsh chemicals, as these can damage the finish or electrical components.
- No User Serviceable Parts: The LED panel and driver board contain no user-serviceable parts. Do not attempt to open or repair the unit.
- Heat Dissipation: Ensure the fixture allows for adequate air circulation around the LED panel to prevent overheating, which can reduce lifespan.
7. Troubleshooting
If you experience issues with your LED light, refer to the following common problems and solutions:
| Problem | Possible Cause | Solution |
|---|---|---|
| Light does not turn on. | No power, loose wiring, faulty switch. | Check circuit breaker. Verify all wire connections are secure. Test the wall switch. |
| Light flickers or blinks. | Incompatible dimmer, loose connection, faulty driver. | Ensure dimmer is LED compatible. Check wire connections. If problem persists, contact customer support. |
| Light is too dim or too bright. | Dimmer setting, incorrect wattage. | Adjust dimmer switch. Confirm the product wattage (23W) is suitable for your needs. |
| Buzzing noise. | Incompatible dimmer, electrical interference. | Replace dimmer with an LED-compatible model. Ensure proper grounding. |
If troubleshooting steps do not resolve the issue, please contact Ledytech customer support.
8. Technical Specifications
| Feature | Specification |
|---|---|
| Model Number | Ledytech23daylight |
| Power Consumption | 23 Watts |
| Brightness | 2624 Lumens |
| Color Temperature | 5000K (Daylight White) |
| Input Voltage | AC120V 60Hz |
| Diameter | 7.08 inches |
| Beam Angle | 120-Degree |
| Dimmable | Yes (compatible with most standard dimmer switches) |
| Lifespan | 5 Years (based on 8 hours/day) |
| Material | Aluminum, Metal, Plastic (PMMA shade) |
| Certifications | ETL Listed, FCC Compliant |
| Mounting Type | Magnet or Screws |
| Recommended Room Size | 12-15 M2 |
9. Warranty and Customer Support
Ledytech products are designed for durability and performance. This product comes with a manufacturer and seller combination warranty.
- Warranty Period: The product is designed for a long lifespan of 5 years (based on 8 hours of daily use). For specific warranty terms and conditions, please refer to the purchase documentation or contact Ledytech directly.
- Customer Support: For technical assistance, warranty claims, or any questions regarding your Ledytech LED Ceiling Light Retrofit Kit, please contact Ledytech customer service through the retailer where the product was purchased or visit the official Ledytech website for contact information.
- Model Number for Support: When contacting support, please provide the model number: Ledytech23daylight.