Introduction
The Huepar HLR1000 Golf Laser Rangefinder is a high-precision optical instrument designed for accurate distance measurement in golf, hunting, and other outdoor activities. It features 6X magnification, multiple measurement modes including golf trajectory, flag-lock, distance, height, speed, and angle, and an external LCD screen for enhanced usability. This manual provides detailed instructions for the proper setup, operation, and maintenance of your device.

Figure 1: Huepar HLR1000 Golf Laser Rangefinder. This image shows the main view of the rangefinder, highlighting its compact and ergonomic design with the objective lens, laser receiving lens, and external display visible.
Package Contents and Device Layout
Before using your Huepar HLR1000, please ensure all components are present and familiarize yourself with the device's layout.

Figure 2: Package Contents. The image displays the rangefinder, carrying case, wrist strap, user manual, and cleaning cloth, as typically included in the product package.

Figure 3: Device Layout. This diagram labels key components such as the Power/Measurement Button, Mode/Unit Switch Button, External Display, Angle Switch, External Display Switch Button, Laser Receiving Lens, Objective Lens/Laser Emitter, Strap Eyelet, Eyepiece, Battery Compartment, and 1/4"-20 Tripod Mount. Dimensions are also indicated.
Key Components:
- Power/Measurement Button: Used to turn the device on/off and initiate measurements.
- Mode/Unit Switch Button: Cycles through measurement modes and switches between units (meters/yards).
- External Display: Provides measurement data visible to others.
- Angle Switch: Toggles the angle compensation function.
- External Display Switch Button: Activates/deactivates the external display.
- Objective Lens/Laser Emitter: The main lens for viewing and the point from which the laser is emitted.
- Laser Receiving Lens: Receives the reflected laser beam for distance calculation.
- Eyepiece: Adjustable for clear viewing.
- Battery Compartment: Houses the battery (not included).
- 1/4"-20 Tripod Mount: Allows mounting on a standard tripod for stable measurements.
Setup
1. Battery Installation:
The Huepar HLR1000 requires a Lithium battery (not included). Locate the battery compartment (refer to Figure 3) and insert the battery according to the polarity indicators. Close the compartment securely.
2. Attaching the Wrist Strap:
Attach the provided wrist strap to the strap eyelet (refer to Figure 3) to prevent accidental drops during use.

Figure 4: Using the Rangefinder with Wristband and Tripod. This image demonstrates how to hold the device with the wrist strap and how it can be mounted on a tripod using the 1/4"-20 threaded mount for stable measurements.
3. Initial Power On:
Press the Power/Measurement Button to turn on the device. The internal display will illuminate.
Operating Instructions
1. Adjusting the Eyepiece:
Rotate the eyepiece (refer to Figure 3) until the display and the target appear clear and in focus.

Figure 5: 6X Magnification Optical Lens. This image illustrates the adjustable eyepiece and the clear view provided by the 6X magnification, showing how measurements are displayed within the view.
2. Switching Measurement Units:
With the device powered on, short press the Mode/Unit Switch Button to toggle between meters (m) and yards (Yd).
3. External Display Operation:
The HLR1000 features an external LCD screen to share measurement data. Press the External Display Switch Button (refer to Figure 3) to turn the external display on or off.

Figure 6: External Display Screen. This image shows the external display in use, highlighting the switch button and how measurement data is presented on the screen for easy viewing by others.
4. Angle Function Switch:
The angle compensation function can be enabled or disabled. Use the Angle Switch (refer to Figure 3) to toggle this feature. When the angle switch is OFF, only the distance measurement function is available, providing a direct line-of-sight distance. When ON, the device calculates slope-adjusted distance.

Figure 7: Angle Function Switchable. This image illustrates the physical angle switch and shows the difference in display when the angle function is OFF (only direct distance) versus ON (slope-adjusted distance and angle displayed).
5. Measurement Modes:
The HLR1000 offers six distinct measurement modes. Press the Mode/Unit Switch Button repeatedly to cycle through these modes. The current mode icon will be displayed on the screen.
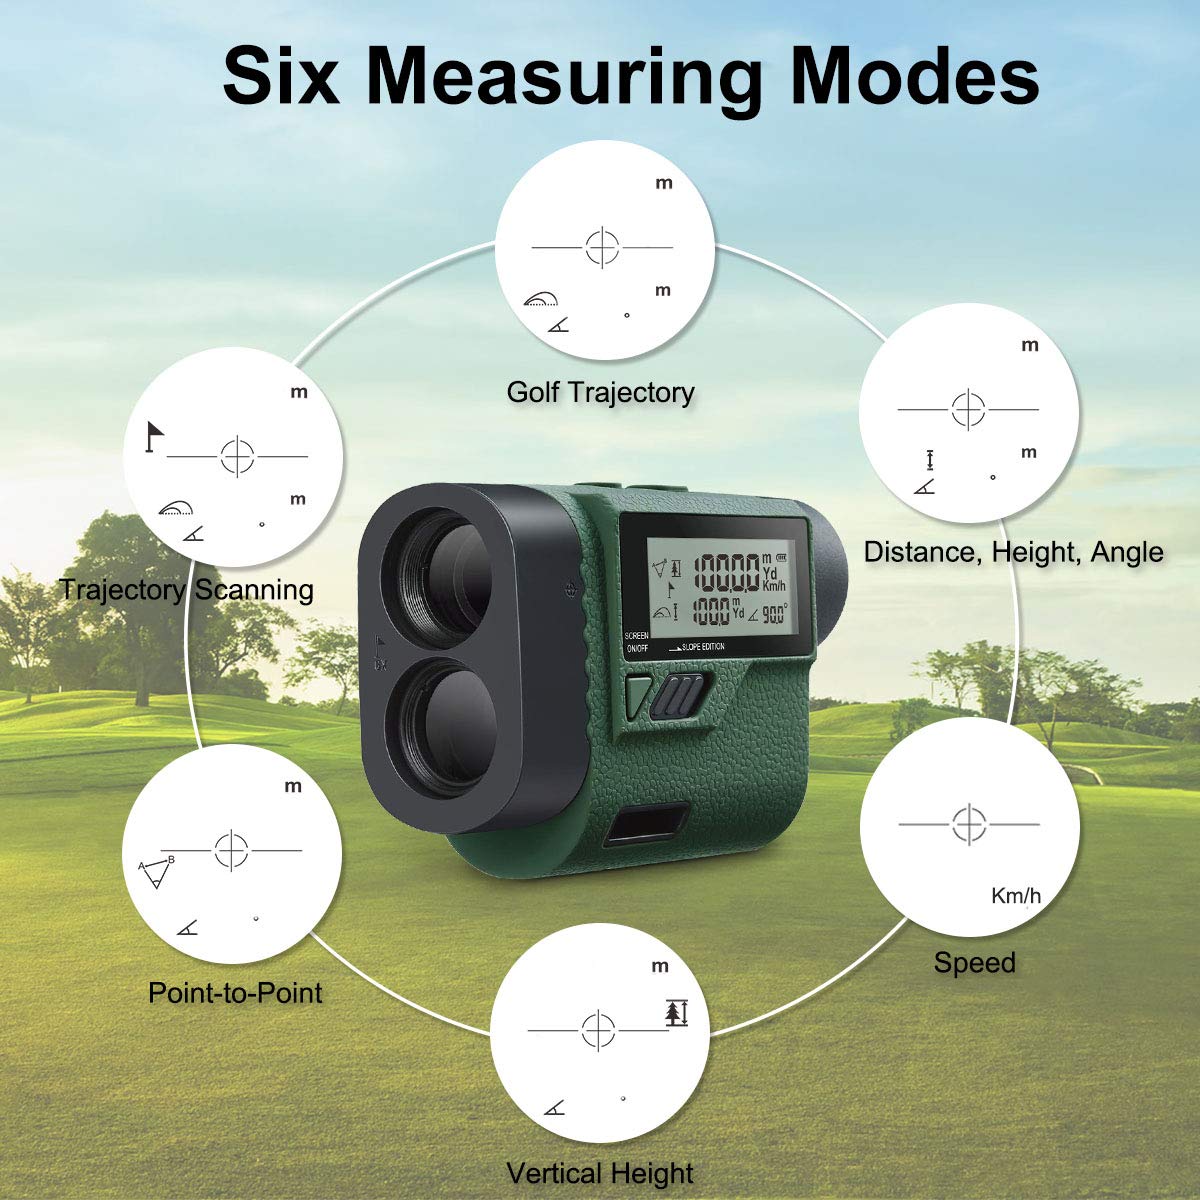
Figure 8: Six Measuring Modes. This graphic visually represents the six measurement modes: Golf Trajectory, Trajectory Scanning, Point-to-Point, Vertical Height, Speed (Km/h), and Distance, Height, Angle.
- Golf Trajectory Mode: Calculates slope-adjusted distance for golf.
- Trajectory Scanning Mode: Continuously measures distances to multiple targets as you pan the device.
- Distance, Height, Angle Mode: Measures horizontal distance, vertical height, and angle to a target.
- Speed Mode (Km/h): Measures the speed of a moving object.
- Vertical Height Mode: Measures the vertical height between two points.
- Point-to-Point Mode: Measures the distance between two points from a single observation point.
6. Taking a Measurement:
Once the desired mode is selected, aim the crosshairs at your target and press the Power/Measurement Button. The measurement will be displayed on the internal and external screens.
Maintenance
1. Cleaning:
Use the provided cleaning cloth or a soft, lint-free cloth to gently wipe the lenses and the device body. Do not use abrasive cleaners or solvents. For stubborn dirt, a slightly damp cloth can be used, followed by a dry one.
2. Storage:
When not in use, store the rangefinder in its protective carrying case in a cool, dry place, away from direct sunlight and extreme temperatures. Remove the battery if the device will not be used for an extended period.
3. Water Resistance:
The HLR1000 is designed with a waterproof rating of IP54, meaning it is protected from dust and splashing water from any direction. While it can withstand light rain, it is not designed for submersion. Avoid exposing the device to heavy rain or water immersion.
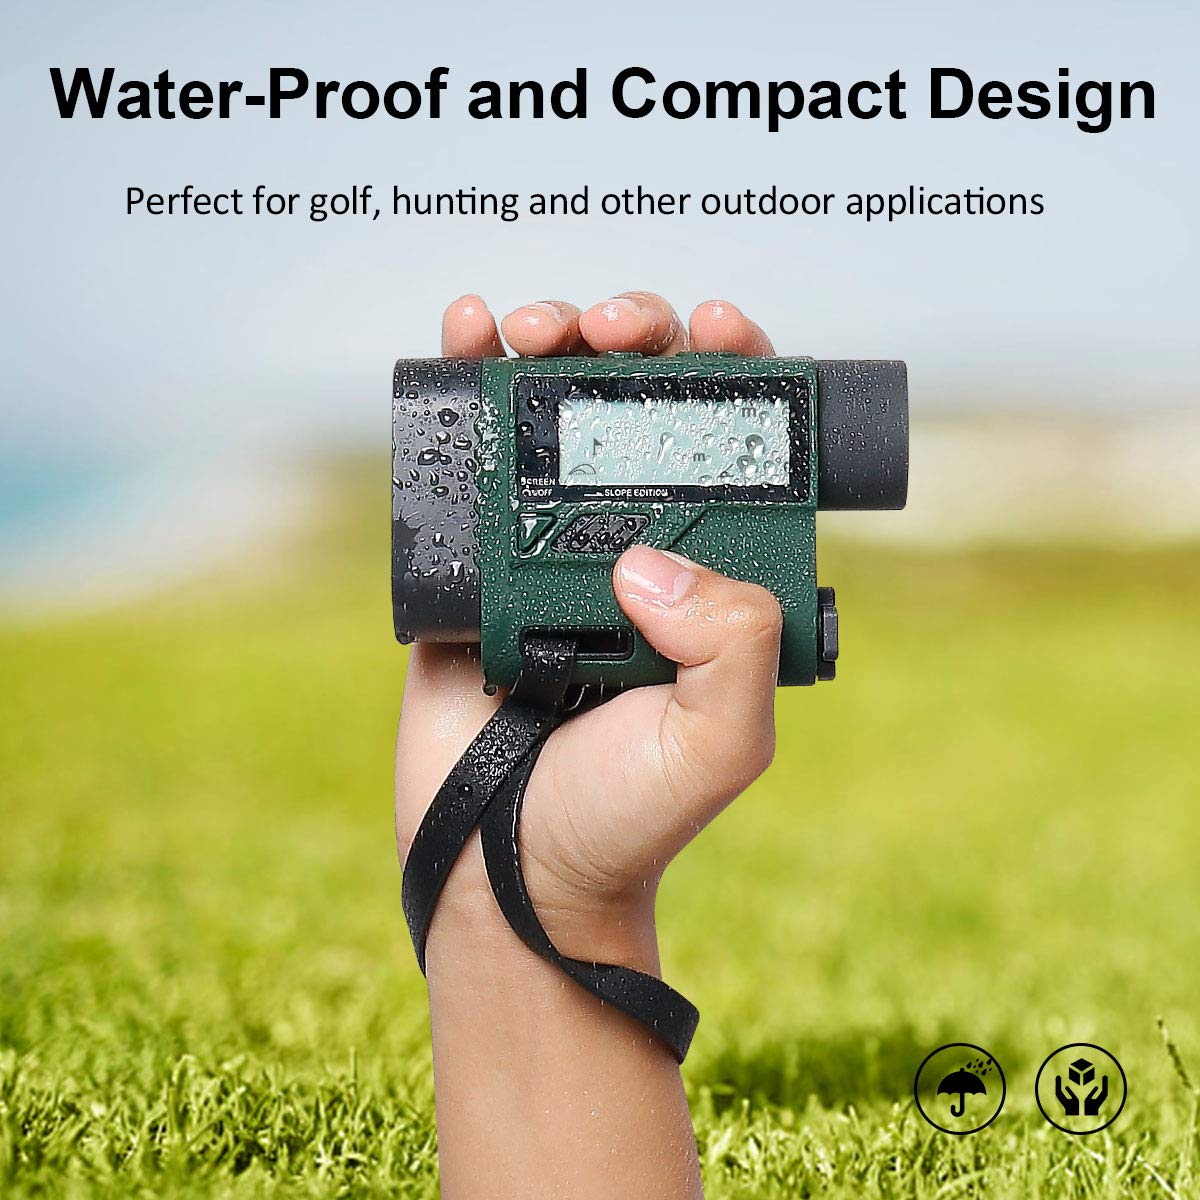
Figure 9: Water-Proof and Compact Design. This image highlights the device's water resistance, showing water droplets on its surface, and emphasizes its suitability for outdoor use.
Troubleshooting
- Device does not power on:
- Check if the battery is inserted correctly with the correct polarity.
- Replace the battery with a fresh one.
- Inaccurate measurements:
- Ensure the target is within the rangefinder's measurement capabilities (up to 1000 yards).
- Clean the objective and laser receiving lenses.
- Ensure there are no obstructions between the rangefinder and the target.
- For very small targets, use Flag-Lock or scanning modes if available.
- Display is dim or flickering:
- The battery may be low. Replace it.
- Ensure the eyepiece is properly adjusted for your vision.
- External display not working:
- Press the External Display Switch Button to activate it.
Specifications
| Feature | Specification |
|---|---|
| Brand | Huepar |
| Model Number | HLR1000_Laser Rangefinder |
| Measurement Range | Up to 1000 Yards |
| Magnification | 6X |
| Measurement Modes | Golf Trajectory, Trajectory Scanning, Distance/Height/Angle, Speed, Vertical Height, Point-to-Point |
| Slope Adjustment | Yes (Switchable) |
| External Display | Yes |
| Battery Type | Lithium (Not Included) |
| Water Resistance Level | IP54 (Waterproof) |
| Item Weight | 172 Grams |
| UPC | 790996364261 |
| ASIN | B07H96KFX5 |
Warranty and Support
For warranty information and technical support, please refer to the official Huepar website or contact their customer service. Keep your purchase receipt as proof of purchase.
You can often find support resources, FAQs, and contact information on the manufacturer's website: www.huepar.com