1. Introduction
Thank you for choosing the BLACK+DECKER 12V DC Auto Dustbuster Handheld Car Vacuum, model NV1210AV. This manual provides essential information for the safe and effective operation, maintenance, and troubleshooting of your new car vacuum. Please read this manual thoroughly before first use and retain it for future reference.

Image 1.1: The BLACK+DECKER 12V DC Auto Dustbuster Handheld Car Vacuum, showcasing its compact design and integrated 12V power cord.
2. Safety Information
Always observe basic safety precautions when using electrical appliances to reduce the risk of fire, electric shock, and personal injury.
- This appliance is intended for dry pickup only. Do not vacuum liquids or wet materials.
- Do not use the vacuum cleaner in the presence of flammable or combustible liquids or gases.
- Ensure the vehicle's engine is off when connecting or disconnecting the vacuum from the 12V DC outlet.
- Do not operate the vacuum with a damaged cord or plug. If the appliance is not working as it should, has been dropped, damaged, left outdoors, or dropped into water, return it to a service center.
- Keep hair, loose clothing, fingers, and all parts of body away from openings and moving parts.
- Do not pick up anything that is burning or smoking, such as cigarettes, matches, or hot ashes.
- Use only as described in this manual. Use only manufacturer's recommended attachments.
- Unplug from the 12V DC outlet when not in use and before cleaning or maintenance.
- This appliance is not intended for use by persons (including children) with reduced physical, sensory or mental capabilities, or lack of experience and knowledge, unless they have been given supervision or instruction concerning use of the appliance by a person responsible for their safety.
3. Package Contents
Verify that all items are present in your package:
- BLACK+DECKER 12V DC Auto Dustbuster Handheld Car Vacuum (NV1210AV)
- Integrated 12V DC Power Cord
- Flexible Hose
- Crevice Tool
- Brush Tool (integrated with crevice tool or separate)
- Long Crevice Tool
- Storage Bag (if included)
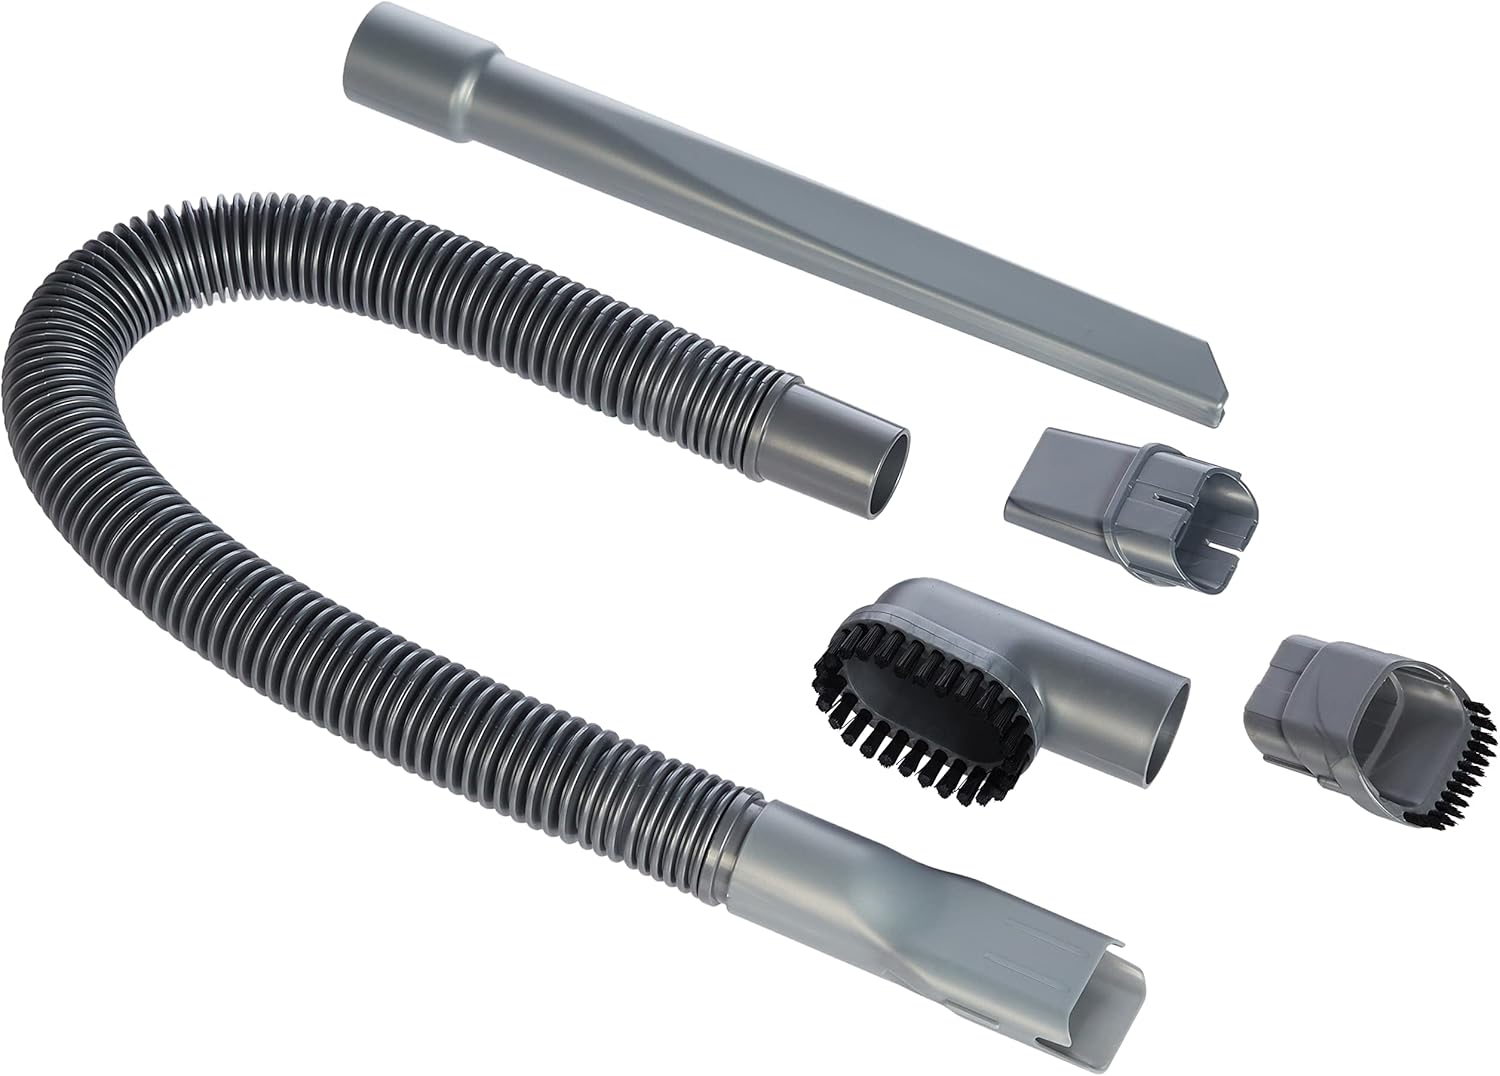
Image 3.1: Included accessories for the BLACK+DECKER NV1210AV, featuring various nozzles and a flexible hose for versatile cleaning.
4. Setup
Your BLACK+DECKER Auto Dustbuster is designed for quick and easy setup.
- Ensure your vehicle's engine is turned off.
- Locate the 12V DC accessory outlet (cigarette lighter socket) in your vehicle.
- Insert the vacuum's 12V DC plug firmly into the vehicle's 12V DC accessory outlet.

Image 4.1: Close-up of the 12V DC plug, which powers the vacuum from your car's accessory outlet.

Image 4.2: Demonstrates inserting the 12V DC plug into a car's power socket for operation.
5. Operating Instructions
To operate your Auto Dustbuster:
- Ensure the vacuum is securely plugged into the 12V DC outlet.
- Press the power switch (usually marked with 'I' or 'ON') to turn on the vacuum.
- Select the appropriate accessory for the cleaning task.
- Crevice Tool: Ideal for reaching tight spaces, such as between seats or along console edges.
- Brush Tool: Useful for agitating and lifting embedded dirt from carpets, upholstery, and dashboard surfaces.
- Flexible Hose: Extends reach and allows for more maneuverability with other attachments in awkward areas.
- Guide the nozzle or attachment over the surface to be cleaned.
- When finished, press the power switch (usually marked with 'O' or 'OFF') to turn off the vacuum.
- Unplug the vacuum from the 12V DC outlet.

Image 5.1: The power switch (red, top) and filter release button (red, bottom) on the vacuum's handle.

Image 5.2: Demonstrates using the crevice tool to clean narrow spaces, such as a car door pocket.

Image 5.3: Shows the brush tool being used to clean dust from a car's dashboard and air vents.

Image 5.4: The vacuum being used to clean the center console area of a car, highlighting its maneuverability.
6. Maintenance
Regular maintenance ensures optimal performance and extends the life of your vacuum.
6.1 Emptying the Dustbin
Empty the dustbin regularly, ideally after each use, to maintain suction power.
- Ensure the vacuum is turned off and unplugged from the 12V DC outlet.
- Press the dustbin release button (refer to Image 5.1) to detach the dustbin from the main unit.
- Carefully empty the contents of the dustbin into a waste receptacle.
6.2 Cleaning the Filters
The vacuum features a double-action filtration system. Clean the filters periodically to prevent clogging and maintain suction.
- With the dustbin detached, remove the inner and outer filters.
- Tap the filters gently over a waste bin to remove loose dust.
- For a more thorough cleaning, wash the filters in warm, soapy water. Rinse thoroughly.
- Allow the filters to air dry completely before reassembling. Do not use a dryer or heat gun.
- Reassemble the filters into the dustbin, then reattach the dustbin to the vacuum unit until it clicks into place.
7. Troubleshooting
If you encounter issues with your vacuum, refer to the following table:
| Problem | Possible Cause | Solution |
|---|---|---|
| Vacuum does not turn on. | Not properly plugged into 12V DC outlet. | Ensure plug is fully inserted and making good contact. |
| Vehicle's 12V DC outlet is not powered (e.g., car engine off). | Turn on vehicle's ignition or engine if required for 12V outlet power. | |
| Blown fuse in vehicle's 12V DC outlet. | Check and replace vehicle's fuse if necessary (consult vehicle manual). | |
| Low suction power. | Dustbin is full. | Empty the dustbin. |
| Filters are clogged. | Clean or replace the filters. | |
| Nozzle or hose is blocked. | Remove any obstructions from the nozzle or hose. |
If the problem persists after attempting these solutions, please contact BLACK+DECKER customer support.
8. Specifications
| Feature | Specification |
|---|---|
| Model Number | NV1210AV |
| Power Source | 12V DC (Vehicle Accessory Outlet) |
| Wattage | 12.5 Watts |
| Voltage | 12 Volts |
| Amperage | 12 Amps |
| Product Dimensions | 25 x 6 x 14 cm |
| Item Weight | 300 g |
| Filter Type | Cartridge (Double-Action Filtration) |
| Special Features | Pivoting Nozzle (up to 200 degrees) |
9. Warranty and Support
This BLACK+DECKER 12V DC Auto Dustbuster Handheld Car Vacuum (NV1210AV) comes with a 2-year brand and manufacturer warranty, ensuring reliable performance and peace of mind.
For warranty claims, technical support, or service inquiries, please contact BLACK+DECKER customer service through their official website or the contact information provided with your purchase documentation.
You can also visit the official BLACK+DECKER website for additional resources and support: www.blackanddecker.com