1. Introduction
This manual provides detailed instructions for the proper installation, operation, and maintenance of the New168 LA38-203/209B Rotary Selector Switch. Please read this manual thoroughly before using the product to ensure safe and efficient operation.
2. Safety Information
WARNING: Electrical work should only be performed by qualified personnel. Always disconnect power before installation or maintenance.
- Ensure all wiring complies with local and national electrical codes.
- Do not exceed the specified voltage and current ratings.
- Avoid contact with live electrical components.
- Use appropriate personal protective equipment (PPE) during installation.
- Verify secure connections to prevent accidental contact with terminals.
3. Product Overview
The New168 LA38-203/209B is a 2-position latching rotary selector switch designed for industrial electrical applications. It features a durable construction and screw terminals for reliable connections.
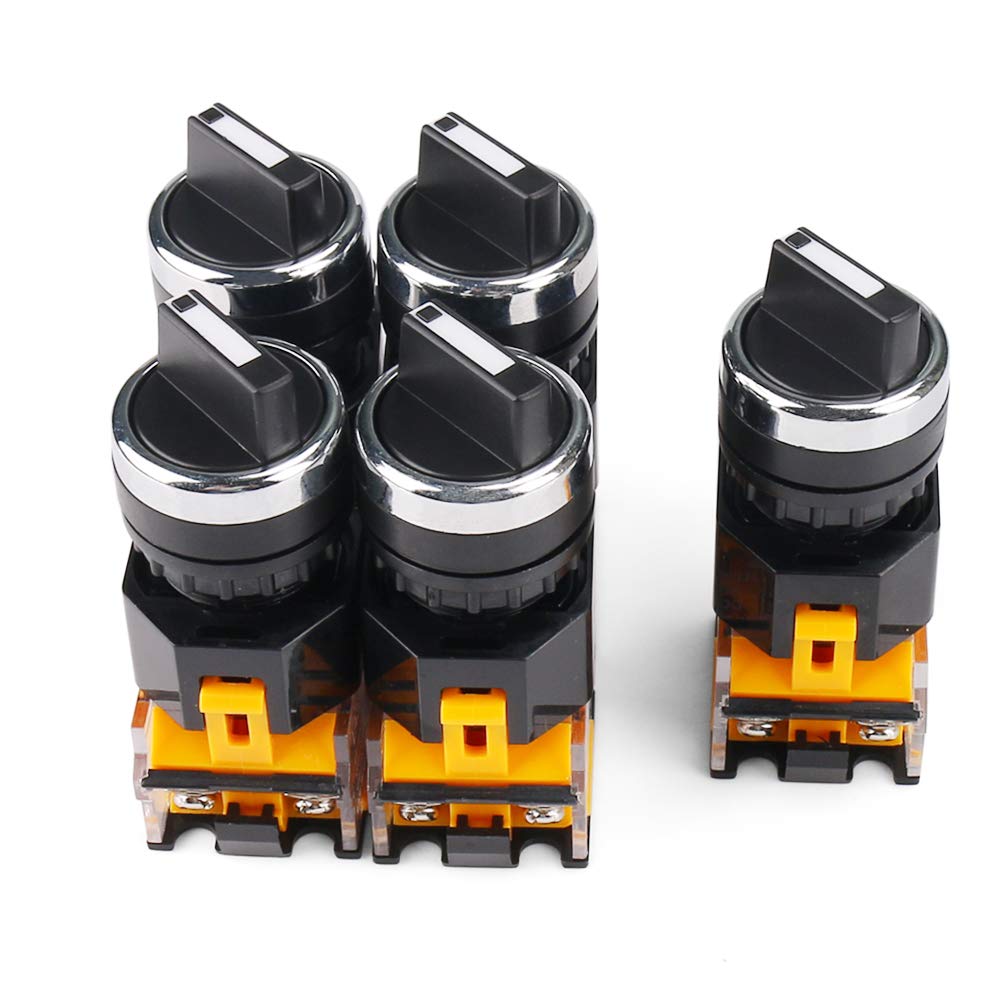
Figure 3.1: Overview of the New168 Rotary Selector Switches (5-piece pack).
Key Features:
- High Quality: Designed for reliability and safety.
- Safety and Reliability: Screw terminals ensure secure wire contact and prevent accidental disconnections.
- Easy Installation: Quick connection terminations for straightforward wiring.
- Wide Application: Suitable for various appliances including electric ovens, juicers, heaters, blowers, range hoods, humidifiers, and massage equipment.
- Package Content: Supplied as a 5-piece set.
4. Specifications
Detailed technical specifications for the LA38-203/209B Rotary Selector Switch:

Figure 4.1: Product Dimensions.
| Specification | Value |
|---|---|
| Model | LA38-203/209B |
| Main Color | Black, Yellow, Silver Tone |
| Position Number | 2 |
| Rating (Current) | 10A |
| Rating (Voltage) | 440V |
| Terminal Quantity | 4 |
| Rotary Knob Diameter | 29mm / 1.15" |
| Total Size (L*W*H) | 78 x 32 x 37mm / 3.07" x 1.26" x 1.46" |
| Material | Plastic, Metal |
| Operation Mode | Manual |
| Contact Type | Normally Open |
| Connector Type | Screws |
| Circuit Type | 2-way |
| Mounting Type | Panel Mount |

Figure 4.2: Rating and Terminal Details.
5. Installation
Follow these steps for proper installation of the rotary selector switch:
- Prepare Mounting Hole: Ensure the panel has an appropriately sized hole for the switch body and bezel.
- Mount the Switch: Insert the switch body through the mounting hole from the front of the panel. Secure it with the provided locking nut from the rear.
- Wire Connections: Strip approximately 7-10mm of insulation from the ends of your wires. Insert the stripped wire ends into the appropriate screw terminals.
- Secure Wires: Tighten the terminal screws firmly to ensure a reliable electrical connection. Verify that no loose strands of wire are present that could cause a short circuit.
- Attach Knob: Place the rotary knob onto the switch shaft, aligning it correctly for the desired positions.
- Test Functionality: After installation, carefully test the switch functionality before applying full power to the connected circuit.
6. Operation
The LA38-203/209B is a 2-position latching rotary selector switch. To operate:
- Position Selection: Rotate the black knob to select between the two available positions. The switch will latch into each position.
- Indication: The position of the knob indicates the current state of the switch contacts.
7. Maintenance
The New168 rotary selector switch requires minimal maintenance. Follow these guidelines to ensure longevity:
- Regular Inspection: Periodically inspect the switch for any signs of physical damage, loose connections, or excessive wear.
- Cleaning: If necessary, clean the exterior of the switch with a dry, soft cloth. Do not use abrasive cleaners or solvents. Ensure no liquids enter the switch mechanism.
- Terminal Check: Re-tighten terminal screws if any looseness is detected, especially in environments with vibration.
8. Troubleshooting
If you encounter issues with your rotary selector switch, consider the following common problems and solutions:
- Switch Not Actuating:
- Check for proper installation of the knob on the shaft.
- Ensure no foreign objects are obstructing the switch mechanism.
- No Electrical Continuity:
- Verify all wire connections are secure and properly tightened at the terminals.
- Check the integrity of the wiring itself.
- Ensure the switch is rated for the current and voltage of the circuit.
- Intermittent Operation:
- Inspect for loose internal components or damaged contacts (if visible).
- Ensure the switch is not exposed to excessive vibration or physical stress.
If problems persist, consult a qualified electrician or contact customer support.
9. Warranty and Support
New168 aims to provide quality products. For any issues with your purchased product, please refer to the seller's return policy or contact the seller directly for support. Keep your purchase receipt for warranty claims, if applicable.