1. Introduction
This instruction manual provides comprehensive guidance for the installation, operation, and maintenance of your new XSPANDER Carburetor. This carburetor is specifically designed as a replacement part for Toro 6.5, 6.75, 7.0, and 7.25 HP recycle mowers equipped with 190cc Briggs & Stratton 22" engines.
Proper installation and regular maintenance are crucial for ensuring the optimal performance and longevity of your engine. Please read this manual thoroughly before attempting any installation or maintenance procedures.
2. Safety Information
Always prioritize safety when working with engine components and fuel. Failure to follow safety instructions can result in serious injury or property damage.
- Ensure the engine is completely cool before beginning any work.
- Disconnect the spark plug wire to prevent accidental starting.
- Work in a well-ventilated area to avoid inhaling fuel fumes.
- Wear appropriate personal protective equipment, including safety glasses and gloves.
- Handle fuel with extreme care. Keep away from open flames or ignition sources.
- Dispose of old fuel and parts responsibly according to local regulations.
3. Product Overview
The XSPANDER Carburetor is engineered to provide an appropriate air and fuel mixture, ensuring great power and torque for your mower's engine. It is designed for stable performance and sensitive reaction, featuring improved air intake holes for enhanced airflow structure.
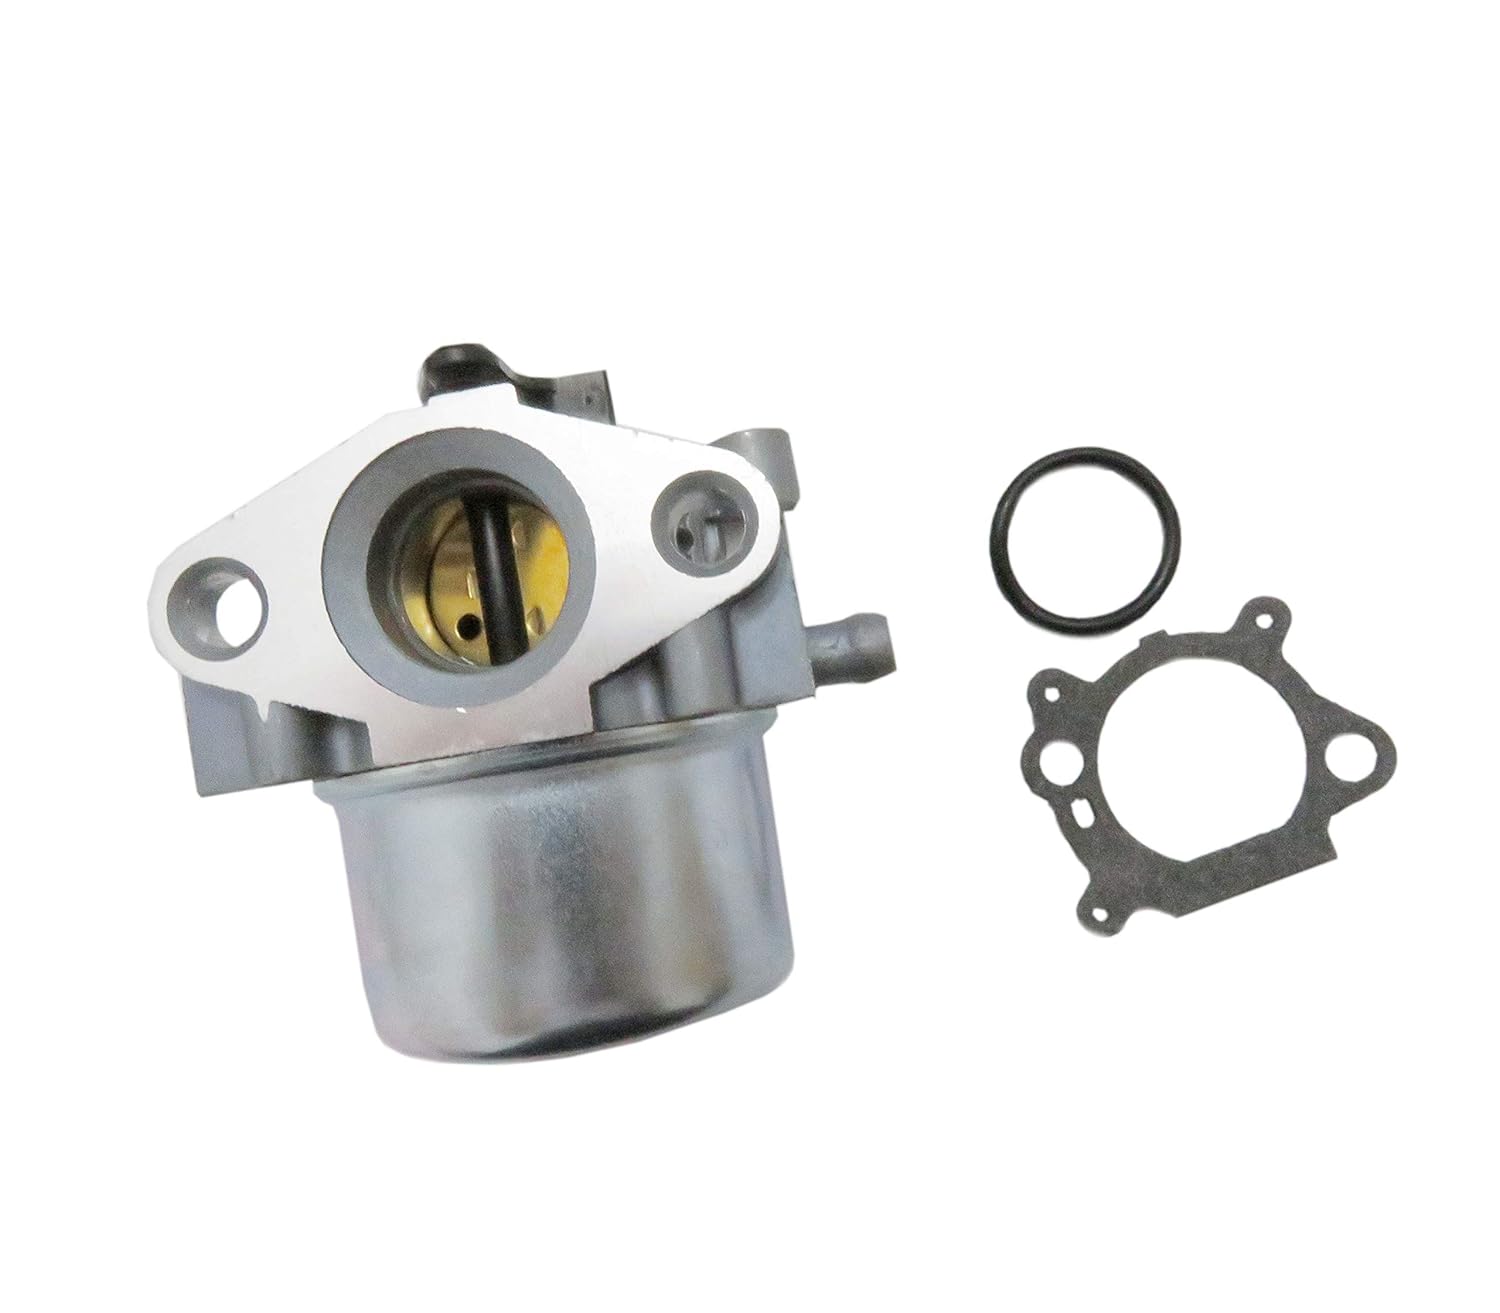
Figure 3.1: XSPANDER Carburetor with accompanying gasket and rubber O-ring.
3.1 Package Contents
Upon opening the package, verify that all components are present:
- 1 x XSPANDER Carburetor
- 1 x Gasket
- 1 x Rubber Ring
These components are essential for a complete and proper installation.
4. Compatibility and Fitment
This carburetor is a direct replacement part compatible with the following engine and mower specifications:
- Mower Type: Toro Recycle Mower 22"
- Engine Type: Briggs & Stratton 190cc
- Engine Horsepower: 6.5 HP, 6.75 HP, 7.0 HP, 7.25 HP
Please ensure your mower and engine specifications match these requirements before proceeding with installation.
5. Installation
The following steps outline the general procedure for replacing your mower's carburetor. Specific steps may vary slightly depending on your exact mower model. Refer to your mower's original service manual for detailed instructions if necessary.
5.1 Tools Required (Commonly Needed)
- Socket wrench set
- Screwdriver set (Phillips and flathead)
- Pliers
- Fuel line clamp (optional, but recommended)
- Clean rags
- Container for draining fuel
5.2 Step-by-Step Installation
- Preparation:
Park the mower on a level surface. Ensure the engine is cool. Disconnect the spark plug wire to prevent accidental starting. Locate the fuel shut-off valve and turn it off, or use a fuel line clamp to pinch the fuel line.
- Drain Fuel:
Place a suitable container under the carburetor's fuel bowl. Carefully loosen the fuel bowl drain screw (if present) or disconnect the fuel line to drain any remaining fuel into the container. Dispose of fuel properly.
- Remove Air Filter Assembly:
Unscrew or unclip the air filter cover and remove the air filter element. Then, remove the air filter housing, which is typically attached to the carburetor.
- Disconnect Linkages and Fuel Line:
Carefully note the position and connection of all linkages (throttle, choke) attached to the carburetor. Disconnect them. Detach the fuel line from the carburetor inlet. Be prepared for any residual fuel to leak.
- Remove Old Carburetor:
Unscrew the mounting bolts that secure the carburetor to the engine manifold. Gently pull the old carburetor away from the engine. Ensure to remove any old gaskets that may be stuck to the engine or carburetor.
- Install New Gasket and Carburetor:
Clean the mounting surface on the engine manifold. Place the new gasket (and rubber ring if applicable) provided with your XSPANDER carburetor onto the mounting studs. Carefully position the new XSPANDER carburetor onto the studs, ensuring the linkages can be reconnected easily.

Figure 5.1: Front view of the XSPANDER Carburetor, showing mounting points.
- Secure Carburetor:
Reinstall the mounting bolts and tighten them evenly to secure the carburetor. Do not overtighten.
- Reconnect Linkages and Fuel Line:
Reconnect all throttle and choke linkages to their original positions. Reattach the fuel line to the carburetor inlet, ensuring a secure connection.
- Reinstall Air Filter Assembly:
Reinstall the air filter housing and then the air filter element and cover.
- Refill Fuel and Test:
Turn the fuel shut-off valve back on (or remove the fuel line clamp). Reconnect the spark plug wire. Start the engine and check for any fuel leaks or abnormal operation.
6. Operating Considerations
After installation, the carburetor should provide optimal performance without significant adjustments. The design aims for a "plug and play" experience, making your engine run like new.
- Initial Start-up: It may take a few pulls to prime the carburetor with fuel after installation.
- Engine Performance: Observe the engine's idle speed and acceleration. It should run smoothly and respond well to throttle input.
- Fuel Leaks: Immediately shut off the engine and address any fuel leaks detected after starting.
7. Maintenance
Regular maintenance of your mower and its components, including the carburetor, will extend its lifespan and ensure reliable operation.
- Fuel Quality: Always use fresh, clean fuel. Stale or contaminated fuel is a common cause of carburetor issues.
- Fuel Stabilizer: Use a fuel stabilizer if storing the mower for extended periods (over 30 days) to prevent fuel degradation and gumming in the carburetor.
- Air Filter: Regularly inspect and clean or replace the air filter. A clogged air filter can restrict airflow and affect carburetor performance.
- Fuel Filter: If your mower has an inline fuel filter, inspect and replace it periodically to prevent debris from reaching the carburetor.
- Storage: Before long-term storage, it is recommended to run the engine until it runs out of fuel, or drain the fuel system, to prevent fuel-related issues.
8. Troubleshooting
If you encounter issues after installing the new carburetor, refer to the following common problems and their potential solutions:
| Problem | Possible Cause | Solution |
|---|---|---|
| Engine will not start or starts with difficulty. | No fuel reaching carburetor; fuel line kinked; spark plug issue (unrelated to carb); incorrect installation. | Check fuel level, ensure fuel valve is open. Inspect fuel line for kinks. Verify spark plug connection. Recheck all installation steps. |
| Engine runs rough or idles poorly. | Air leak around carburetor gasket; old fuel; clogged air filter. | Ensure carburetor mounting bolts are tight. Replace old fuel with fresh fuel. Clean or replace air filter. |
| Engine lacks power or stalls under load. | Air filter clogged; fuel delivery issue; engine mechanical problem (unrelated to carb). | Check and clean/replace air filter. Ensure fuel flow is unobstructed. Consult a professional if engine issues persist. |
| Fuel leak from carburetor. | Improperly seated gasket; loose fuel line connection; damaged fuel bowl. | Inspect gasket for proper seating and damage. Tighten fuel line connections. If fuel bowl is damaged, replacement may be necessary. |
If troubleshooting steps do not resolve the issue, it is recommended to consult a qualified small engine mechanic.
9. Specifications
Key specifications for the XSPANDER Carburetor (Model: B07H3PH4SF):
- Product Dimensions: Approximately 4.1 inches (Length) x 3.2 inches (Width) x 2.8 inches (Height)
- Weight: Approximately 1.76 ounces
- Main Material: Metal alloy (carburetor body), Rubber (O-ring)
- Compatibility: Toro 6.5-7.25 HP Recycle Mowers with Briggs & Stratton 190cc 22" engines
10. Warranty and Support
For any product-related questions, concerns, or support needs, please contact XSPANDER customer service. Refer to your purchase documentation or the seller's information for contact details.
This product is designed for reliable performance. In case of manufacturing defects, please reach out to the seller for assistance as per their return and warranty policies.