
Your Choice Aquatics DC12000
Your Choice Aquatics DC12000 (3200GPH) Water Pump Instruction Manual
Model: DC12000
1. Introduction
Thank you for choosing the Your Choice Aquatics DC12000 Water Pump. This manual provides essential information for the safe and efficient operation, installation, and maintenance of your new pump. Please read this manual thoroughly before use and retain it for future reference.
Safety Information
- Always disconnect the pump from the power supply before performing any maintenance, installation, or cleaning.
- This pump is designed for submersible use in water environments only. Do not operate dry.
- Ensure the power outlet is properly grounded and protected by a Ground Fault Circuit Interrupter (GFCI).
- Do not operate the pump if the power cord or any part of the unit is damaged. Contact qualified personnel for repairs.
- Keep children and pets away from the pump and electrical connections during operation.
- The pump is suitable for both reef and saltwater applications.
2. Product Overview
The Your Choice Aquatics DC12000 is a high-performance DC water pump designed for various aquatic applications, including aquariums and sumps. It features a variable flow rate, quiet operation, and a durable design.
Components
- DC12000 Pump Unit
- External Controller
- Power Adapter
- Hose Barbs/Fittings (various sizes)
Key Features
- High Flow Rate: Up to 12000 L/H (3200 GPH).
- Energy Efficient: Power consumption from 10 to 100 watts.
- Variable Speed Control: Adjust flow rate via the external controller.
- Wave Mode: Pulsing function to create natural water movement.
- Quiet Operation: Designed for minimal noise.
- Durable Construction: Suitable for reef and saltwater environments.
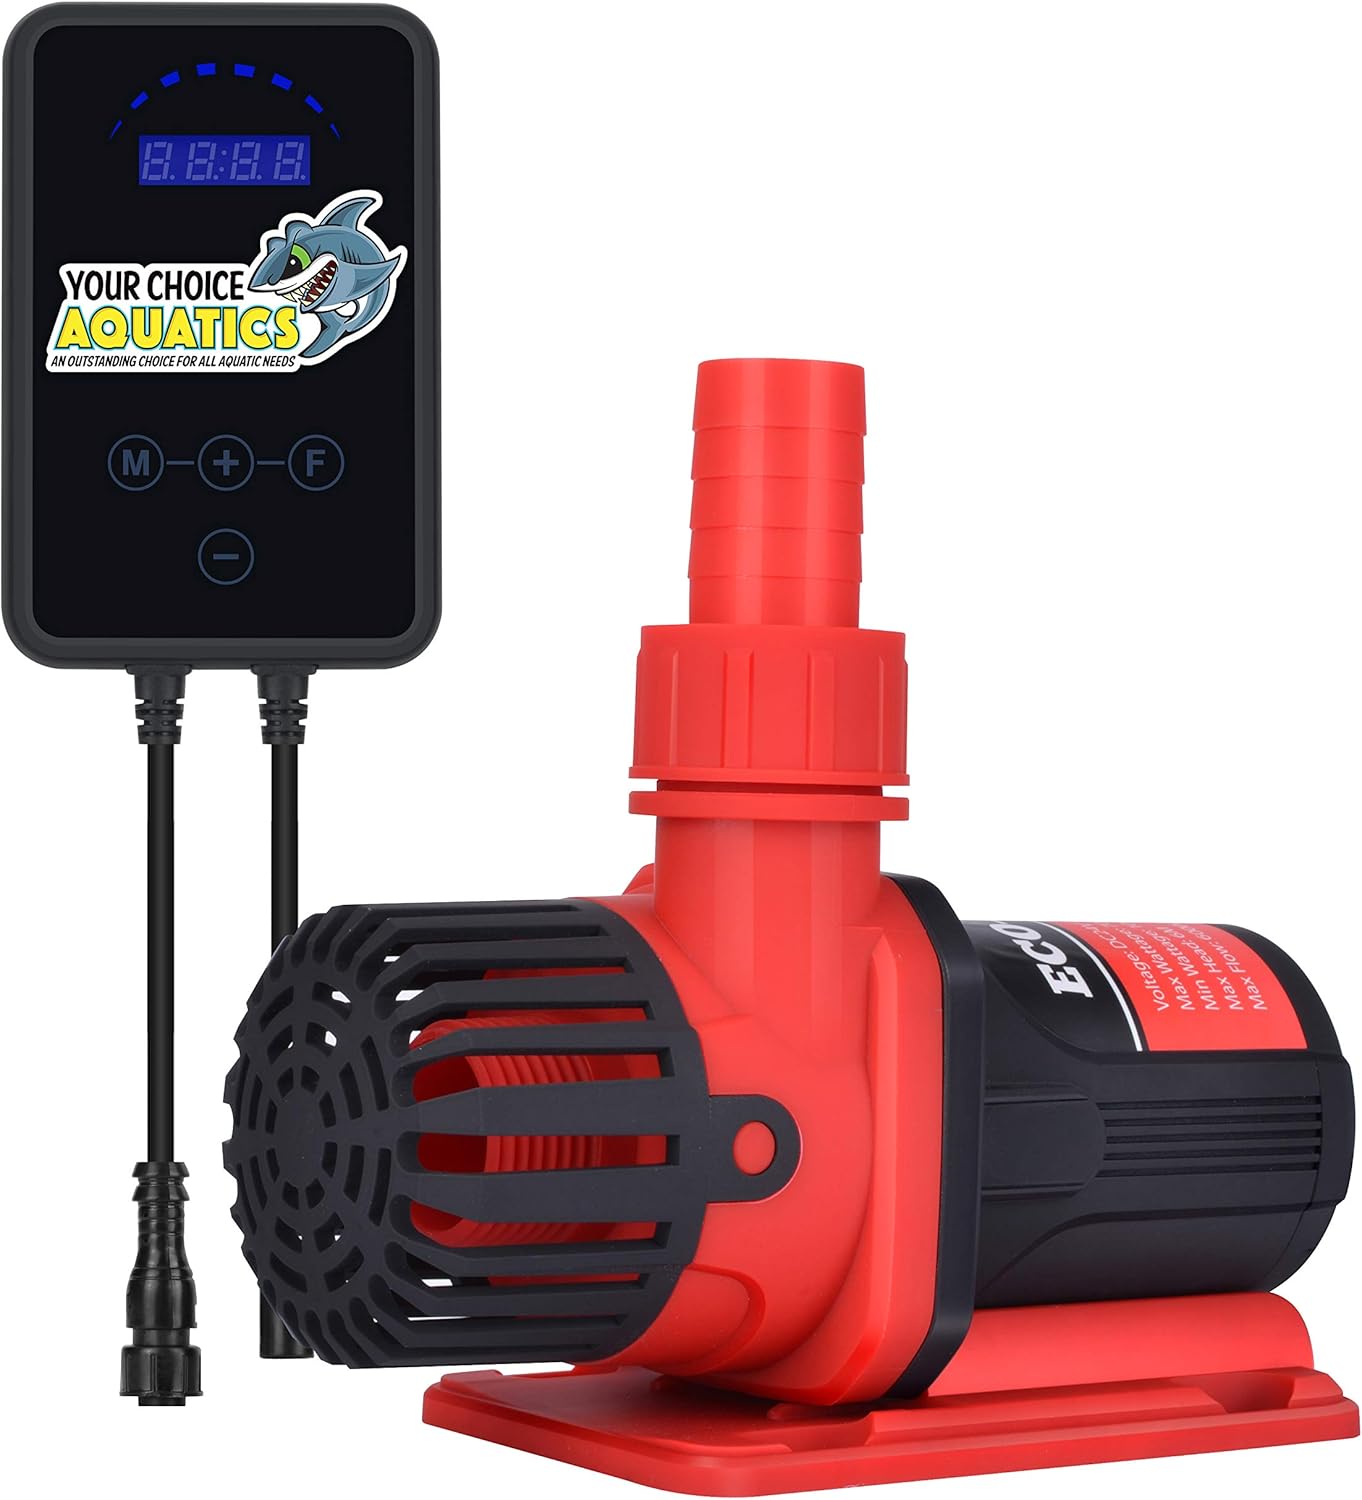
Image 2.1: The DC12000 water pump unit connected to its external controller. The pump is red and black, with a protective intake screen. The controller has a digital display and control buttons.
3. Setup and Installation
Follow these steps to properly install your DC12000 water pump:
- Unpack Components: Carefully remove all items from the packaging and inspect for any damage.
- Attach Fittings: Select the appropriate hose barb fitting for your plumbing and securely attach it to the pump's outlet. Ensure a tight seal to prevent leaks.
- Position the Pump: Place the pump unit fully submerged in the desired location within your aquarium or sump. Ensure it is stable and not obstructed.
- Connect to Controller: Connect the pump's cable to the designated port on the external controller. Ensure the connection is secure.
- Connect Power Adapter: Connect the power adapter to the controller, then plug the power adapter into a GFCI-protected electrical outlet.
- Initial Start-up: Once all connections are secure and the pump is submerged, plug in the power adapter. The pump should start operating according to the controller's settings.

Image 3.1: A diagram illustrating the connection sequence: pump to controller, controller to power adapter, and power adapter to wall outlet.
4. Operation
The external controller allows you to manage the pump's functions. The digital display shows the current operating mode or power level.
Controller Buttons:
- M (Mode) Button: Toggles between constant flow mode and pulsing (wave) mode.
- + (Increase) Button: Increases the flow rate or intensity in the current mode.
- - (Decrease) Button: Decreases the flow rate or intensity in the current mode.
- F (Feed) Button: Activates a temporary pause for feeding. Press once to pause, press again to resume normal operation.
Operating Modes:
- Constant Flow Mode: Provides a steady, continuous water flow. Use the '+' and '-' buttons to adjust the desired flow rate. The display will show the power level or flow setting.
- Pulsing (Wave) Mode: Creates an oscillating flow to simulate natural wave action. Use the '+' and '-' buttons to adjust the intensity or frequency of the pulses.
Error Codes:
If the pump encounters an issue, the controller display may show an error code. Common issues include dry running, impeller blockage, or electrical faults. If an error code appears, disconnect power, inspect the pump for obstructions, and ensure it is fully submerged before reconnecting power. If the error persists, contact customer support.
5. Maintenance
Regular maintenance ensures optimal performance and extends the lifespan of your pump.
- Disconnect Power: Always unplug the pump from the power outlet before any maintenance.
- Remove from Water: Carefully remove the pump unit from your aquarium or sump.
- Disassemble: Remove the intake screen and front cover. Gently pull out the impeller assembly.
- Clean Components: Rinse all parts (impeller, housing, intake screen) under clean water. Use a soft brush or pipe cleaner to remove any algae, debris, or mineral deposits. For stubborn deposits, a mild vinegar solution can be used, followed by thorough rinsing.
- Inspect: Check the impeller for any signs of wear or damage. Ensure the ceramic shaft is intact.
- Reassemble: Carefully reassemble the pump in reverse order. Ensure all parts fit securely.
- Test: Place the pump back into the water and reconnect power to test its operation.
Frequency: Perform cleaning every 1-3 months, depending on water conditions and debris accumulation.
6. Troubleshooting
Refer to the table below for common issues and their solutions.
| Problem | Possible Cause | Solution |
|---|---|---|
| Pump does not turn on. | No power, loose connection, damaged power adapter/controller, pump malfunction. | Check power outlet and GFCI. Ensure all connections are secure. Inspect power cord and adapter for damage. If problem persists, contact support. |
| Reduced flow rate. | Clogged intake/impeller, air in pump, incorrect flow setting. | Disconnect power and clean the impeller and intake screen. Ensure pump is fully submerged and free of air. Adjust flow setting on controller. |
| Unusual noise or vibration. | Impeller obstruction, worn impeller, pump not stable. | Disconnect power and clean the impeller. Check for any foreign objects. Ensure the pump is placed on a stable surface. |
| Controller displays error code. | Dry running, impeller blockage, electrical issue. | Disconnect power. Check if pump is fully submerged. Inspect impeller for blockages. Reconnect power. If error persists, contact support. |
7. Specifications
| Feature | Specification |
|---|---|
| Model | DC12000 |
| Maximum Flow Rate | 12000 Liters Per Hour (3200 GPH) |
| Maximum Head Height | 6 Meters |
| Power Consumption | 10 - 100 Watts |
| Power Source | AC/DC |
| Material (Internal) | Stainless Steel (shaft) |
| Application | Submersible, Reef and Saltwater Safe |
| UPC | 748388704416 |
8. Warranty and Support
Warranty
This Your Choice Aquatics DC12000 Water Pump comes with a 12-month warranty from the date of purchase, covering manufacturing defects. This warranty does not cover damage resulting from improper installation, misuse, neglect, unauthorized modifications, or normal wear and tear.
Please retain your proof of purchase for warranty claims.
Customer Support
For technical assistance, troubleshooting, or warranty inquiries, please contact Your Choice Aquatics customer support through the retailer where the product was purchased or visit the official Your Choice Aquatics website for contact information.
When contacting support, please have your product model (DC12000) and proof of purchase readily available.
Ask a question about this manual
Ask about setup, troubleshooting, compatibility, parts, safety, or missing instructions. Manuals+ will review the question and use this page’s manual context to help answer it.