
Introduction
This manual provides essential information for the proper use and maintenance of your Speedaire 1WF47 Rv30 Maintenance Kit. This kit is designed to help maintain the optimal performance and longevity of compatible Speedaire air compressors. Regular maintenance is crucial for efficient operation and to prevent premature wear of your equipment.
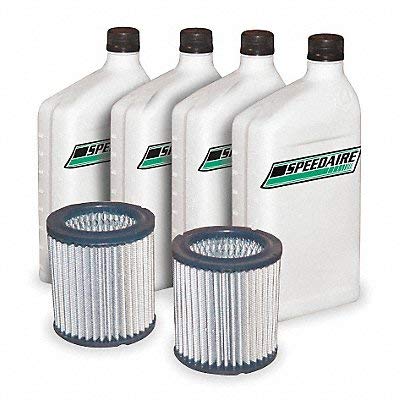
This image displays the contents of the Speedaire 1WF47 Rv30 Maintenance Kit. It includes four white bottles of Speedaire air compressor oil and two cylindrical air filters with pleated media and dark blue end caps.
Safety Information
Always prioritize safety when performing maintenance on any machinery. Refer to your air compressor's original user manual for specific safety guidelines. Ensure the air compressor is powered off, depressurized, and disconnected from its power source before beginning any maintenance procedures. Wear appropriate personal protective equipment (PPE) such as safety glasses and gloves.
Kit Contents
The Speedaire 1WF47 Rv30 Maintenance Kit typically includes the following components:
- Two (2) Air Filters: Designed to filter incoming air, protecting the compressor's internal components from dust and debris.
- Four (4) Quarts of Oil: Specifically formulated compressor oil for lubrication and heat dissipation.
Maintenance Procedures
1. Air Filter Replacement
- Preparation: Ensure the air compressor is turned off, unplugged, and any residual air pressure is released.
- Locate Filter: Identify the air filter housing on your compressor. It is typically a cylindrical or rectangular casing.
- Remove Old Filter: Carefully open the housing and remove the old, dirty air filter. Note its orientation for correct installation of the new filter.
- Clean Housing: Wipe down the inside of the filter housing to remove any accumulated dust or debris.
- Install New Filter: Insert one of the new air filters from the kit into the housing, ensuring it fits snugly and is correctly oriented.
- Secure Housing: Close and secure the filter housing.
2. Oil Change
- Preparation: Ensure the compressor is off, unplugged, and cool. Place a suitable drain pan beneath the oil drain plug.
- Drain Old Oil: Locate the oil drain plug, typically at the bottom of the compressor's crankcase. Carefully remove the plug to allow the old oil to drain completely into the pan.
- Replace Drain Plug: Once all oil has drained, clean the drain plug and reinstall it securely. Do not overtighten.
- Add New Oil: Locate the oil fill cap/dipstick. Remove it and slowly pour the new Speedaire compressor oil from the kit into the crankcase. Use the dipstick to monitor the oil level, ensuring it reaches the recommended mark (usually between 'add' and 'full' or within a specified range). Do not overfill.
- Replace Fill Cap: Securely replace the oil fill cap/dipstick.
- Dispose of Old Oil: Properly dispose of the used oil according to local environmental regulations. Do not pour it down drains or onto the ground.
Troubleshooting Common Issues After Maintenance
If you encounter issues after performing maintenance, consider the following:
- Reduced Airflow/Pressure: Check if the new air filter is installed correctly and not obstructed. Ensure all connections are tight.
- Oil Leaks: Verify that the oil drain plug and oil fill cap are securely tightened. Inspect for any cracks or damage around seals.
- Unusual Noises: Recheck all components to ensure they are properly seated and tightened.
If problems persist, consult a qualified technician or refer to your compressor's specific service manual.
Specifications
| Model Number | 1WF47 |
| Product Dimensions | 13 x 7 x 9 inches |
| Item Weight | 9 Pounds |
| Manufacturer | Speedaire |
| Compatible Grainger Part Numbers | 1WD50, 1WD52, 1WD66, 1WD67, 1WD68, 1WD70, 1WD71, 1WD72, 1WD73, 1WD74, 1WD75, 1WD76, 1WD78 |
Warranty and Support
For information regarding product warranty, technical support, or replacement parts beyond this kit, please refer to the official Speedaire website or contact Speedaire customer service directly. Always use genuine Speedaire parts for optimal performance and to maintain warranty validity.