Bestowal NK-10413
Bestowal 10pcs Horn Clothing Buttons User Manual
Model: NK-10413 | Brand: Bestowal
Product Overview
This product consists of a set of 10 horn buttons, designed for various clothing applications. They are crafted from natural horn, providing a unique and classic aesthetic to garments.
- Material: Natural Horn
- Quantity: 10 pieces per pack
- Available Sizes: 15 mm, 20 mm, 25 mm, 28 mm
- Compatibility: Suitable for sweaters, uniforms, shirts, blazers, coats, and jackets.
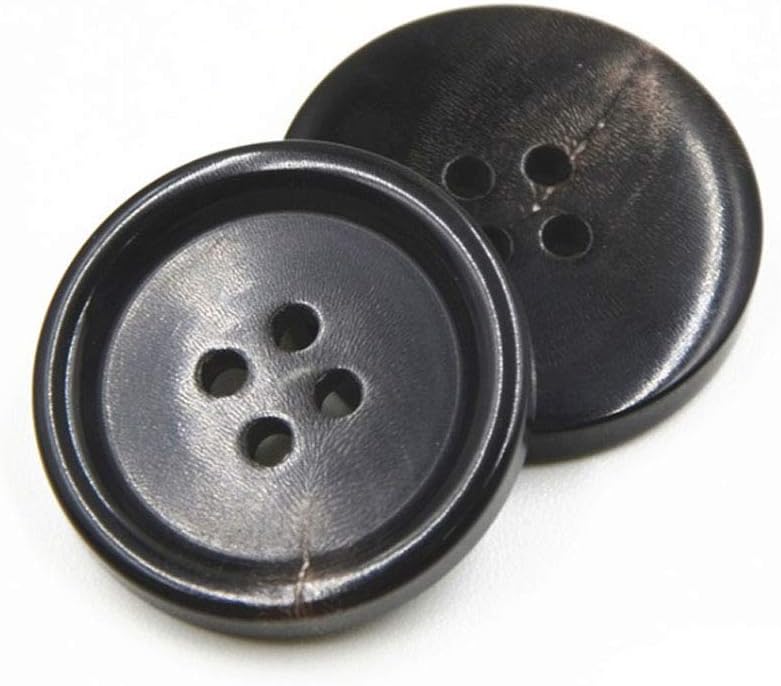
Image: A pair of black horn buttons, showcasing their natural texture and four-hole design. These buttons are ideal for various clothing items.
Specifications
| Brand | Bestowal |
| Model Number | NK-10413 |
| Material | Horn |
| Color | Black |
| Shape | Round |
| Quantity per Pack | 10 pieces |
| Available Sizes | 15mm, 20mm, 25mm, 28mm |
| Item Weight | 24 grams |
Setup and Preparation
Before attaching the buttons, ensure you have the necessary tools:
- Needle (appropriate size for fabric and thread)
- Strong thread (matching or contrasting with fabric)
- Fabric marker or chalk (optional, for marking placement)
- Thimble (optional, for protection)
Always check the size of the buttons to ensure they are suitable for your garment. For best results, pre-wash and iron your fabric if applicable.
Operating Instructions (Attaching Buttons)
Follow these steps to securely attach your Bestowal horn buttons:
- Mark Placement: Determine the exact position for each button on your garment. Use a fabric marker or chalk to lightly mark the center of where the button will sit.
- Prepare Thread: Cut a length of thread (approximately 18-24 inches) and double it. Thread your needle and tie a knot at the end of the doubled thread.
- Start Sewing: From the wrong side of the fabric, bring the needle up through the fabric at one of the marked holes for the button. Pull the thread through until the knot is secure against the fabric.
- Attach Button: Pass the needle through one of the button's holes from the top. Then, bring the needle back down through an adjacent hole on the button and through the fabric to the wrong side.
- Repeat Stitching: Continue stitching through the button holes and fabric multiple times (typically 4-6 times per set of holes) to ensure the button is firmly attached. For four-hole buttons, you can sew parallel stitches or cross stitches (X-shape).
- Create a Shank (Optional but Recommended for Thicker Fabrics): Before finishing, wrap the thread several times around the stitches between the button and the fabric. This creates a small "shank" that allows the fabric underneath to lie flat when the button is fastened.
- Secure Knot: On the wrong side of the fabric, make a small knot by passing the needle under a few stitches and looping the thread through. Repeat this knot once or twice for extra security. Trim excess thread.

Image: An array of Bestowal horn buttons in black and brown, demonstrating the variety of sizes available for different garment needs.
Maintenance and Care
To ensure the longevity and appearance of your horn buttons, follow these care guidelines:
- Washing: Horn buttons are durable but can be sensitive to harsh chemicals and high heat. It is generally safe to machine wash garments with horn buttons on a gentle cycle with cold or lukewarm water.
- Drying: Air drying is recommended. If using a dryer, use a low heat setting and remove the garment promptly to avoid prolonged exposure to heat, which can cause horn to warp or crack.
- Ironing: Avoid direct, prolonged contact with a hot iron. If ironing is necessary, place a pressing cloth over the buttons or iron around them.
- Chemicals: Avoid exposing buttons to strong bleaches, solvents, or abrasive cleaners, as these can damage the natural material.
- Storage: Store garments with horn buttons in a cool, dry place away from direct sunlight to prevent fading or degradation.
Troubleshooting
| Problem | Possible Cause | Solution |
|---|---|---|
| Button feels loose | Insufficient stitching; thread has worn out. | Re-sew the button with stronger thread, ensuring enough stitches are made. Consider adding a shank. |
| Button has cracked or warped | Exposure to excessive heat (e.g., hot dryer, direct iron) or harsh chemicals. | Replace the damaged button. Follow care instructions carefully to prevent future damage. |
| Thread is visible on the front of the garment | Incorrect needle entry/exit point; thread color mismatch. | Ensure needle enters and exits precisely at the marked points. Use thread that closely matches the fabric color. |
Warranty and Support
Bestowal products are manufactured with attention to quality. While these buttons are designed for durability, natural materials can vary.
For any questions regarding the product, its application, or if you encounter any issues, please contact Bestowal customer support through the retailer where you purchased the item. Please refer to your purchase receipt for specific warranty details, if applicable.
You can also visit the Bestowal Store on Amazon for more information and product offerings.
Ask a question about this manual
Ask about setup, troubleshooting, compatibility, parts, safety, or missing instructions. Manuals+ will review the question and use this page’s manual context to help answer it.