Introduction
This manual provides detailed instructions for the setup, operation, and maintenance of your ALLOMN Wireless Weather Station. This device offers comprehensive weather information including indoor and outdoor temperature and humidity, barometric pressure trends, weather forecasts, moon phases, and an alarm clock function. Please read this manual thoroughly before using the product to ensure correct operation and to maximize its features.

Image: The ALLOMN Wireless Weather Station main display unit with a bamboo-style frame, showing indoor and outdoor temperature, humidity, weather forecast, time, and moon phase. An accompanying white wireless outdoor sensor is shown to the right.
Package Contents
Please check the package contents to ensure all items are present:
- 1 x ALLOMN Wireless Weather Station (Main Unit)
- 1 x Wireless Outdoor Sensor
- 1 x USB Cable
- 1 x User Manual (This document)
Product Features
The ALLOMN Wireless Weather Station is equipped with several features to provide comprehensive environmental monitoring:
- Weather Forecast Function: Displays next 8-hour weather trends using 7 color icons.
- Indoor/Outdoor Temperature & Humidity: Monitors and displays current conditions in Celsius or Fahrenheit. Includes Min/Max records.
- Barometric Pressure Trend: Shows air pressure changes.
- Ice Alert: An outdoor ice alert symbol appears and an alarm sounds when outdoor temperature is between 30°F to 37°F (-1.1°C to 2.8°C).
- Clock & Daily Alarm: Manually set time (12/24H format) with an easy ON/OFF daily alarm and snooze function.
- Moon Phase Display: Shows the current moon phase.
- Color LCD Display: High-definition display with 3 adjustable backlight levels.
- Wireless Transmission: Outdoor sensor transmits data up to 197 feet (60 meters) in open areas.
- Power Options: Operates on 2 x AA batteries (not included) or via the included USB cable.
- Low Battery Indicator: Displays a low battery icon when operating on batteries only and power is low.

Image: An infographic showing the ALLOMN Weather Station on a table in a living room setting, with icons representing its features: Temperature, Humidity, Calendar, Clock/Snooze, LCD Display, Moon Phase, Barometric Pressure, and 12-Hour Weather Forecast.
Setup
1. Powering the Main Unit
- Battery Installation (Optional): Open the battery compartment on the back of the main unit. Insert 2 x AA batteries (not included), ensuring correct polarity (+/-).
- USB Power (Recommended for continuous backlight): Connect the included USB cable to the main unit's power port and plug the other end into a USB power adapter (not included) or a powered USB port. When powered by USB, the backlight can remain continuously on.
2. Powering the Wireless Outdoor Sensor
- Open the battery compartment on the back of the wireless outdoor sensor.
- Insert 2 x AA batteries (not included), ensuring correct polarity (+/-). The sensor will immediately begin transmitting data.
3. Pairing the Outdoor Sensor with the Main Unit
The main unit will automatically search for and connect to the outdoor sensor upon initial power-up. If the connection is not established or is lost:
- Ensure both units have fresh batteries or are properly powered.
- Place the outdoor sensor within range of the main unit (up to 197 feet/60 meters in open air).
- Press and hold the "CHANNEL" or "SEARCH" button (refer to specific button labels on your unit) on the main unit to initiate a manual search for the outdoor sensor.

Image: A diagram illustrating the wireless transmission of data from the outdoor sensor, mounted on the exterior of a house, to the main weather station unit located indoors. The transmission range is indicated as 60m/197ft (obstacle-free).
4. Placement Recommendations
- Main Unit: Place indoors on a flat surface or mount on a wall using the integrated hanging holes. Ensure it is away from direct sunlight or heat sources that could affect indoor temperature readings.
- Outdoor Sensor: Mount in a shaded area, protected from direct rain and sunlight, to ensure accurate temperature and humidity readings. Avoid placing it near large metal objects or electrical appliances that could interfere with wireless transmission.
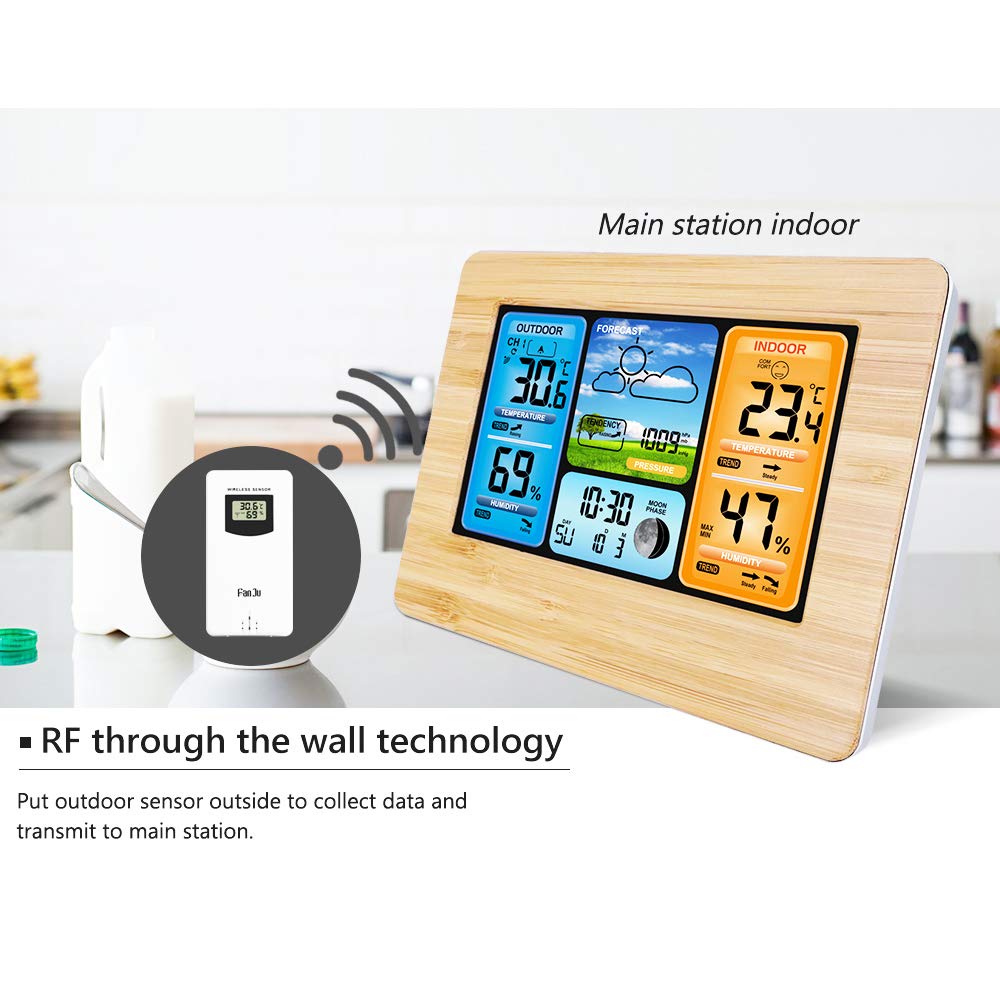
Image: The main weather station unit is shown indoors on a kitchen counter, receiving a wireless signal from the outdoor sensor, which is depicted in an inset circle. This illustrates the "RF through the wall technology" for data collection.
Operating Instructions
1. Display Overview

Image: A detailed diagram of the ALLOMN Weather Station's display, with labels pointing to various functions: Outdoor temperature, Outdoor humidity, Weather forecast and weather trend, Air pressure, Comfort Display, Indoor temperature, Indoor humidity, Date and week indicator, and Moon phase.
2. Setting Time and Date
Refer to the specific buttons on your unit (e.g., "MODE", "SET") to enter time/date setting mode. Use the "UP" or "DOWN" buttons to adjust values and "SET" or "MODE" to confirm and move to the next setting. You can select between 12-hour and 24-hour time formats.
3. Temperature Unit Selection (°C/°F)
Press the "°C/°F" button (or similar, check your unit's labels) to switch between Celsius and Fahrenheit temperature displays.
4. Alarm and Snooze Function
- Setting Alarm: Use the "ALARM" or "SET" button to enter alarm setting mode. Adjust the hour and minute using the "UP" or "DOWN" buttons.
- Activating/Deactivating Alarm: Press the "ALARM ON/OFF" button to toggle the alarm.
- Snooze Function: When the alarm sounds, press the "SNOOZE" button to temporarily silence it for 5-60 minutes (duration may be adjustable, refer to unit settings).
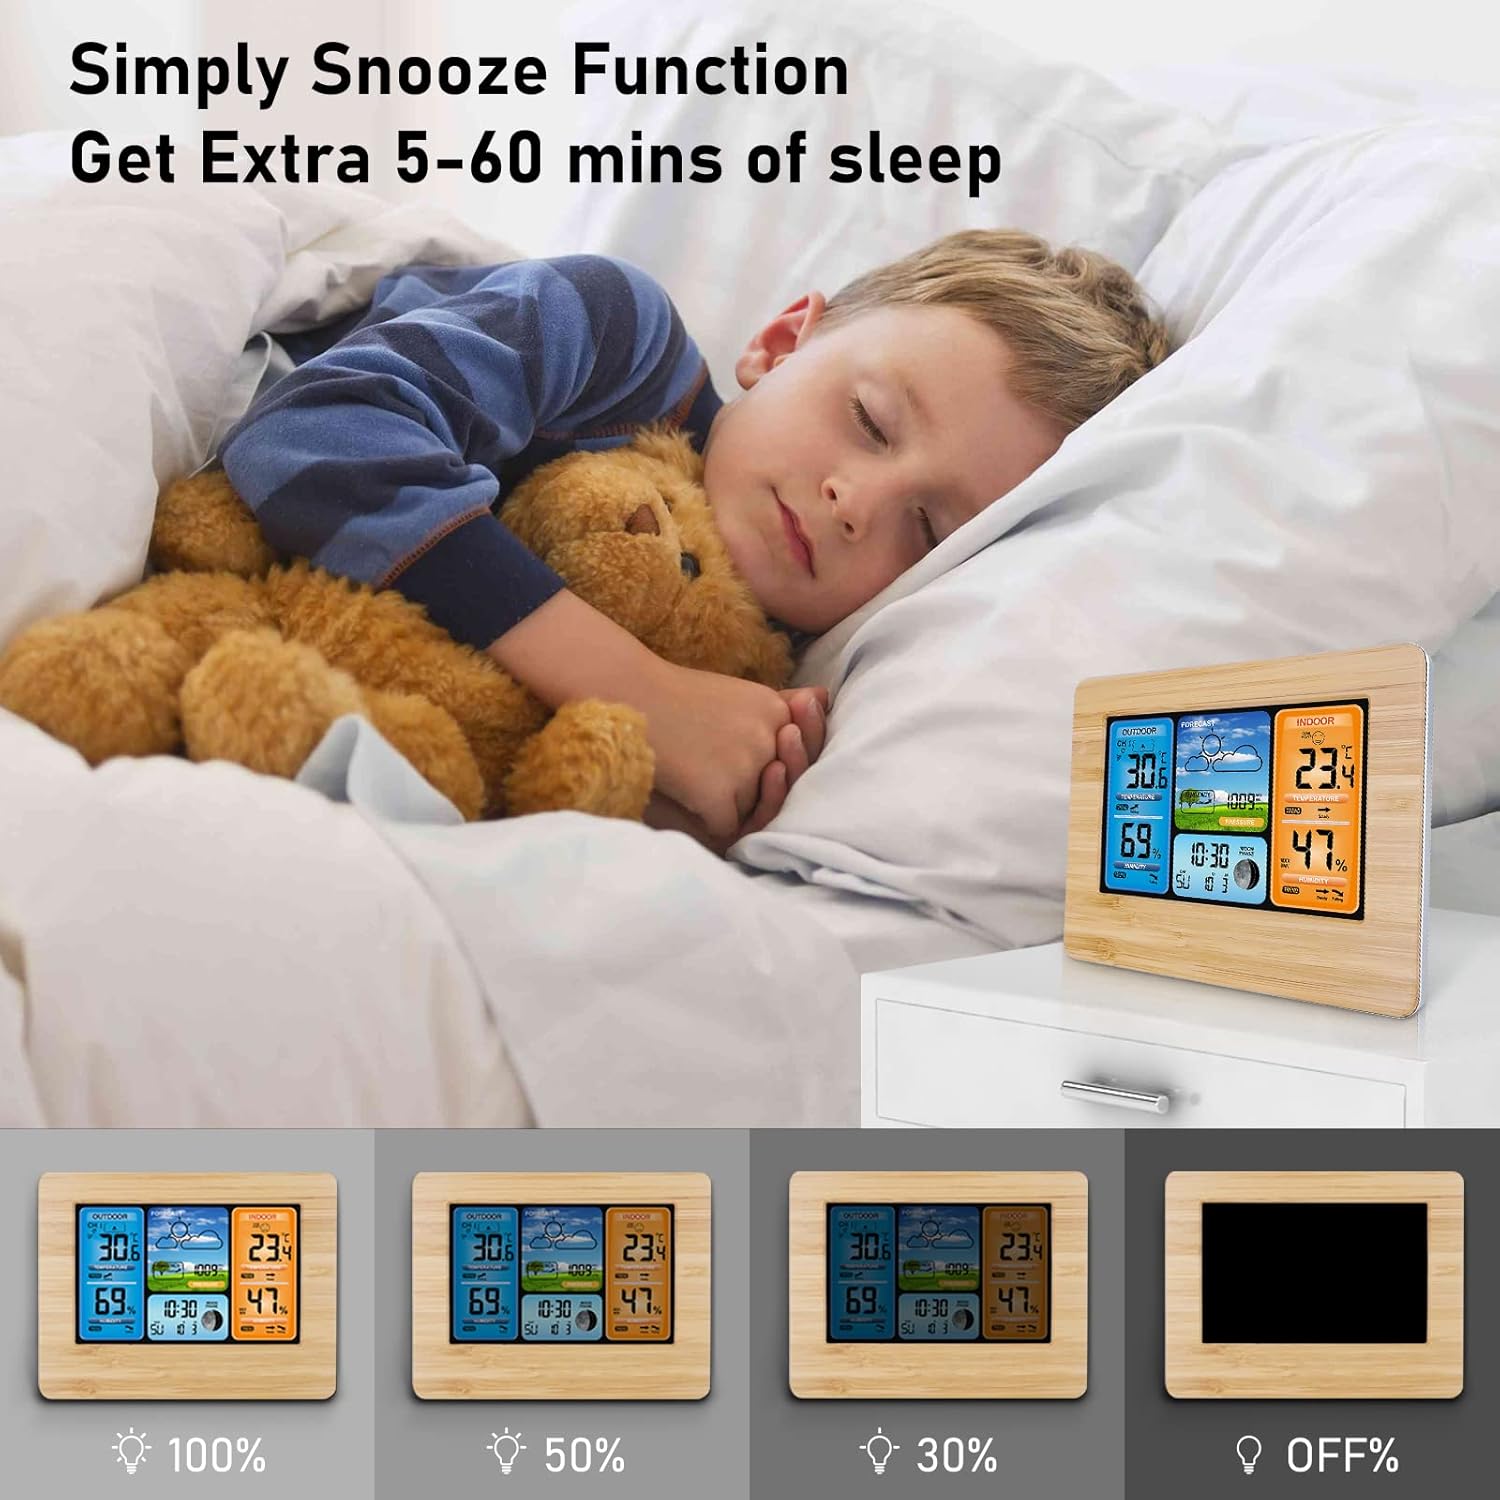
Image: A child is shown sleeping in bed with the ALLOMN Weather Station on a nightstand, highlighting the "Simply Snooze Function" for an extra 5-60 minutes of sleep. Below, four images demonstrate the 100%, 50%, 30% backlight brightness levels, and the OFF state.
5. Backlight Adjustment
When the main unit is powered by the USB cable, press the "SNOOZE" button to cycle through 3 levels of backlight brightness (High, Medium, Soft) or turn it off. If operating on batteries only, the backlight will illuminate briefly when a button is pressed to conserve power.
6. Weather Forecast Interpretation
The weather station forecasts the weather for the next 8 hours, not the current weather. The 7 color icons represent various weather conditions (e.g., sunny, partly cloudy, cloudy, rainy, snowy). Observe the trend arrows for barometric pressure to understand upcoming changes.
7. Humidity and Comfort Level Display
The display shows indoor and outdoor humidity percentages. Additionally, a comfort level indicator (e.g., Dry, Comfort, Wet) is provided based on indoor temperature and humidity, typically with 5 levels of comfort calculation.

Image: A horizontal arrow graphic transitioning from green to yellow to red, labeled "Comfortable" at the green end and "Cold or Hot" at the red end. This illustrates the comfort display, which calculates indoor comfort level based on temperature and humidity, with a total of 5 levels.
Maintenance
- Clean the display and unit surfaces with a soft, dry cloth. Avoid abrasive cleaners or solvents.
- Do not immerse the unit or sensor in water.
- If not using the device for an extended period, remove batteries from both the main unit and the outdoor sensor to prevent leakage.
- Ensure the outdoor sensor's battery compartment is securely closed to protect against moisture.
Troubleshooting
| Problem | Possible Cause | Solution |
|---|---|---|
| No display on main unit. | Batteries are dead or incorrectly inserted; USB cable not connected or faulty. | Replace batteries, check polarity. Ensure USB cable is securely connected to a working power source. |
| Outdoor temperature/humidity not displayed or inaccurate. | Outdoor sensor batteries are dead; sensor out of range; interference; sensor not paired. | Replace outdoor sensor batteries. Move sensor closer to the main unit. Avoid placing near large metal objects. Initiate manual search for the sensor on the main unit. |
| Display is dim or hard to read. | Unit is running on batteries only; backlight setting is low. | Connect the unit via USB cable for continuous backlight. Press the "SNOOZE" button to adjust backlight brightness. |
| Weather forecast seems incorrect. | Forecast is for the next 8 hours, not current conditions; local atmospheric pressure variations. | Understand that the forecast is a prediction. Ensure the unit has been operating for at least 24 hours to calibrate local atmospheric pressure. |
| Alarm does not sound. | Alarm is not activated; volume is too low (if adjustable). | Ensure the alarm function is turned ON. Check alarm settings. |
Specifications
| Feature | Detail |
|---|---|
| Model | B07GRY81NT |
| Type | Forecast Weather Station |
| Material | Plastic, Bamboo |
| Time Format | 12/24H selectable |
| Indoor Temperature Range | -9°C to +50°C (15°F to 122°F) |
| Outdoor Temperature Range | -20°C to +60°C (-4°F to 140°F) |
| Temperature Resolution | 1°C/°F |
| Humidity Range | 20%-95% RH |
| Humidity Resolution | 1% |
| Air Pressure Range | 600hPa/mb to 1100hPa/mb (17.72inHg to 32.48inHg) |
| Air Pressure Resolution | 1hPa/mb (0.03inHg) |
| Sensor Frequency | 433.92MHz RF |
| Sensor Distance | Up to 60m (197ft) in open area |
| Backlight Brightness Levels | 3 (High, Medium, Soft) |
| Snooze Duration | 5-60 Minutes |
| Power Requirements | Main Unit: 2 x AA batteries (not included) or USB cable (included) Outdoor Sensor: 2 x AA batteries (not included) |
| Dimensions (Main Unit) | 16.5 x 6 x 13 cm (6.5 x 2.4 x 5.1 inches) (L*W*H) |
Warranty and Support
For information regarding warranty coverage and customer support, please refer to the documentation provided at the time of purchase or contact ALLOMN customer service directly. The manufacturer is ALLOMN.