1. Introduction
The Bell Motivator 2.0 Magnetic Resistance Trainer provides a stable and adjustable platform for indoor cycling. This trainer is designed to convert your outdoor bicycle into a stationary exercise bike, allowing you to maintain your fitness regimen regardless of weather conditions. It features six levels of magnetic resistance and is compatible with most bicycles equipped with 26-inch to 29-inch wheels or 700c wheels, utilizing a quick-release rear axle.
2. Safety Information
- Always ensure the trainer is placed on a flat, stable, and non-slip surface.
- Verify that your bicycle is securely mounted to the trainer before each use.
- Keep children and pets away from the trainer during operation.
- Wear appropriate cycling attire, including a helmet if desired, and cycling shoes.
- Do not touch the resistance unit or roller during or immediately after use, as they may become hot.
- Consult a physician before starting any new exercise program.
- Ensure adequate ventilation in your workout area.
3. Package Contents
Please check the package to ensure all components are present:
- Bell Motivator 2.0 Magnetic Resistance Trainer frame
- Magnetic resistance unit with steel roller
- Remote resistance control lever with cable
- Quick-release skewer (steel)
- Mounting hardware and adjustment knobs
4. Setup Instructions
4.1 Unfolding the Trainer
Carefully unfold the trainer frame until it locks into its open position. Ensure all legs are fully extended and stable.

Image: The Bell Motivator 2.0 Magnetic Resistance Trainer in its unfolded, ready-to-use position, showing the frame, resistance unit, and remote control cable.
4.2 Replacing Your Bike's Rear Skewer
For optimal security and compatibility, replace your bicycle's existing rear quick-release skewer with the steel quick-release skewer provided with the trainer. This ensures a secure fit within the trainer's clamping mechanism.
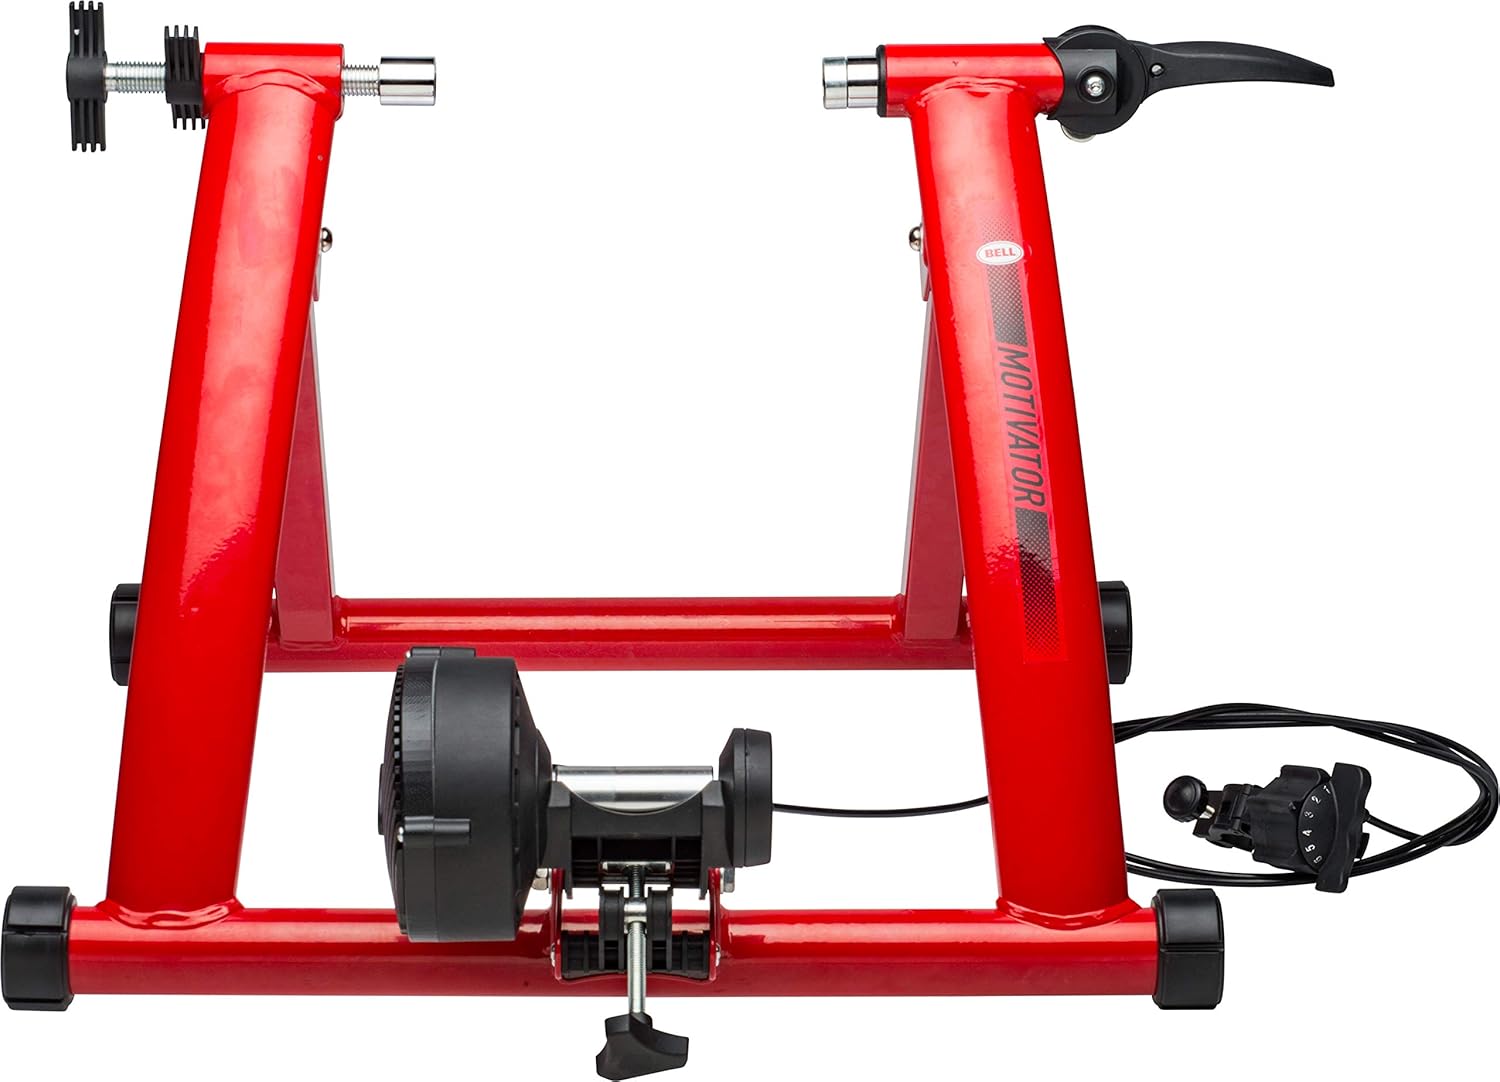
Image: A close-up view of the quick-release lever mechanism on the trainer, designed to securely hold the bicycle's rear wheel skewer.
4.3 Mounting Your Bicycle
- Position your bicycle with the rear wheel centered between the trainer's mounting cups.
- Engage the quick-release mounting lever on the trainer. Ensure the skewer ends are fully seated in the cups.
- Tighten the adjustment knob on the opposite side of the quick-release lever until the bike is firmly held. The quick-release lever should require moderate effort to close, indicating a secure grip.
- Adjust the resistance unit roller: Loosen the knob that holds the resistance unit. Position the steel roller against the rear tire. The roller should make firm contact with the tire, creating slight compression. Tighten the knob to secure the resistance unit in place.
- Check stability: Gently rock the bike to ensure it is stable and securely mounted. The trainer's offset end caps can be adjusted for uneven floors to enhance stability.

Image: A bicycle securely mounted on the Bell Motivator 2.0 trainer, ready for an indoor workout session.
4.4 Installing the Remote Resistance Control
Attach the remote resistance control lever to your bicycle's handlebars in a convenient location. Route the cable along the bike frame to the resistance unit, ensuring it does not interfere with moving parts or your pedaling motion.
5. Operating Instructions
5.1 Starting Your Workout
Once your bike is securely mounted and the resistance unit is properly adjusted, you can begin your indoor cycling session. Shift your bike's gears as you normally would to find a comfortable cadence.
5.2 Adjusting Resistance Levels
The Bell Motivator 2.0 offers 6 levels of magnetic resistance, controlled by the remote lever mounted on your handlebars. Turn the dial on the remote control to increase or decrease the resistance. Level 1 provides the lowest resistance, and Level 6 provides the highest. Adjust the resistance to match your desired workout intensity and fitness goals.

Image: A person riding a bicycle on the Bell Motivator 2.0 trainer, with a hand visible adjusting the remote resistance control on the handlebars.
5.3 Ending Your Workout
To dismount your bicycle, first ensure you have come to a complete stop. Then, open the quick-release mounting lever on the trainer and carefully lift your bike off the trainer.
6. Maintenance
- Cleaning: Wipe down the trainer frame and resistance unit with a damp cloth after each use to remove sweat and dust. Avoid using abrasive cleaners.
- Lubrication: Periodically check and lubricate any moving parts or pivot points with a light machine oil, if necessary, to ensure smooth operation.
- Tire Pressure: Maintain proper tire pressure on your bicycle's rear wheel for consistent resistance and reduced tire wear.
- Resistance Unit: Ensure the steel roller is clean and free of debris. A dirty roller can cause excessive tire wear and noise.
- Storage: When not in use, the trainer can be folded for compact storage. Store in a dry, cool place away from direct sunlight.

Image: The Bell Motivator 2.0 Magnetic Resistance Trainer shown in its folded configuration, highlighting its compact design for easy storage.
7. Troubleshooting
| Problem | Possible Cause | Solution |
|---|---|---|
| Bike is unstable on trainer | Improper mounting; uneven floor | Ensure quick-release lever is fully engaged and adjustment knob is tight. Adjust offset end caps for level surface. |
| No or inconsistent resistance | Resistance unit not making proper contact; remote cable issue | Adjust the resistance unit roller to ensure firm contact with the tire. Check remote cable for kinks or damage. |
| Excessive noise during use | Loose components; tire slippage; dirty roller | Check all bolts and connections. Ensure tire pressure is correct and roller is clean. |
| Tire wear is excessive | Low tire pressure; dirty roller; incorrect roller tension | Maintain recommended tire pressure. Keep roller clean. Adjust roller tension to be firm but not overly tight. |
8. Specifications
- Model: Bell Motivator 2.0 Magnetic Resistance Trainer
- Item Model Number: 7103074
- Resistance Mechanism: Magnetic
- Number of Resistance Settings: 6
- Compatible Wheel Sizes: 26" to 29" and 700c wheels
- Axle Compatibility: Quick-release rear wheels (not compatible with thru-axles)
- Frame Material: Alloy Steel
- Roller Material: Steel
- Foldable: Yes, for easy storage
- Approximate Dimensions (folded): 60.96 x 57.15 x 20.32 cm (24 x 22.5 x 8 inches)
- Approximate Weight: 9.03 kg (19.9 lbs)
9. Warranty & Support
For warranty information or technical support regarding your Bell Motivator 2.0 Magnetic Resistance Trainer, please refer to the documentation included with your purchase or contact Bell customer service directly. Keep your proof of purchase for warranty claims.
Manufacturer: VISTA OUTDOOR SALES LLC


