1. Introduction
The ECHOBBY UP600+ is a high-performance dual-channel charger designed for LiPo and LiHV batteries, specifically catering to the needs of large drones. It supports simultaneous charging and storage of two 2-6S LiPo/LiHV battery packs. This manual provides essential information for safe and efficient operation of your UP600+ charger.

Image 1.1: Front view of the ECHOBBY UP600+ Dual Channels LiPo LiHV Charger, showcasing its dual-channel display and robust design.
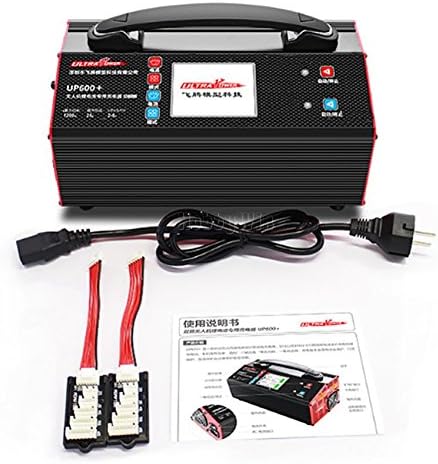
Image 1.2: The UP600+ charger displayed with its included power cable and balance charging boards.
2. Important Safety Instructions
These warnings and safety instructions are particularly important. Please follow the instructions for maximum safety. Otherwise, the charger and the battery can be damaged or at worst it can catch fire.
- Never leave the charger unattended when it is connected to its power supply. If any malfunction is found, TERMINATE THE PROCESS AT ONCE and refer to the operation manual.
- Keep the charger away from dust, moisture, rain, heat, direct sunshine, and vibration.
- The input voltage is AC 110V or AC 220V. Before connecting to the power source, please ensure the input voltage matches the charger's requirement.
- Default battery type is standard LiPo battery type with charge mode. Before connecting the battery, please keep the battery type compliant with the charger setting.
- Users must be at least 18 years or older to purchase and operate this device.

Image 2.1: Excerpt from the manual showing important safety warnings and troubleshooting tips.
3. Product Overview and Features
The UP600+ is specifically designed for dual-channel LiPo/LiHV charging of large drone batteries. It offers a "one-button charge" function for ease of use and includes multiple protection features to ensure maximum safety during operation.
Key Features:
- Supports charging of two 2-6S LiPo/LiHV batteries simultaneously.
- Independent radio battery connection port for charging 2-3S radio batteries (one at a time).
- Adjustable charging current: 5A, 10A, 15A, 20A, 25A.
- Two work modes: Balance Charge mode and Storage mode.
- Memorizes the last used charging current setting.
- Multiple protection functions: over-voltage, over-current, reverse polarity, and over-temperature protection.
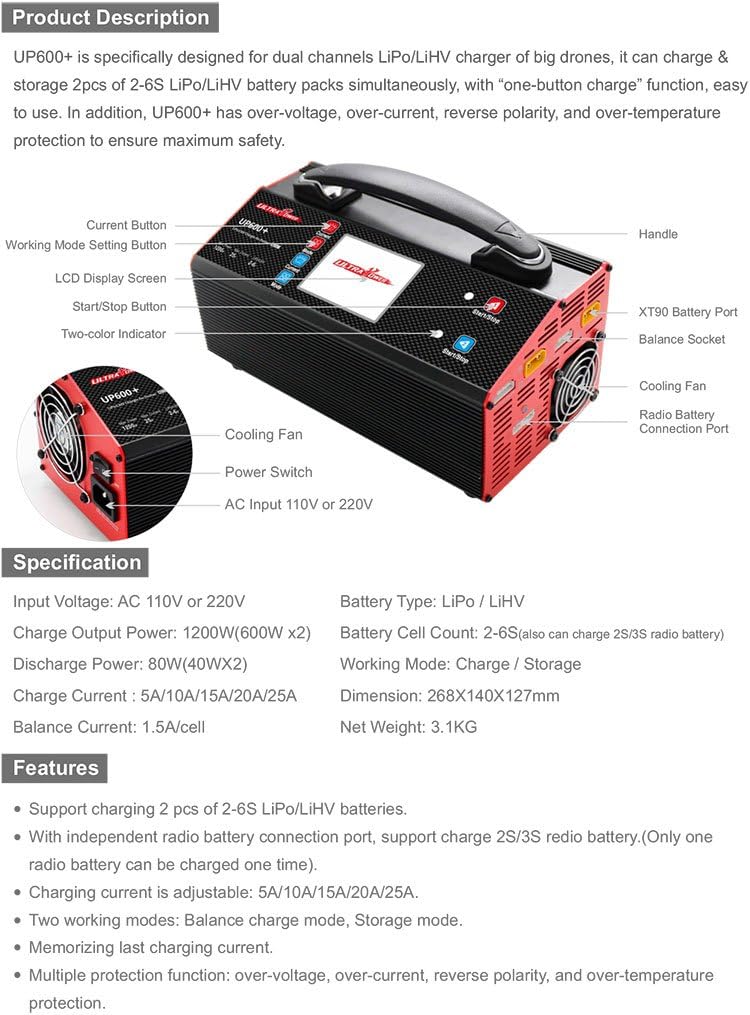
Image 3.1: Detailed diagram of the UP600+ charger, highlighting its various components such as the LCD screen, control buttons, cooling fans, and battery ports.
4. Specifications
| Parameter | Value |
|---|---|
| Input Voltage | AC 110V or 220V |
| Charge Output Power | Max. 1200W (600W x2) |
| Discharge Power | Max. 80W (40W x2) |
| Charge Current | 5A / 10A / 15A / 20A / 25A |
| Balance Current | 1.5A/cell |
| Battery Type | LiPo / LiHV |
| Battery Cell Count | 2-6S (also supports 2-3S radio battery) |
| Work Mode | Charge / Storage |
| Dimensions | 268 x 140 x 127 mm (10.55 x 5.51 x 5 inches) |
| Net Weight | 3.1 kg (6.83 lb) |
5. Setup and Initial Power On
- Power Connection: Connect the power cord to the charger's AC input port and then to a suitable AC 110V or 220V power outlet. Ensure the voltage matches the charger's requirement.
- Power On: Turn on the power switch located on the side of the charger. The two-color indicators will illuminate for 2 seconds, and the LCD display screen will show the start-up page for 2 seconds before entering standby mode.

Image 5.1: Illustration of the power-on sequence and the correct method for connecting batteries to the charger.
6. Operating Instructions
6.1. Battery Connection
Connect your batteries to the charger as illustrated below. Ensure both the main power connector and the balance socket are securely connected.
- 1) Connect the main battery connector to the XT90 Battery Port.
- 2) Connect the balance lead to the Balance Socket.

Image 6.1.1: The UP600+ charger with two large LiPo batteries connected, demonstrating proper connection points.
6.2. Setting Charging Parameters
Follow these steps to set the charging current and mode:
- Press the Current button to cycle through and choose the appropriate charging current: 5A, 10A, 15A, 20A, or 25A. (It is generally recommended to charge at 1C, where 1C is the battery's capacity in Amps, e.g., 10000mAh battery = 10A).
- Press the Mode button to select the desired work mode. The default mode is Charge mode.
- Long press the Start/Stop button for 2 seconds until you hear a "beep" sound. The two-color indicator will flash, indicating that charging is in progress.
- To stop the charging process, press the Start/Stop button again.

Image 6.2.1: The charger's LCD screen displaying current charging parameters, including voltage, current, and battery status.
6.3. Charging Process and Battery Level Status
During charging, the LCD screen will display real-time information such as voltage, current, and elapsed time. The two-color indicator will show red when charging is active. The display will switch between different interface views every few seconds.
6.4. Switching Between LiPo and LiHV Battery Types
Please take this seriously: using the wrong battery type setting will damage the battery and could even cause a fire or explosion.
- LiPo battery switch to LiHV battery: Press the Current and Mode buttons simultaneously for 3 seconds. The device will enter LiHV battery mode.
- LiHV battery switch to LiPo battery: Only need to press the Current and Mode buttons simultaneously. The device will enter LiPo battery mode. (LiPo cut-off voltage: 4.2V; LiHV cut-off voltage: 4.35V).
6.5. Storage Mode
If a Lithium battery is not used for a long time, it is highly recommended to charge or discharge the battery to 3.80V per cell using Storage mode. This extends the battery's life. If the battery voltage is higher than 3.80V per cell, the charger will discharge the battery. If the battery voltage is lower than 3.80V per cell, the charger will charge the battery to the storage voltage.
- Press the Mode button to choose the Storage mode.
- Long press the Start/Stop button to enter Storage mode.
7. Troubleshooting
When the charger displays abnormal situations, the two-color indicators will flash red, and the LCD screen will show a fault message. Refer to the table below for specific message notifications and their causes.
| Fault Message | Cause Analysis |
|---|---|
| Connection Break | No battery connected; check if the battery main port is correctly connected to the device. |
| Reverse Polarity | Battery polarity reversed; check the battery main port polarity connection. |
| Cell Voltage High | Balance socket voltage abnormality; check if the battery balance port is correctly connected to the device; check if the battery voltage is normal or not. |
| INT. TEMP High | Temperature protection; check the cooling fan is running normally or not and check if the external environment temperature is too high. |
| Over Load! | Current overload protection; the device will stop charging once the current is over 30A. |
8. Warranty and Service
ECHOBBY guarantees this product to be free of manufacturing and assembly defects for a period of one year from the date of purchase. The warranty only applies to material or operational defects that are present at the time of purchase. During that period, we will repair or replace free of service charge for products deemed defective due to those causes.
You will be required to produce proof of purchase (invoice or receipt). This warranty is not valid for any damage or subsequent damage arising as a result of misuse, modification, or as a result of failure to observe the procedures outlined in this manual.