MASUNN T189
MASUNN T189 Mini DV Camera User Manual
Model: T189
1. Introduction
This manual provides comprehensive instructions for the operation and maintenance of your MASUNN T189 Mini DV Camera. The T189 is a compact, portable digital video recorder designed for high-definition video and photo capture. Please read this manual thoroughly before using the device to ensure proper functionality and longevity.
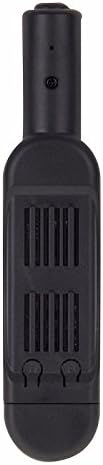
Figure 1: Front view of the MASUNN T189 Mini DV Camera, showcasing its compact and discreet design.
2. Product Overview
2.1 Key Features
- High-quality high-definition images with full HD1080P DV DC capability.
- Compact and portable design for discreet use.
- Supports HD video recording in 1280 x 720p and 1920 x 1080p resolutions.
- Photo capture mode with 8MP resolution.
- Fast data transfer via USB 2.0 interface.
- External TF card slot supporting up to 32GB (TF card not included).
- TV Out function for connecting to a TV monitor.
- Built-in lithium battery providing approximately 330 minutes (5.5 hours) of continuous recording.
- Integrated microphone for audio recording.
2.2 Product Components
Familiarize yourself with the various parts of your T189 Mini DV Camera:
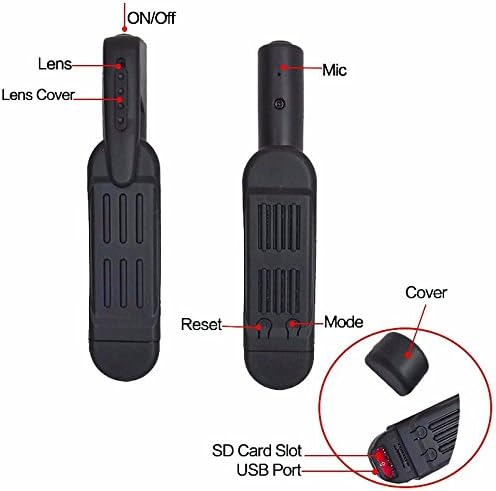
Figure 2: Component Diagram of the T189 Mini DV Camera. This image illustrates the location of the ON/Off button, Lens, Lens Cover, Microphone, Reset button, Mode button, SD Card Slot, and USB Port.
- ON/Off Button: Used to power the device on or off.
- Lens: The camera's optical component for capturing images and video.
- Lens Cover: Protects the lens when not in use.
- Mic: Built-in microphone for audio recording.
- Reset Button: Used to reset the device in case of malfunction.
- Mode Button: Cycles through different operating modes (e.g., 720p video, 1080p video, photo).
- SD Card Slot: For inserting a Micro SD (TF) card (up to 32GB) for storage.
- USB Port: Mini 8pin USB port for charging, data transfer, and TV Out connection.
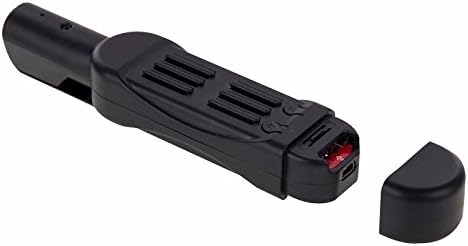
Figure 3: View of the T189 Mini DV Camera with the protective cap removed, revealing the Micro SD card slot and the Mini USB port.
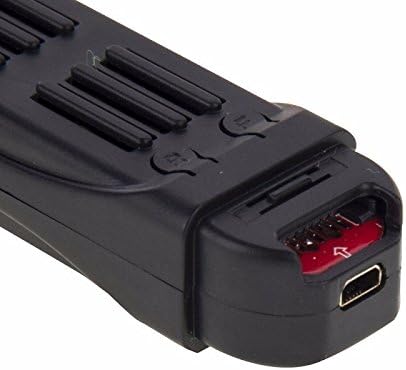
Figure 4: A detailed close-up of the T189 Mini DV Camera's Mini USB port and the Micro SD card slot, showing the internal components.
3. Setup
3.1 Charging the Device
Before first use, fully charge the T189 Mini DV Camera. Connect the device to a DC 5V power source using the provided USB cable. The charging time is approximately 3.0 hours. The indicator light will typically change or turn off once fully charged.
3.2 Inserting a Micro SD (TF) Card
The device requires a Micro SD (TF) card for storing recordings. The card is not included. Ensure the card is formatted correctly (FAT32 recommended) before insertion. The device supports cards up to 32GB.
- Locate the SD card slot on the device (refer to Figure 3).
- Gently insert the Micro SD card into the slot with the gold contacts facing down until it clicks into place.
- To remove, gently push the card in until it clicks again, and it will spring out.
4. Operating Instructions
4.1 Power On/Off
- Power On: Press and hold the ON/Off button for a few seconds until the indicator light illuminates.
- Power Off: Press and hold the ON/Off button again for a few seconds until the indicator light turns off.
4.2 Video Recording
The T189 supports two video resolutions: 1280x720p and 1920x1080p.
- Select Mode: After powering on, press the Mode button to cycle through the video recording modes. The indicator light will change to indicate the selected mode (refer to the full manual for specific light patterns).
- Start Recording: Once the desired video mode is selected, press the ON/Off button briefly to start recording. The indicator light will typically flash or change color to indicate recording is in progress.
- Stop Recording: Press the ON/Off button briefly again to stop recording. The device will save the video file and return to standby mode.
4.3 Photo Capture
The device can capture still images at 8MP resolution.
- Select Mode: After powering on, press the Mode button until the indicator light signifies photo mode (refer to the full manual for specific light patterns).
- Take Photo: Press the ON/Off button briefly to capture a photo. The indicator light will flash once to confirm the photo has been taken and saved.
4.4 Connecting to a Computer (PC)
You can connect the T189 to a computer to transfer files or use it as a webcam (driver installation may be required for webcam functionality).
- Ensure the device is powered off.
- Connect the T189 to your computer using the provided USB cable.
- The device will be recognized as a removable disk. You can then access the stored video and photo files.
4.5 Connecting to a TV (TV Out)
The T189 supports TV Out functionality, allowing you to view recordings directly on a television.
- Connect the T189 to your TV using the appropriate AV cable (usually included with the USB cable, as shown in Figure 5).
- Select the correct AV input on your television.
- The device's interface should appear on your TV screen, allowing you to navigate and play back files.

Figure 5: The MASUNN T189 Mini DV Camera packaging, including the USB and AV cable, and a small instruction sheet. The cable is essential for charging and connecting to a TV or PC.
5. Maintenance
- Keep the device dry. Avoid exposure to water or high humidity.
- Clean the lens regularly with a soft, lint-free cloth to ensure clear recordings.
- Avoid dropping or subjecting the device to strong impacts.
- Store the device in a cool, dry place when not in use.
- Periodically back up your recorded files to a computer or external storage to prevent data loss.
6. Troubleshooting
- Device not turning on:
- Ensure the battery is fully charged. If the issue persists, try pressing the Reset button with a thin object (like a paperclip) to restart the device.
- Cannot record or save files:
- Check if a Micro SD (TF) card is properly inserted. Ensure the card has sufficient free space. If the card is full, transfer files to a computer and delete them from the card, or replace the card. Ensure the card is formatted correctly (FAT32).
- Poor video/photo quality:
- Clean the camera lens. Ensure adequate lighting in the recording environment. Verify that the correct resolution mode (720p or 1080p) is selected for video recording.
- Device not recognized by computer:
- Ensure the device is powered off before connecting to the computer. Try a different USB port or cable. Restart your computer. If necessary, try installing generic USB device drivers.
7. Specifications
| Feature | Detail |
|---|---|
| Model | T189 |
| Material | Plastic |
| Video Resolution | 1920 x 1080p, 1280 x 720p |
| Photo Resolution | 8.0 MP |
| Charging Voltage | DC 5V |
| Memory Medium | Micro-SD card (TF card), up to 32GB (not included) |
| Battery Type | Li-polymer battery |
| Battery Capacity | 850 mAh |
| Battery Life | Approx. 330 minutes (5.5 hours) |
| Charging Time | Approx. 3.0 hours |
| Interface | Mini 8pin USB, TF card slot |
| Operating System Compatibility | Windows 2000, 2003, XP, Me, Vista, Mac OS, Linux |
| Dimensions | 10.8 x 2.3 x 2 cm |
| Weight | 35g |
| Video Format | AVI |
| Video Encoding | M-JPEG |
| Image Format | JPG |
| Image Ratio | 4:03 |
8. Warranty and Support
Specific warranty information for the MASUNN T189 Mini DV Camera is not provided in the product details. For warranty claims or technical support, please contact your retailer or the manufacturer directly.
A more detailed English manual can be downloaded from the following link:
The code for the link is: _7zDxDFnV2XjeWF_f5nXKRY7ZTeHSwXgLDEsXhVHD1c