Introduction
This instruction manual provides detailed guidance for the installation, maintenance, and safe use of your new USonline911 replacement shaver heads. These replacement heads are designed to restore optimal shaving performance for compatible Philips Norelco electric shavers. Please read this manual thoroughly before use.
Safety Information
Caution:
- To avoid cuts and skin irritation, ensure the shaver head is clean and in good condition before use.
- Clean the shaver head thoroughly after each use to prevent bacterial growth.
- Do not use the shaver near water or while charging.
- Keep out of reach of children.
Compatible Shaver Models
These replacement shaver heads are compatible with Philips Norelco HQ8 series electric shavers, including but not limited to the following models:
- 7950XL
- 7800XL, 7800XLcc
- 7810XL
- 7380XL, 7360XL, 7350XL, 7345XL, 7340XL, 7325XL, 7315XL, 7310XL
For optimal performance, it is recommended to replace your shaver heads every 12 months.
Package Contents
Your package should contain:
- 3x Replacement Shaver Heads (Blades and Foils)

Image: A set of three replacement shaver heads, each consisting of a circular foil and a multi-bladed cutter, displayed against a white background.
Installation Instructions
1. Open the Shaver Head Unit:
Locate the release button on your shaver (usually near the head) and press it to open the shaver head unit. Gently pull the entire head assembly away from the shaver body to detach it.

Image: A complete shaver head assembly, showing the three circular heads and their underlying blades, ready for installation or removal.
2. Remove the Retaining Ring:
Inside the detached shaver head unit, you will find a retaining ring that holds the individual blades in place. Turn this ring counter-clockwise (usually indicated by arrows) to unlock it, then carefully lift it out.
Video: Demonstrates how to remove the retaining ring and individual shaver blades from a Philips Norelco shaver head for replacement.
3. Remove Old Blades:
Once the retaining ring is removed, you can carefully lift out the old shaver foils and blades. Dispose of them properly.
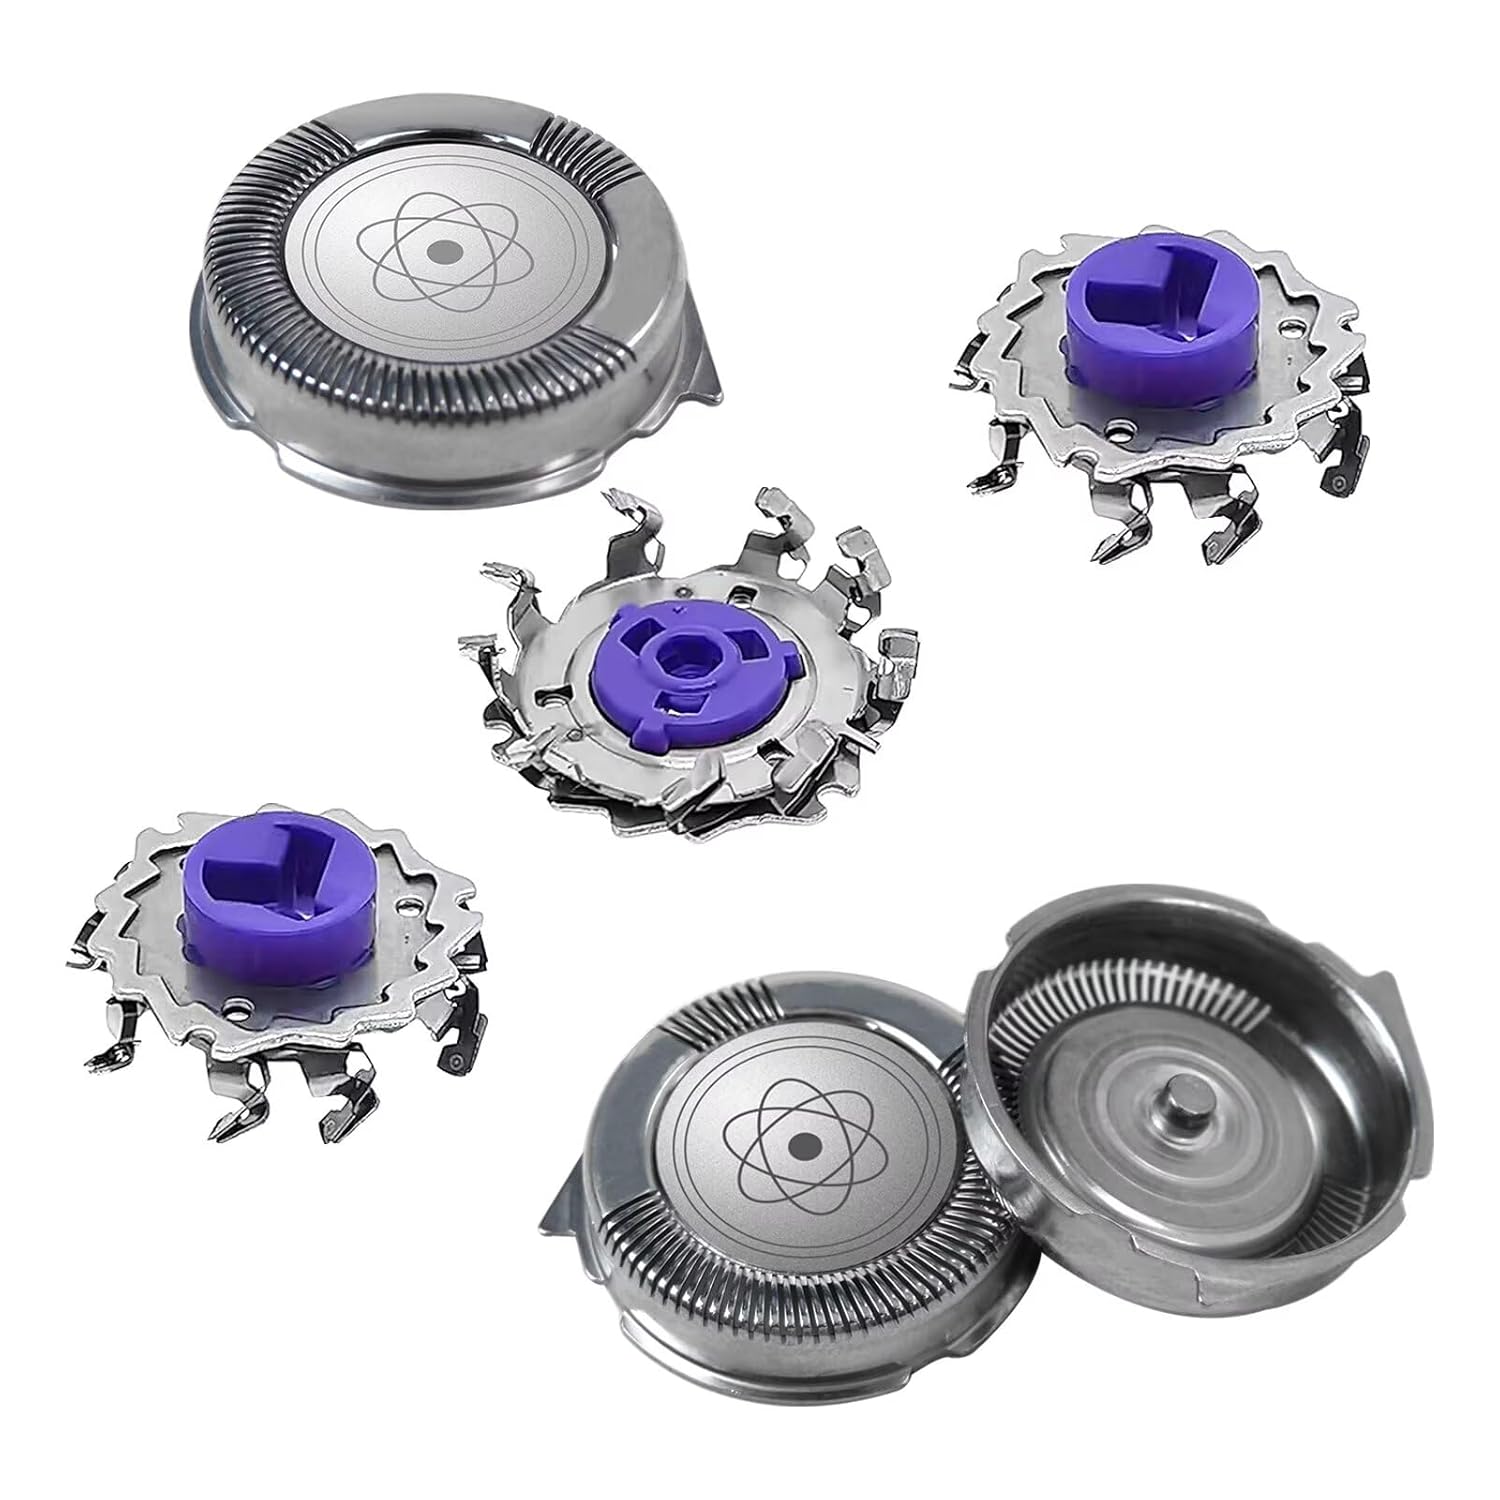
Image: An exploded view of a shaver head, illustrating the separate foil and cutter components, useful for understanding how they fit together.
4. Insert New Blades:
Place the new replacement foils into the shaver head unit. Ensure they sit flush. Then, place the new blades into each foil. Pay attention to the orientation; the small "dog ear" tabs on the blades should align with the corresponding slots in the shaver head unit to ensure proper fit and function.

Image: A close-up showing the individual shaver head components, including the foils and multi-bladed cutters, ready for assembly.
5. Reattach Retaining Ring:
Place the retaining ring back over the new blades and foils. Turn it clockwise until it locks securely into place. You should hear a click or feel it firmly seat.
6. Reattach Shaver Head Unit:
Align the shaver head unit with the shaver body and gently press it back into place until it clicks securely. Ensure it is firmly attached.
7. Reset Shaver Reminder (if applicable):
Some shaver models have a replacement reminder indicator. To reset it, press and hold the power button for approximately 5 seconds until the indicator light turns off or resets.
Maintenance
Regular cleaning and timely replacement of shaver heads are crucial for maintaining optimal performance and hygiene.
Daily Cleaning:
After each shave, open the shaver head unit and rinse the blades and foils under warm running water. You can also use a small brush to remove any trapped hair. Allow the heads to air dry completely before closing the unit.
Video: Demonstrates the process of maintaining and deep cleaning a Philips electric shaver, including rinsing under water and disassembling for thorough cleaning.
Deep Cleaning (Recommended every 6 months):
For a more thorough clean, you can disassemble the shaver heads as described in the installation section. Soak the individual foils and blades in a solution of warm water and a mild soap or a specialized shaver cleaning solution for about 10-15 minutes. Rinse thoroughly and allow to air dry completely before reassembling.

Image: Individual shaver head components, including foils and cutters, shown in a container of water for deep cleaning.
Replacement Frequency:
For maximum shaving performance and hygiene, it is recommended to replace your shaver heads every 12 months.
Specifications
- Brand: USonline911
- Model Number: 9021-AO694-02
- Included Components: 3x Shaver Heads (Blades and Foils)
- Recommended Use: Head shaving
- Power Source: Battery Powered (Shaver unit, not included)
- Package Dimensions: 6.34 x 4.69 x 0.39 inches
- Item Weight: 0.88 ounces
Troubleshooting
Poor Shaving Performance:
- Cause: Worn or dull blades.
- Solution: Replace shaver heads every 12 months.
- Cause: Insufficient cleaning.
- Solution: Perform daily and deep cleaning as outlined in the Maintenance section.
Skin Irritation:
- Cause: Dirty or damaged shaver heads.
- Solution: Ensure heads are clean and in good condition. Replace if damaged.
- Cause: Skin not adapted to electric shaving.
- Solution: Allow 3-4 weeks for skin to adapt if new to electric shaving.
Warranty and Support
For warranty information or product support, please refer to the contact details provided by USonline911 at the point of purchase or visit their official website. Keep your purchase receipt for warranty claims.