TC-Home PAR64
TC-Home PAR64 LED Stage Light User Manual
Model: PAR64 | For 18X15W RGBWA UV 6 in 1 LED Stage Lights
1. Introduction
Thank you for choosing the TC-Home PAR64 LED Stage Light. This professional-grade lighting fixture is designed for various applications, including stage performances, events, and architectural lighting. Featuring 18 powerful 15W RGBWA UV 6-in-1 LEDs, it offers a wide spectrum of colors and effects. Its robust IP65 waterproof design ensures reliable operation in diverse environments. Please read this manual thoroughly before operation to ensure safe and correct usage.
2. Safety Information
To prevent electric shock or fire, and to ensure the longevity of your device, please observe the following safety precautions:
- Always connect the device to a grounded power outlet.
- Ensure the input voltage (AC90-240V, 50-60Hz) matches your local power supply.
- Do not open the housing. There are no user-serviceable parts inside. Refer all servicing to qualified personnel.
- Avoid direct eye exposure to the light source. The light output is very bright.
- Ensure adequate ventilation around the fixture. The maximum ambient temperature is 40°C (104°F), and the maximum lamp temperature is 60°C (140°F).
- Keep the device away from rain, moisture, and excessive heat.
- Disconnect power before cleaning or performing any maintenance.
CAUTION: RISK OF ELECTRIC SHOCK! DO NOT OPEN!
3. Product Overview
3.1 Key Features
- Light Source: 18PCS*15W RGBWA UV 6IN1 LEDs
- Power Consumption: 270W
- Lamp Lifetime: Approximately 100,000 hours
- Waterproof Level: IP65
- Color Mixing System: 6IN1 RGBAW UV unlimited color mixing
- Control Modes: DMX512, Sound Activated, Auto, Master-slave
- Dimmer: 0 ~ 100% linearly adjustable
- Strobe: 0-20 t/s
- Housing Material: Die-cast aluminum housing (Black)
3.2 Components
The TC-Home PAR64 LED Stage Light features a robust design with essential components for versatile operation.
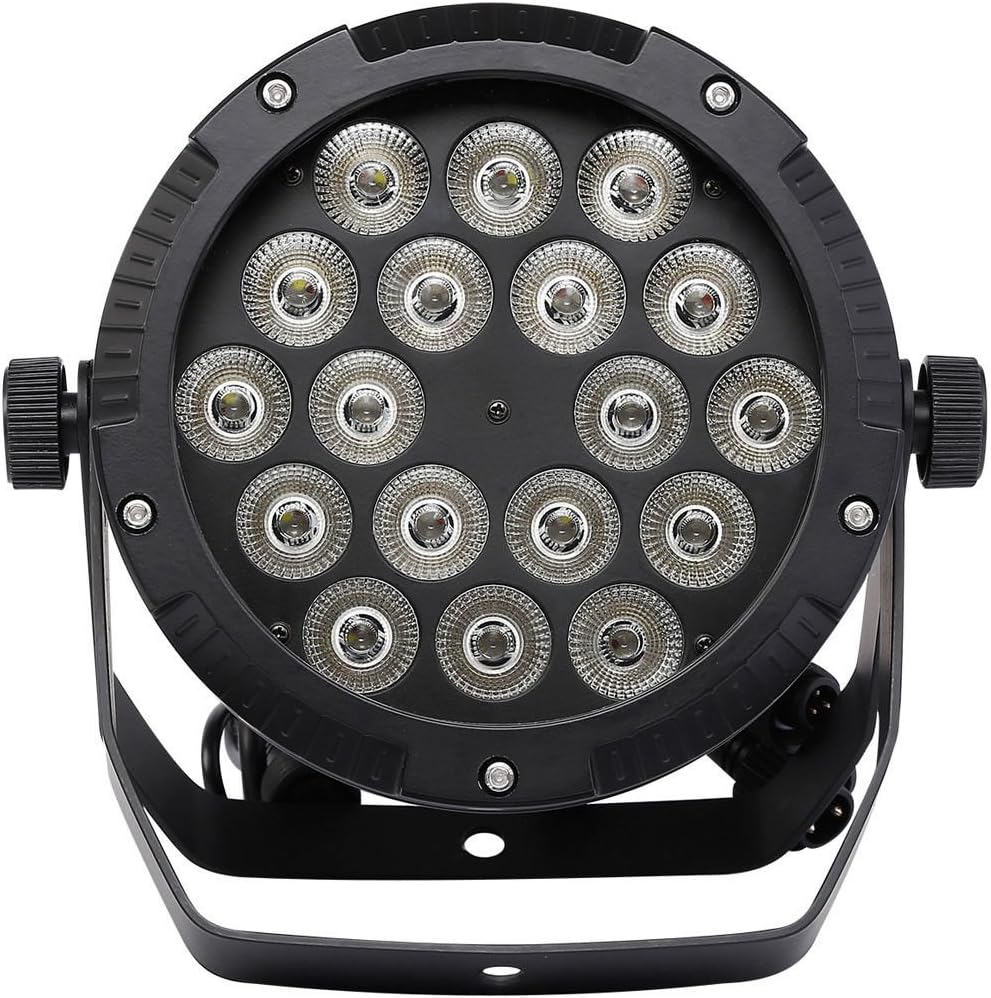
Figure 1: Front view of a single PAR64 LED Stage Light, showing the array of 18 LEDs.
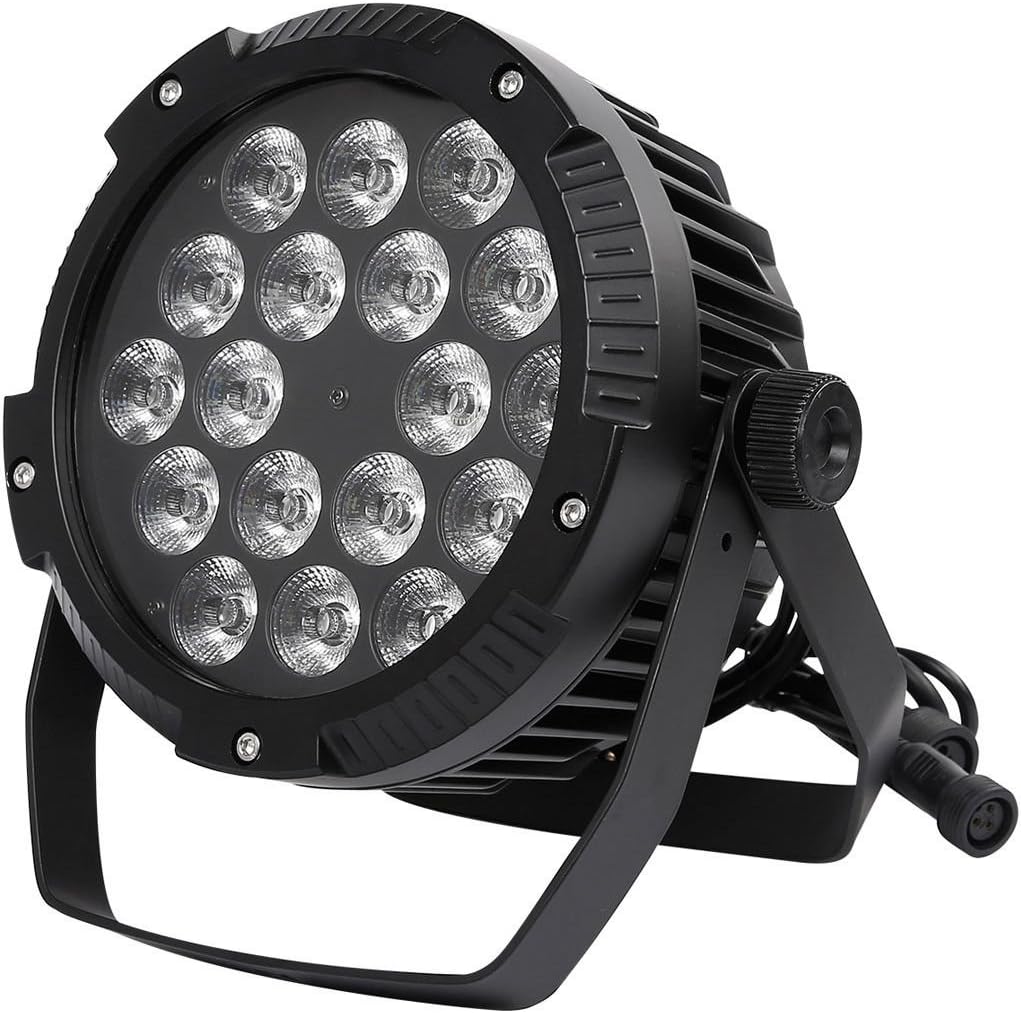
Figure 2: Angled view of the PAR64 light, highlighting its sturdy bracket and heat sink design.

Figure 3: Rear panel of the light, featuring the LED digital display, control buttons (MENU, UP, DOWN, ENTER), Power In/Out, and DMX In/Out ports.

Figure 4: Close-up view of the waterproof DMX and power connectors, ensuring secure and reliable connections.
4. Setup
4.1 Mounting
The PAR64 light comes with a dual-yoke bracket for flexible mounting. It can be securely mounted on a truss, on the floor, or on a wall. Ensure the mounting surface or structure can support the weight of the fixture and any additional equipment. Use appropriate clamps and safety cables (not included) when mounting overhead.
4.2 Power Connection
Connect the provided power cable to the 'POWER IN' port on the rear of the fixture. Plug the other end into a suitable AC90-240V, 50-60Hz grounded power outlet. For daisy-chaining multiple units, use the 'POWER OUT' port to connect to the 'POWER IN' of the next fixture. Ensure the total power consumption does not exceed the circuit's capacity.
4.3 DMX Connection (Optional)
For DMX control, connect a DMX controller to the 'DMX IN' port using a 3-pin XLR cable. To link multiple fixtures, connect the 'DMX OUT' of the first fixture to the 'DMX IN' of the next, and so on. A DMX terminator is recommended for the last fixture in a chain to prevent signal reflection.
5. Operating Modes
The TC-Home PAR64 LED Stage Light offers multiple control modes, selectable via the LED digital display and control buttons (MENU, UP, DOWN, ENTER) on the rear panel.
5.1 DMX512 Mode
This mode allows for professional control using a DMX controller. The fixture uses 10 DMX channels. Refer to the DMX Channel Chart (typically provided in a separate DMX manual or online) for specific channel functions (e.g., Red, Green, Blue, White, Amber, UV intensity, Dimmer, Strobe, Color Macros, etc.).
- Set the DMX address for each fixture using the control panel. Each fixture in a DMX chain must have a unique address.
- Connect the DMX controller to the 'DMX IN' port.
- Ensure the DMX signal input and output are correctly wired (3-core XLR).
5.2 Sound Activated Mode
In this mode, the light reacts to ambient sound. The built-in microphone detects sound, and the light's patterns and colors change in sync with the music or audio. This mode is ideal for dynamic, responsive lighting without external control.
5.3 Auto Mode
The fixture cycles through pre-programmed internal shows and color sequences automatically. This mode is suitable for continuous, unattended operation, providing a variety of lighting effects without manual intervention.
5.4 Master-Slave Mode
This mode allows multiple fixtures to operate in synchronization without a DMX controller. Designate one fixture as the 'Master' and others as 'Slaves'. The Master fixture's settings (e.g., Auto mode, Sound mode) will control all connected Slave fixtures. Connect the 'DMX OUT' of the Master to the 'DMX IN' of the first Slave, and continue the chain.
6. Maintenance
Regular maintenance ensures the optimal performance and extends the lifespan of your PAR64 LED Stage Light.
- Cleaning: Periodically clean the lens and housing with a soft, lint-free cloth. For stubborn dirt, use a mild glass cleaner. Ensure the fixture is powered off and cool before cleaning.
- Inspection: Regularly check power cables, DMX cables, and connectors for any signs of wear, damage, or corrosion. Replace damaged cables immediately.
- Ventilation: Ensure the cooling fins on the housing are free from dust and debris to maintain proper heat dissipation.
- Storage: When not in use for extended periods, store the fixture in a dry, dust-free environment, preferably in its original packaging or a protective case.
7. Troubleshooting
If you encounter issues with your TC-Home PAR64 LED Stage Light, refer to the following common troubleshooting steps:
| Problem | Possible Cause | Solution |
|---|---|---|
| Light does not turn on | No power supply; Faulty cable; Internal fuse blown | Check power connection and outlet; Test with a different cable; Contact service for fuse replacement. |
| No DMX control | Incorrect DMX address; Faulty DMX cable; No DMX signal; DMX terminator missing | Verify DMX address setting; Check DMX cable connections; Ensure DMX controller is sending signal; Add DMX terminator to the last fixture. |
| Light flickers or behaves erratically | Unstable power; DMX signal interference; Overheating | Ensure stable power supply; Check DMX connections and cabling; Ensure adequate ventilation and ambient temperature. |
| Colors are incorrect or incomplete | DMX channel values incorrect; Internal mode issue | Verify DMX channel values on controller; Try resetting the fixture or switching to Auto mode to check internal functions. |
If the problem persists after attempting these solutions, please contact TC-Home customer support or a qualified technician.
8. Specifications
| Parameter | Value |
|---|---|
| Input Voltage | AC90-240V 50-60Hz |
| Light Source | 18PCS*15W RGBWA UV 6IN1 LEDs |
| Power Consumption | 270W |
| Lamp Lifetime | 100,000 hours |
| Waterproof Level | IP65 |
| Color Mixing System | 6IN1 RGBAW UV unlimited color mixing |
| Control Mode | DMX512/Sound/Auto/Master-slave |
| Operation Panel | LED Digital Display |
| DMX Channels | 10CH |
| Signal Input/Output | 3-core XLR |
| Dimmer | 0 ~ 100% linearly adjustable |
| Strobe | 0-20 t/s |
| Maximum Ambient Temperature | 40°C (104°F) |
| Maximum Lamp Temperature | 60°C (140°F) |
| Housing Material | Die-cast aluminum housing |
| Housing Color | Black |
| Gross Weight (approx) | 5.1KG / PC |
| Packing Size (approx) | 26×26×38cm / PC |
9. Warranty and Support
For warranty information, technical support, or service inquiries, please contact your original point of purchase or the TC-Home customer service department. Keep your purchase receipt as proof of purchase for any warranty claims.
For the most up-to-date information and support resources, please visit the official TC-Home website or contact their customer service directly.
Ask a question about this manual
Ask about setup, troubleshooting, compatibility, parts, safety, or missing instructions. Manuals+ will review the question and use this page’s manual context to help answer it.