Product Overview
The Youxmoto High Mount LED Third Brake Light (CHMSL) is designed to provide enhanced visibility and safety for your vehicle. This replacement unit features bright LED illumination and a durable polycarbonate red lens, offering superior UV protection and high impact resistance. It is engineered for a direct fit on compatible Chevy, GMC, and Buick models.
Key Features
- Super Bright LED Light for improved visibility.
- Polycarbonate Red Lens for UV protection and impact resistance.
- Gloss Surface, good rigidity, and heat resistance to prevent fading.
- Waterproof design for reliable performance in various weather conditions.
- PC Designed Full Linked Boards for longer lifetime.
Compatibility
This third brake light is compatible with the following vehicle models:
- Chevy models (2002-2009)
- GMC models (2002-2009)
- Buick models (2002-2009)
Package Contents
- 1 x Youxmoto Red Lens High Mount LED Third Brake Light
Safety Information
Please read and understand all instructions before installation. Improper installation can lead to electrical issues or damage to your vehicle. Always disconnect the vehicle's battery before performing any electrical work. If you are unsure about any step, consult a qualified automotive technician.
Installation Instructions
Follow these steps for proper installation of your new third brake light. Tools required may include a screwdriver (Phillips or flathead, depending on vehicle), a socket wrench set, and possibly trim removal tools.
- Prepare the Vehicle: Park your vehicle on a level surface and engage the parking brake. Turn off the ignition and remove the key. For safety, disconnect the negative terminal of your vehicle's battery.
- Access the Old Light: Locate the existing third brake light. Depending on your vehicle model, you may need to open the rear hatch or tailgate and remove interior trim panels to access the mounting screws or clips.
- Remove the Old Light: Carefully unscrew any mounting fasteners holding the old brake light in place. Disconnect the electrical connector by pressing the release tab and pulling it apart. Remove the old light assembly.
- Inspect and Prepare: Clean the mounting area to ensure a proper seal for the new light. Inspect the vehicle's wiring harness for any signs of damage.
- Connect the New Light: Take your new Youxmoto third brake light. Connect its electrical connector to the vehicle's wiring harness. Ensure the connection is secure.
- Test Functionality: Before fully mounting, reconnect the vehicle's battery. Have an assistant press the brake pedal to verify that the new LED brake light illuminates correctly. If it does not, check the electrical connection and ensure the light is properly seated. Disconnect the battery again after testing.
- Mount the New Light: Carefully position the new brake light into its opening. Secure it with the original mounting screws or clips. Ensure it is flush and tightly sealed to prevent water intrusion.
- Reassemble: Reinstall any interior trim panels or other components that were removed during the process.
- Final Check: Reconnect the negative battery terminal. Test the brake light function again to confirm proper operation.

Image: Front view of the Youxmoto High Mount LED Third Brake Light, showcasing its red lens and LED array.

Image: Rear view of the Youxmoto High Mount LED Third Brake Light, showing the mounting points and integrated wiring harness.

Image: Close-up of the electrical connector, illustrating the plug-and-play design for easy connection to the vehicle's existing wiring.
Operating Instructions
The Youxmoto High Mount LED Third Brake Light operates automatically. When the vehicle's brake pedal is pressed, the LED lights will illuminate, providing a clear signal to following drivers. The light will turn off when the brake pedal is released.
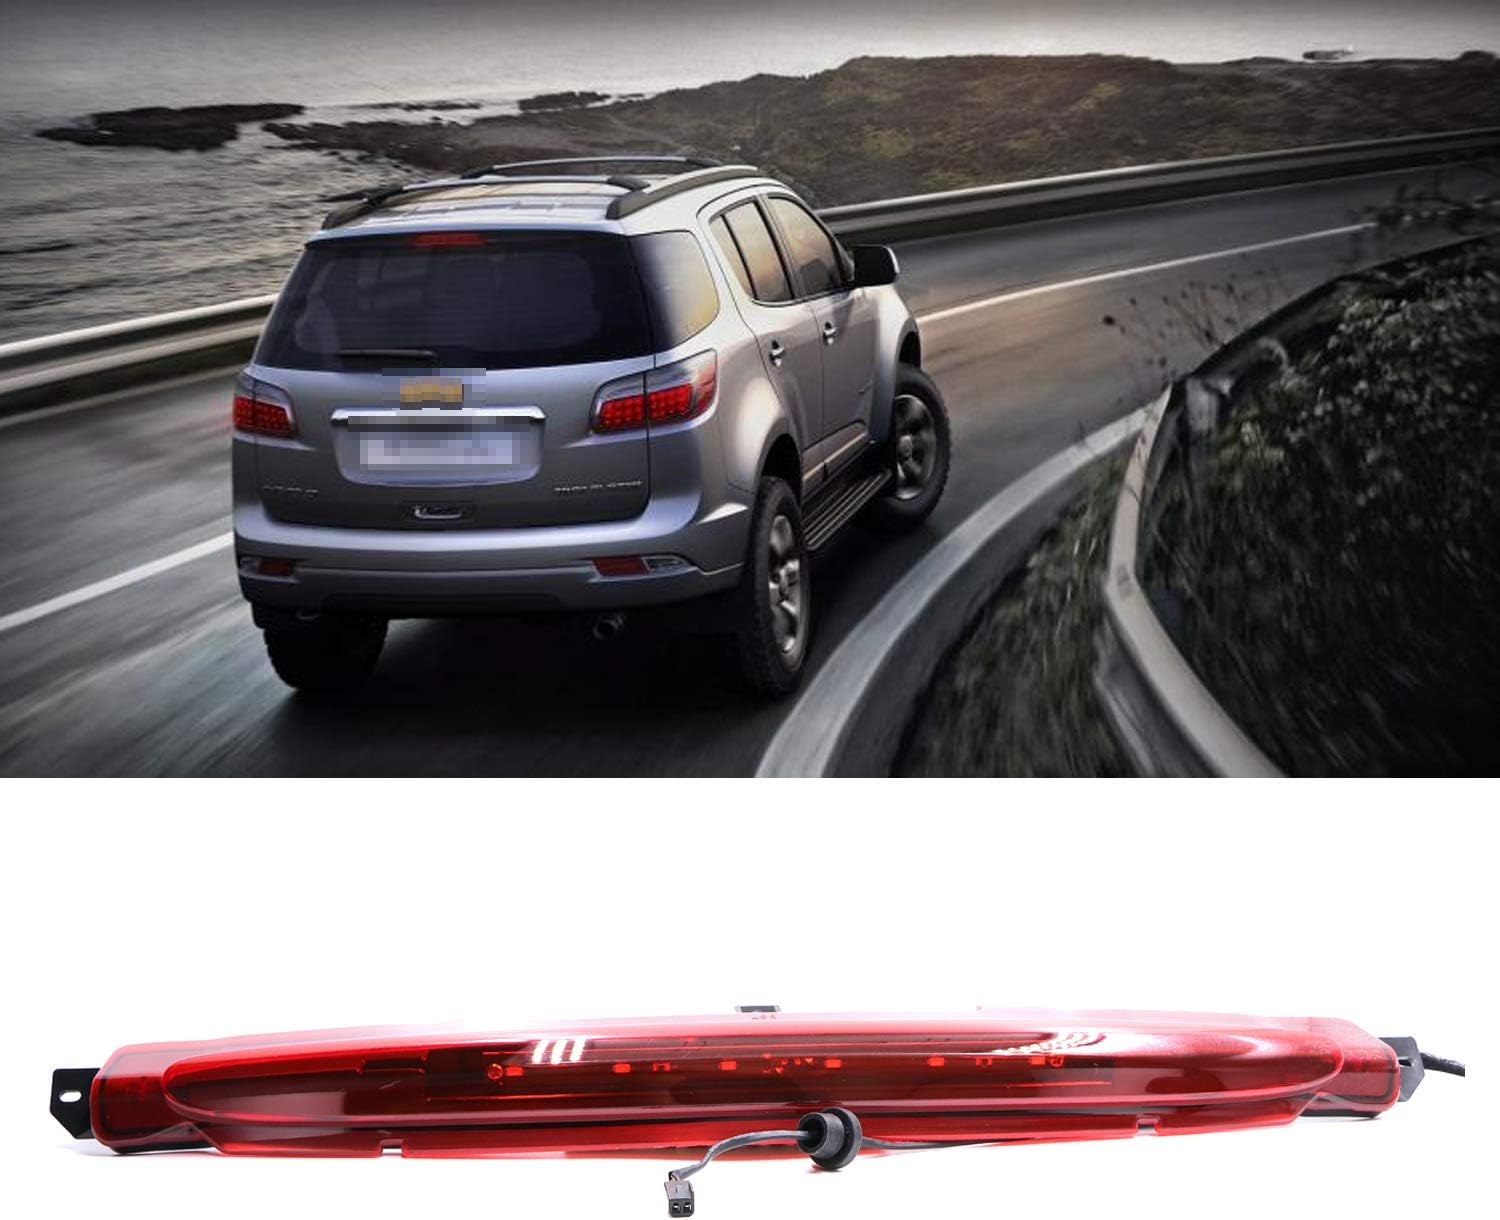
Image: The Youxmoto Third Brake Light shown installed on the rear of a compatible vehicle, demonstrating its integrated appearance.
Maintenance
This LED third brake light requires minimal maintenance. Periodically inspect the light for any dirt or debris accumulation on the lens. Clean the lens with a soft cloth and mild soap and water. Avoid using abrasive cleaners or solvents, as these can damage the polycarbonate material. Regularly check the light's function to ensure all LEDs are illuminating correctly.
Troubleshooting
- Light Does Not Illuminate:
- Check the electrical connection to ensure it is securely plugged in.
- Verify that the vehicle's brake light fuse is not blown.
- Ensure the vehicle's battery is properly connected and charged.
- If the issue persists, the unit may be faulty and require replacement.
- Light Flickers or is Dim:
- Inspect the electrical connection for any loose wires or corrosion.
- Check the vehicle's charging system to ensure stable voltage.
- Ensure the light is properly grounded.
- Water Inside the Lens:
- Ensure the light is properly sealed against the vehicle body. Re-tighten mounting screws if necessary.
- Check for any cracks or damage to the lens or housing.
Specifications
| Brand | Youxmoto |
| Model Number | YX1000054-1 |
| Lamp Type | LED Brake/Stop Light |
| Lens Color | Red |
| Lens Material | Polycarbonate |
| Special Feature | Waterproof |
| Auto Part Position | Center |
| Item Weight | 15.4 ounces |
| UPC | 706973353272 |
Warranty and Support
This Youxmoto product typically comes with a 1-year warranty covering manufacturing defects. For warranty claims, technical support, or any questions regarding your product, please contact Youxmoto customer service through the retailer where the product was purchased or visit the official Youxmoto website for contact information.
Please retain your purchase receipt as proof of purchase for warranty purposes.