1. Introduction
This manual provides comprehensive instructions for the safe and effective use of your BEAR FORCE High-Pressure Water Gun. Please read this manual thoroughly before operating the product to ensure proper function, longevity, and user safety. This product is designed for use with compatible high-pressure washers, specifically Lavor, Vax, Sterwins, and Parkside models.
2. Product Overview and Package Contents
The BEAR FORCE High-Pressure Water Gun system includes the main spray gun body and two interchangeable lances: a variable jet lance and a rotary turbo lance. These components are designed for various cleaning tasks, offering flexibility and efficiency.
Package Contents:
- 1 x High-Pressure Spray Gun
- 1 x Variable Jet Lance
- 1 x Rotary Turbo Lance

Figure 2.1: The complete BEAR FORCE High-Pressure Water Gun kit, including the main gun body, the variable jet lance, and the rotary turbo lance.
3. Setup Instructions
Before connecting the water gun, ensure your pressure washer is turned off and disconnected from the power supply. Always wear appropriate safety gear, including eye protection, during setup and operation.
- Inspect Components: Unpack all components and inspect them for any signs of damage. Do not use if any part is damaged.
- Connect the High-Pressure Hose: Connect your pressure washer's high-pressure hose to the inlet of the BEAR FORCE spray gun. This connection typically uses a quick-connect fitting. Ensure it is securely fastened to prevent leaks.
- Attach a Lance: Select either the variable jet lance or the rotary turbo lance based on your cleaning needs. Insert the chosen lance into the front nozzle connection point of the spray gun. Push firmly and twist until it clicks into place.

Figure 3.1: Detailed dimensions of the connection points on the lances and the gun, ensuring compatibility with various pressure washer hoses and accessories.

Figure 3.2: A close-up view of the red hose release button, which allows for quick and secure detachment of the high-pressure hose from the gun.
4. Operating Instructions
Once the water gun is properly connected to your pressure washer, you can begin operation. Always ensure a stable footing and maintain control of the gun during use due to the high pressure involved.
4.1. General Operation
- Water Supply: Ensure your pressure washer is connected to a sufficient water supply.
- Power On: Turn on your pressure washer according to its manufacturer's instructions.
- Engage Trigger: Aim the nozzle away from people, animals, and delicate objects. Squeeze the trigger on the water gun to begin the high-pressure spray.
- Safety Lock: The gun features a safety lock (often a small lever or button near the trigger, as shown in Figure 3.2) to prevent accidental activation. Engage this lock when not actively spraying.
4.2. Using the Variable Jet Lance
The variable jet lance allows you to adjust the spray pattern from a concentrated 0-degree pencil jet to a wide 60-degree fan spray. This versatility is ideal for various cleaning tasks, from stubborn dirt removal to gentle rinsing.
- Adjustment: To adjust the spray pattern, simply rotate the nozzle head of the variable jet lance. Turn it clockwise for a narrower, more powerful stream and counter-clockwise for a wider, less intense fan spray.
- Application: Use a narrow jet for tough stains on durable surfaces like concrete. Use a wider fan spray for general cleaning, rinsing, or on more delicate surfaces.
4.3. Using the Rotary Turbo Lance
The rotary turbo lance provides a powerful, oscillating jet that is highly effective for removing heavily ingrained dirt and grime. It creates a 25-degree rotational spray pattern, combining the impact of a solid stream with the coverage of a fan spray.
- Operation: The turbo lance operates at a fixed, rotating pattern. No adjustment is needed.
- Application: Ideal for cleaning large, heavily soiled areas such as driveways, patios, and brickwork. Not recommended for delicate surfaces due to its high impact.
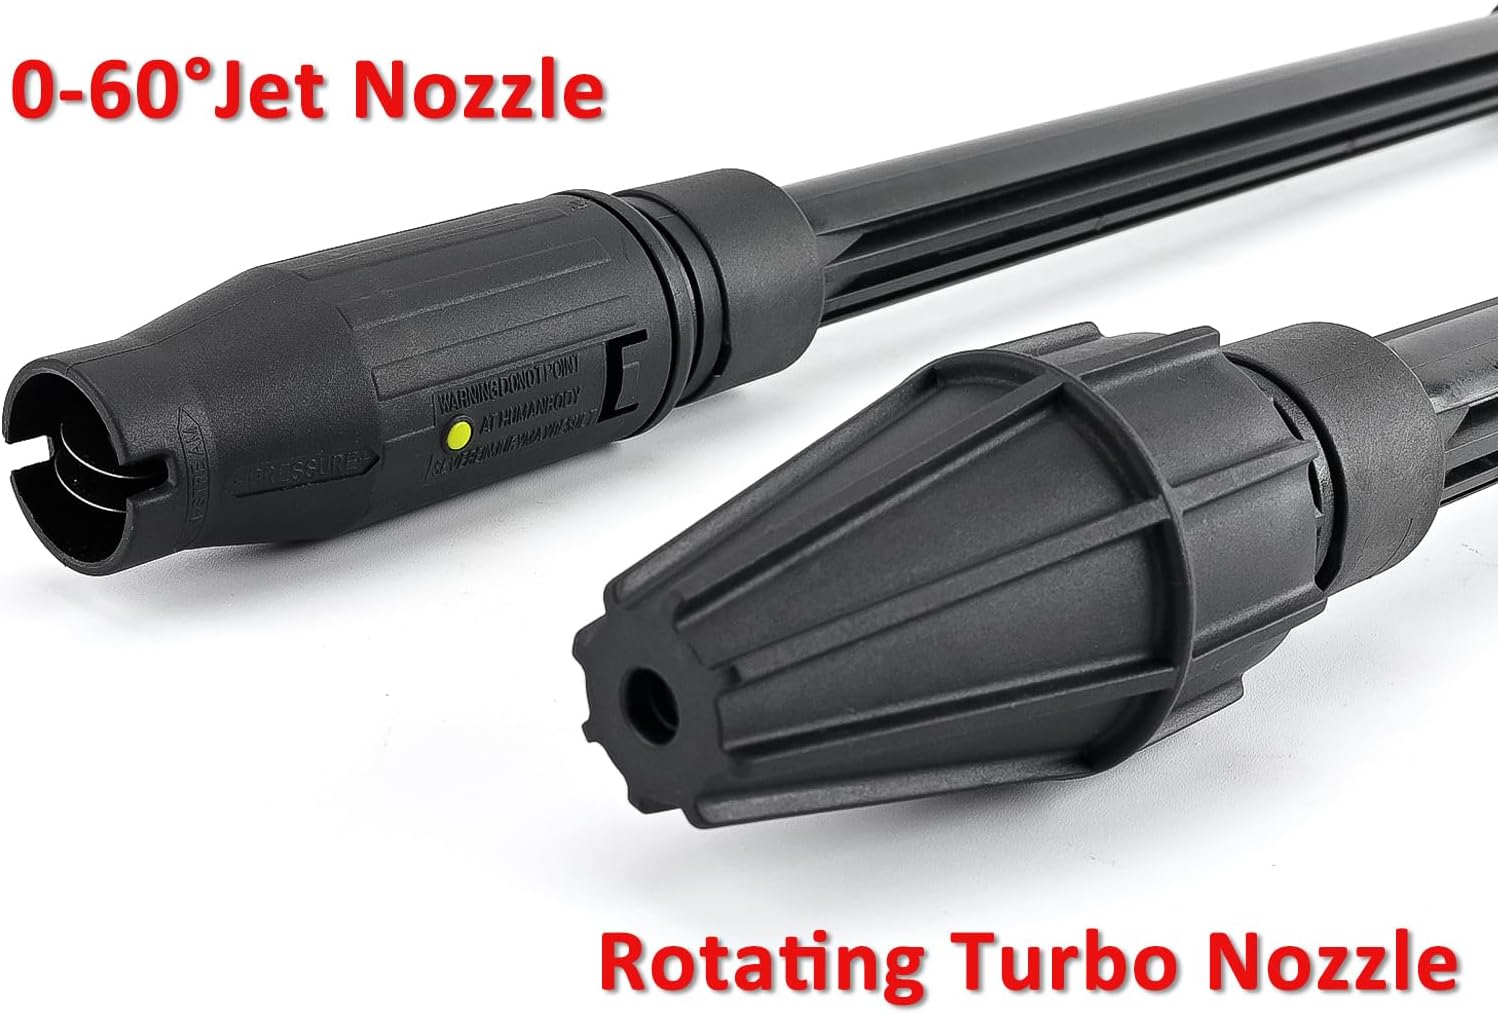
Figure 4.1: The two distinct lances included: the 0-60° Variable Jet Nozzle (left) and the Rotating Turbo Nozzle (right).

Figure 4.2: The adjustment mechanism of the variable jet nozzle, indicated by red arrows, allows users to easily switch between spray patterns by rotating the head.

Figure 4.3: A visual comparison demonstrating the 25° rotational spray of the Turbo Nozzle (top) versus the 0°-60° adjustable spray of the Variable Jet Nozzle (bottom).
5. Maintenance
Regular maintenance will ensure the optimal performance and extend the lifespan of your BEAR FORCE High-Pressure Water Gun.
- After Each Use: Disconnect the water gun from the pressure washer and flush it with clean water to remove any detergent residue or debris.
- Clean Nozzles: Periodically check the nozzles for blockages. Use a small wire or the included nozzle cleaning tool (if applicable) to clear any obstructions.
- Check Connections: Inspect all connections and O-rings for wear or damage. Replace worn O-rings to prevent leaks.
- Storage: Store the water gun and lances in a clean, dry place, away from direct sunlight and freezing temperatures.

Figure 5.1: Illustration showing how to properly screw the nozzles to the correct position for tightening, aligning the concave and convex points for a secure fit.
6. Troubleshooting
If you encounter issues with your high-pressure water gun, refer to the following common problems and solutions:
| Problem | Possible Cause | Solution |
|---|---|---|
| No water flow or low pressure | Nozzle clogged; Insufficient water supply; Kinked hose; Air in system | Clean nozzle; Ensure adequate water supply; Straighten hose; Bleed air from system by running water through the gun without the pressure washer on. |
| Water leaking from connections | Loose connections; Worn O-rings; Damaged fittings | Tighten all connections; Replace worn O-rings; Inspect and replace damaged fittings. |
| Lance not attaching securely | Debris in connection; Misalignment; Damaged quick-connect | Clean connection points; Ensure proper alignment before pushing and twisting; Inspect quick-connect for damage. |
7. Specifications
| Feature | Specification |
|---|---|
| Brand | BEAR FORCE |
| Model Number | 5190LG |
| Material | Plastic |
| Item Weight | 850 g |
| Product Dimensions (L x W x H) | 85 x 18 x 5 cm |
| Maximum Operating Pressure | 160 Bars (1.6E+2 Bars) |
| Maximum Temperature | 60 °C |
| Input Connection Type | Quick Connection |
| Output Connection Type | FNPT |
| Number of Ports | 2 |
| Valve Type | Ball Valve |
| Compatibility | Lavor, Vax, Sterwins, Parkside High-Pressure Cleaners |
8. Warranty and Support
This product is designed and manufactured to high standards. For any issues or support inquiries, please contact the seller directly through your purchase platform. The seller for this product is Bearforce Car Wash Shop.
Please note that the return policy allows for refunds or replacements within 30 days of purchase, subject to the terms and conditions of the retailer.
Legal Disclaimer: We are not affiliated with the mentioned pressure washer brands (Lavor, Vax, Sterwins, Parkside). This product offers compatible parts, not original equipment manufacturer (OEM) parts from those brands.