1. Introduction
This manual provides essential information for the safe and efficient installation, operation, and maintenance of the CRYDOM TD2410 Solid State Relay. Please read this manual thoroughly before using the product to ensure proper functionality and to prevent potential hazards.
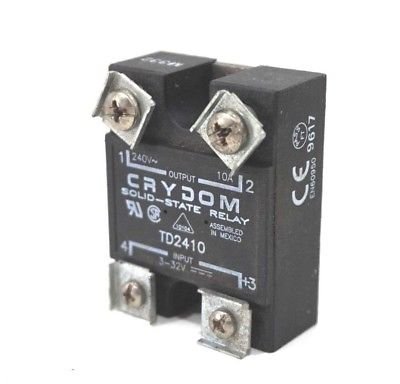
Figure 1: The CRYDOM TD2410 Solid State Relay. This image displays the compact black housing of the relay, featuring four screw terminals for connections. The top terminals are labeled '1' and '2' for the output, with '240V~ OUTPUT 10A' clearly visible. The bottom terminals are labeled '4' and '3' for the input, with 'INPUT 3-32V === +3' indicating the DC control voltage. The CRYDOM brand and TD2410 model number are prominently displayed on the front face, along with certifications like CE and EN60950.
2. Safety Information
Always observe the following safety precautions to prevent injury or damage to the device:
- Ensure all power sources are disconnected before installation or maintenance.
- Installation should only be performed by qualified personnel.
- Verify correct wiring connections according to the provided diagrams and specifications.
- Do not exceed the specified voltage and current ratings.
- Protect the relay from moisture, dust, and extreme temperatures.
- Use appropriate fusing and circuit protection for the load and control circuits.
3. Product Overview
The CRYDOM TD2410 is a compact, panel-mount solid state relay designed for switching AC loads. It offers reliable, silent, and fast switching capabilities compared to traditional electromechanical relays. Key features include:
- Input Control: DC 3-32V
- Output Load: AC 240V, 10A
- Mounting: Panel Mount
- Certifications: CE, EN60950
4. Setup and Installation
4.1 Mounting
The TD2410 is designed for panel mounting. Secure the relay using appropriate screws through the mounting holes. Ensure adequate ventilation around the relay, especially when operating at higher currents, to prevent overheating.
4.2 Wiring Connections
Refer to the markings on the relay and the diagram below for correct wiring. Always ensure power is disconnected before making any connections.
- Input Control Terminals:
- Terminal +3: Positive DC input (3-32V)
- Terminal 4: Negative DC input
- Output Load Terminals:
- Terminal 1: AC Load connection (240V~)
- Terminal 2: AC Load connection (240V~)
Connect the DC control voltage (3-32V) to terminals +3 and 4. When the control voltage is applied, the relay will switch the AC load connected to terminals 1 and 2. Ensure the AC load voltage does not exceed 240V and the current does not exceed 10A.
5. Operating Instructions
Once properly installed and wired, the CRYDOM TD2410 Solid State Relay operates by applying a DC control voltage to its input terminals. The relay will switch the AC load connected to its output terminals when the control voltage is within the specified range (3-32V DC).
- Ensure all wiring is correct and secure.
- Apply the AC load voltage to terminals 1 and 2.
- Apply a DC control voltage between 3V and 32V to terminals +3 (positive) and 4 (negative).
- The relay will turn ON, allowing current to flow through the AC load.
- To turn the relay OFF, remove the DC control voltage from terminals +3 and 4.
The TD2410 is a zero-crossing relay, meaning it switches the AC load on or off when the AC voltage crosses zero, which helps to reduce electrical noise and extend the life of the load.
6. Maintenance
The CRYDOM TD2410 Solid State Relay is designed for long-term, maintenance-free operation. However, periodic inspection is recommended:
- Visual Inspection: Check for any signs of physical damage, discoloration, or loose connections.
- Cleaning: If necessary, gently clean the exterior of the relay with a dry, soft cloth. Do not use solvents or abrasive cleaners.
- Connection Integrity: Periodically verify that all terminal screws are tight and connections are secure.
- Environmental Conditions: Ensure the operating environment remains within the specified temperature and humidity ranges.
7. Troubleshooting
If the CRYDOM TD2410 Solid State Relay is not functioning as expected, consider the following common issues and solutions:
| Problem | Possible Cause | Solution |
|---|---|---|
| Relay does not turn ON (load remains OFF) |
|
|
| Relay does not turn OFF (load remains ON) |
|
|
| Overheating |
|
|
If problems persist after attempting these solutions, contact CRYDOM technical support or a qualified electrician.
8. Specifications
| Parameter | Value |
|---|---|
| Model | TD2410 |
| Brand | CRYDOM |
| Input Control Voltage | 3-32V DC |
| Output Load Voltage | 240V AC (Nominal) |
| Output Load Current | 10A AC |
| Mounting Type | Panel Mount |
| Certifications | CE, EN60950 |
| Assembly Location | Assembled in Mexico |
| Item Weight | 1 Pound (approximately 0.45 kg) |
9. Warranty and Support
For warranty information, technical support, or further assistance with your CRYDOM TD2410 Solid State Relay, please refer to the official CRYDOM website or contact their customer service department. Keep your purchase receipt for warranty claims.
Manufacturer: CRYDOM (as indicated on product)
Website: www.crydom.com (Example link, actual link may vary)