Introduction
This manual provides instructions for the Easytry123 replacement remote control, model Easytry0884. This remote is designed to operate various Hitachi AC Air Conditioner models, including SPX-RCKA, RAR-24Z, RAR-35Z, RAR-3V2, RAS-DX10HDK, RAS-S10CY, RAS-5115CY, and RAS-S13CY. Please read this manual carefully before use to ensure proper operation.
Important Notes
- This is a replacement remote control. While designed for compatibility, some advanced functions present on your original remote may not be supported or may operate differently.
- Verify that your air conditioner model is listed as compatible to ensure full functionality.
- Batteries are not included with this remote control. Two AAA batteries are required for operation.
- The remote control is designed for ease of use with common air conditioner functions.
Setup
1. Battery Installation
- Locate the battery compartment on the back of the remote control.
- Slide the battery compartment cover downwards or outwards to open it.
- Insert two new AAA batteries, ensuring the positive (+) and negative (-) terminals match the diagrams inside the compartment.
- Slide the battery compartment cover back into place until it clicks securely.

Image: Back of the remote control with the battery compartment visible. This is where you will insert the AAA batteries.
2. Initial Use
This replacement remote control typically does not require pairing or complex setup. Once batteries are installed, it should be ready to operate your compatible Hitachi AC unit. Point the remote directly at the air conditioner's receiver when operating.
Operating Instructions
The Easytry123 remote control features standard buttons for common air conditioner functions. Refer to the image below for a visual guide to the remote's layout.
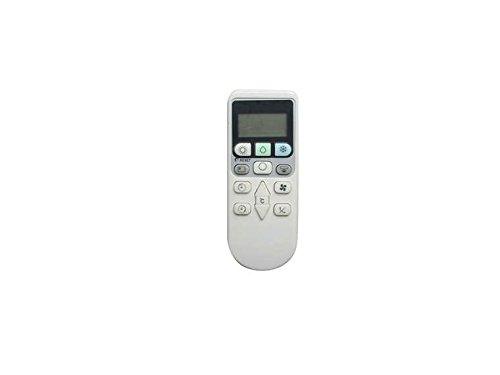
Image: Front view of the Easytry123 remote control, displaying its buttons for various functions.
- Power Button: Turns the air conditioner ON or OFF.
- Mode Button: Cycles through operating modes such as Cool, Heat, Fan, Dry, Auto.
- Temperature Up/Down Buttons: Adjusts the desired temperature setting.
- Fan Speed Button: Adjusts the fan speed (e.g., Low, Medium, High, Auto).
- Swing Button: Controls the louver swing function for air direction.
- Timer Button: Sets the ON/OFF timer for the air conditioner. (Functionality may vary by AC unit.)
- Other Buttons: Depending on your specific AC model, other buttons may control functions like Sleep mode, Eco mode, or display settings. Test these buttons to determine their functionality with your unit.
Maintenance
Battery Replacement
Replace batteries when the remote control's range decreases or if it stops responding. Always replace both AAA batteries at the same time with new ones. Do not mix old and new batteries or different types of batteries.
Cleaning
Wipe the remote control with a soft, dry cloth. Do not use liquid cleaners, sprays, or abrasive materials, as these can damage the remote's surface or internal components.
Troubleshooting
- Remote not responding:
- Check if the batteries are inserted correctly with the correct polarity.
- Replace old batteries with new AAA batteries.
- Ensure there are no obstructions between the remote control and the air conditioner's receiver.
- Make sure you are within the effective operating range of the air conditioner.
- Limited functionality:
- As a replacement remote, some specific or advanced functions of your original air conditioner remote may not be supported. This is normal for universal or replacement remotes.
- Verify that your air conditioner model is explicitly listed as compatible with this remote.
Specifications
| Feature | Detail |
|---|---|
| Brand | Easytry123 |
| Model Number | Easytry0884 |
| Compatible Devices | Hitachi AC Air Conditioners (SPX-RCKA, RAR-24Z, RAR-35Z, RAR-3V2, RAS-DX10HDK, RAS-S10CY, RAS-5115CY, RAS-S13CY) |
| Batteries Required | 2 x AAA (not included) |
| Item Weight | Approximately 0.01 ounces |
| Color | White |
| Special Feature | Ergonomic design |
Mounting Option
The remote control features a design that allows for wall mounting. This can help keep your remote control in a convenient and accessible location.
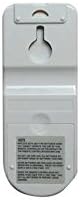
Image: Back of the remote control, highlighting the integrated wall mount hole for convenient storage.
Warranty and Support
Specific warranty information for this replacement remote control is not provided in this manual. For warranty claims, technical support, or further assistance, please contact the seller or manufacturer directly through your purchase platform.