1. Introduction
This user manual provides detailed instructions for the TeKswamp Video Projector Remote Control, designed specifically for use with Smart UF55 projectors. This remote control offers most of the original commands for your device, ensuring seamless operation for essential functions.
No additional programming is required for this remote control. It is guaranteed to turn the device on and off, provide access to and navigation within the menu, and allow selection of input signals.
Please note that while most functions are available, some specific features such as page flip, keystone correction, video adjustment, and numerical inputs may not work properly with all devices in rare cases. This remote control does not include a laser pointer function.
2. Product Overview
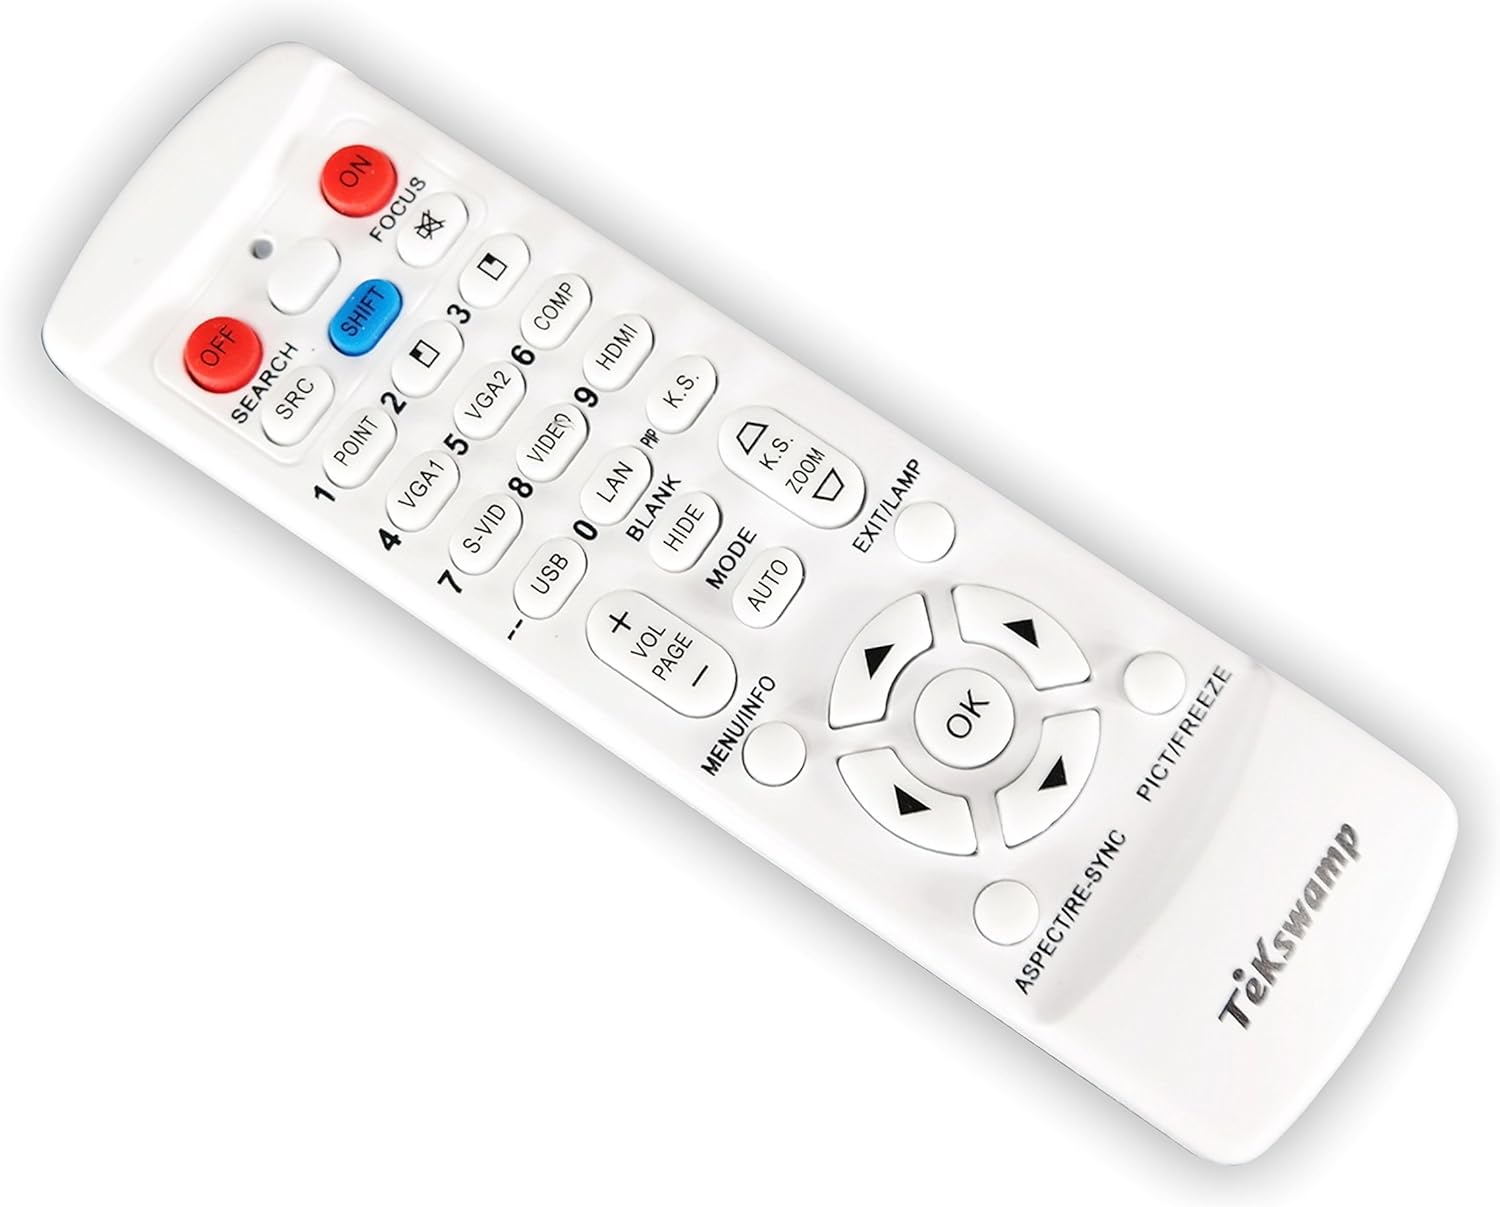
The TeKswamp remote control is designed for comfort and ease of use, featuring a compact, rectangular body with conveniently placed buttons.
Key Features:
- Ergonomic Design: Comfortable, easy-to-reach buttons for everyday use and transportation.
- Low Power Consumption: The electrical circuit requires minimal power, allowing operation even when batteries are low.
- IR Signal Indicator: An ON indicator light illuminates when any active button is pressed, confirming proper remote function and IR signal transmission.
- Durable Construction: Manufactured from strong, durable plastic to resist breakage. Buttons are designed to be comfortable yet not overly sensitive, preventing accidental signals.
- Security Screw: Includes a childproofing security screw to prevent unauthorized access to internal small parts.
Product Images:


3. Getting Started
Battery Installation:
The TeKswamp remote control requires two (2) AAA batteries (not included) for operation.
- Locate the battery compartment on the back of the remote control.
- Slide the battery compartment cover downwards or outwards to open it.
- Insert two AAA batteries, ensuring the positive (+) and negative (-) terminals align correctly with the markings inside the compartment.
- Replace the battery compartment cover by sliding it back into place until it clicks securely.

Note: If the remote control is not used for an extended period, it is recommended to remove the batteries to prevent leakage and potential damage.
4. Operating the Remote Control
Point the remote control directly at the projector's IR receiver. Ensure there are no obstructions between the remote and the projector.
Basic Functions:
- ON (Red Button): Press to power on the projector.
- OFF (Red Button): Press to power off the projector.
- SEARCH/SRC: Cycles through available input sources (e.g., HDMI, VGA, USB).
- MENU/INFO: Opens the projector's on-screen menu or displays information about the current input.
- Navigation Buttons (Up, Down, Left, Right): Used to navigate through menu options.
- OK: Confirms a selection within the menu.
- EXIT/LAMP: Exits the current menu or displays lamp usage information.
Advanced Functions:
- FOCUS (+/-): Adjusts the image focus.
- Numbered Buttons (0-9): May be used for direct input selection (e.g., VGA1, HDMI) or other numerical inputs depending on the projector model.
- SHIFT (Blue Button): May activate secondary functions for certain buttons.
- POINT: If available, this button may activate a digital pointer function on the screen.
- BLANK: Temporarily blanks the projector screen.
- HIDE: Hides the on-screen display or menu.
- VOL (+/-): Adjusts the audio volume.
- PAGE (+/-): Used for navigating pages in presentations or documents, if supported by the projector.
- MODE: Cycles through different display modes.
- AUTO: Initiates automatic image adjustment.
- K.S. (Keystone): Adjusts keystone correction to square the image.
- ZOOM (+/-): Controls digital zoom for the projected image.
- ASPECT/RE-SYNC: Adjusts the image aspect ratio or re-synchronizes the signal.
- PICT/FREEZE: Accesses picture settings or freezes the current image on the screen.
Compatibility Note: While this remote provides most functions, some specific features like page flip, keystone correction, video adjustment, and numerical inputs may not work with all projector models. The remote does not have a laser pointer.
5. Maintenance and Care
- Cleaning: Use a soft, dry cloth to clean the remote control. Do not use liquid cleaners or abrasive materials, as they may damage the surface or internal components.
- Storage: Store the remote control in a cool, dry place away from direct sunlight and extreme temperatures.
- Battery Replacement: Replace batteries when the remote's response becomes sluggish or the ON indicator light does not illuminate. Always replace both batteries at the same time with new ones.
- Avoid Drops: While durable, avoid dropping the remote control, as severe impacts can damage internal circuitry.
6. Troubleshooting
Common Issues and Solutions:
| Problem | Possible Cause | Solution |
|---|---|---|
| Remote not responding. | Dead or incorrectly inserted batteries. | Replace batteries with new AAA batteries, ensuring correct polarity (+/-). |
| Remote not responding. | Obstruction between remote and projector. | Ensure a clear line of sight between the remote's IR emitter and the projector's IR receiver. |
| Remote not responding. | Projector is off or in standby. | Ensure the projector is powered on and ready to receive commands. |
| Specific functions (e.g., keystone, page flip) not working. | Function not supported by your specific projector model or requires a different command. | Refer to your projector's original manual for specific function compatibility. This remote provides general compatibility. |
7. Specifications
| Attribute | Detail |
|---|---|
| Product Dimensions | 5.7 x 1.6 x 0.8 inches |
| Item Weight | 2 ounces |
| Batteries Required | 2 AAA batteries (not included) |
| Manufacturer | TL Electronics CO. |
| Brand | Tekswamp |
| Compatible Devices | Video Projector (specifically Smart UF55) |
| Max Number of Supported Devices | 1 |
| Color | White |
8. Warranty and Support
For specific warranty information regarding your TeKswamp remote control, please refer to the documentation provided at the time of purchase or visit the official TeKswamp Store on Amazon.
If you encounter issues not covered in this manual or require further assistance, please contact TeKswamp customer support through their official channels.