Introduction
Thank you for choosing the EMPIRE GAMING WarMachine ATX Mid-Tower PC Gaming Case. This manual provides detailed instructions for the installation, operation, and maintenance of your new PC case. Please read this manual carefully before proceeding with the installation to ensure proper setup and to maximize the performance and lifespan of your components.
Safety Information
Always observe the following safety precautions to prevent damage to your system and to ensure personal safety:
- Disconnect the power supply from the wall outlet before installing or removing any components.
- Wear an anti-static wrist strap to prevent electrostatic discharge (ESD) damage to sensitive components.
- Handle components carefully. Avoid touching pins or circuit boards directly.
- Ensure all cables are properly connected and routed to avoid interference with fans or other moving parts.
- Do not operate the PC case with the side panels removed unless performing maintenance or troubleshooting.
- Keep the case away from liquids and excessive humidity.
Package Contents
Please verify that all items are present in your package:
- EMPIRE GAMING WarMachine ATX Mid-Tower PC Gaming Case
- Accessory Box (screws, standoffs, cable ties)
- User Manual (this document)
Product Overview
The EMPIRE GAMING WarMachine case features a sleek design with tempered glass panels and pre-installed RGB LED fans for optimal cooling and aesthetics.
External Features
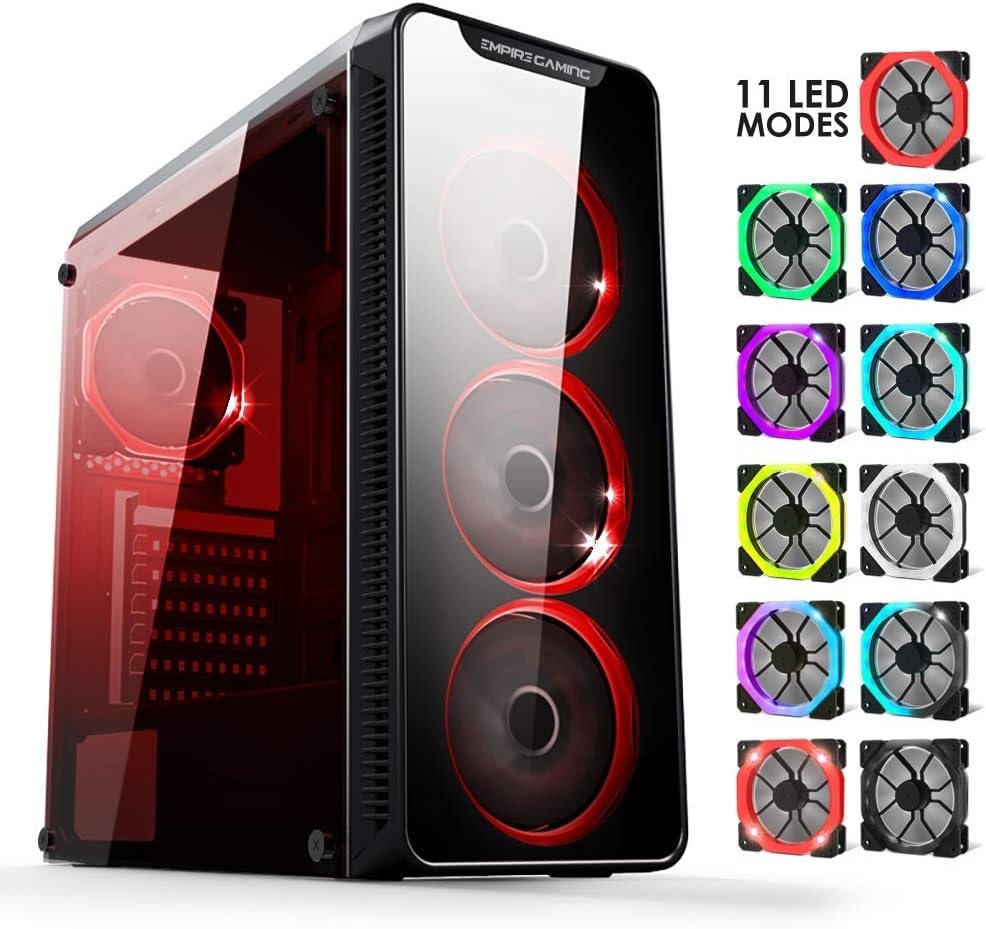
Image: The EMPIRE GAMING WarMachine PC case showcasing its tempered glass side panel and front panel, with multiple RGB fan lighting modes illustrated on the right side.

Image: A direct front view of the EMPIRE GAMING WarMachine PC case, highlighting the three 120mm RGB fans with blue illumination behind the tempered glass front panel.
Top I/O Ports

Image: A close-up of the top I/O panel of the EMPIRE GAMING WarMachine PC case, featuring power and reset buttons, LED control button, USB 3.0 port, two USB 2.0 ports, and audio jacks.
- Power Button: To turn the system on/off.
- Reset Button: To restart the system.
- LED Control Button: To cycle through 11 predefined RGB lighting modes for the fans.
- USB 3.0 Port: For high-speed data transfer.
- USB 2.0 Ports (x2): For connecting peripherals.
- Audio Jacks: For headphones and microphone.
Internal Layout

Image: An internal diagram of the EMPIRE GAMING WarMachine PC case, illustrating compatible motherboard sizes (ITX, mATX, ATX), fan placements (FAN X4), and SSD mounting locations (SSD x2).
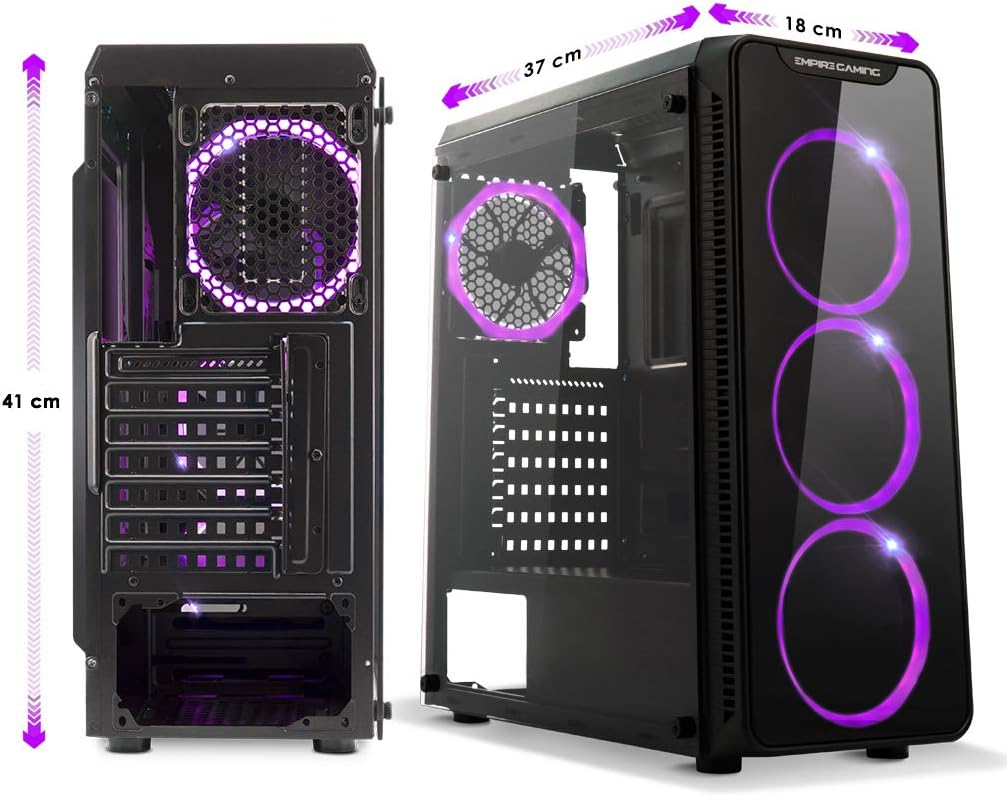
Image: A rear internal diagram of the EMPIRE GAMING WarMachine PC case, detailing the cable management routes, HDD 3.5" bays, and the power supply unit (PSU) compartment.
- Motherboard Tray: Supports ATX, Micro-ATX, and Mini-ITX motherboards.
- Drive Bays: Dedicated bays for 3.5" HDDs and 2.5" SSDs (4 total storage bays).
- Fan Mounts: Pre-installed 4 x 120mm RGB LED fans. Additional mounting points for optimal airflow.
- Cable Management: Ample space behind the motherboard tray for clean cable routing.
- PSU Shroud: Conceals the power supply unit and cables for a cleaner interior.
Setup Guide
Follow these steps to assemble your PC components within the WarMachine case.
1. Preparing the Case
- Place the case on a flat, stable surface.
- Carefully remove the tempered glass side panel by unscrewing the thumb screws and gently pulling it away. Set it aside on a soft, non-abrasive surface.
- Remove the rear metal side panel by unscrewing its thumb screws.
2. Motherboard Installation
- Install the I/O shield that came with your motherboard into the designated opening at the rear of the case.
- Align your motherboard with the pre-installed standoffs. Ensure the standoffs match your motherboard's form factor (ATX, Micro-ATX, or Mini-ITX).
- Secure the motherboard with the provided screws from the accessory box.
3. Power Supply Installation
- Slide your power supply unit (PSU) into the PSU shroud compartment at the bottom rear of the case.
- Align the PSU with the screw holes at the rear of the case.
- Secure the PSU with the screws provided with your power supply.
4. Storage Drive Installation (HDD/SSD)
- For 3.5" HDDs, locate the drive cage beneath the PSU shroud. Slide the HDD into the bay and secure it with screws.
- For 2.5" SSDs, mount them on the designated SSD trays located on the motherboard tray or behind it. Secure with screws.
5. Graphics Card (GPU) Installation
- Remove the necessary expansion slot covers at the rear of the case.
- Insert your graphics card into the appropriate PCIe slot on your motherboard.
- Secure the graphics card with screws.
6. CPU Cooler Installation
Install your CPU cooler according to its manufacturer's instructions. The WarMachine case supports CPU coolers up to 155mm in height and watercooling radiators of 120mm or 240mm.
7. Cable Management
- Connect all necessary power cables from the PSU to your motherboard, GPU, and storage drives.
- Connect the case's front panel cables (Power SW, Reset SW, HDD LED, Power LED, USB 3.0, USB 2.0, Audio) to the corresponding headers on your motherboard.
- Route cables through the cutouts and tie-down points behind the motherboard tray using the provided cable ties to ensure clean airflow and aesthetics.
- Connect the pre-installed fan power cables to your motherboard or a fan controller.
8. Final Assembly
- Once all components are installed and cables are managed, reattach the rear metal side panel and the tempered glass side panel.
- Ensure all thumb screws are tightened securely.
Operating Instructions
Powering On
After connecting your monitor, keyboard, mouse, and power cable to the PSU, press the Power Button on the top I/O panel to start your system.
RGB Fan Control

Image: A visual representation of different RGB lighting modes available for the EMPIRE GAMING fans, including solid colors and dynamic effects.
The WarMachine case comes with 4 pre-installed 120mm RGB LED fans. These fans feature 11 predefined backlight modes.
- Press the LED Control Button on the top I/O panel to cycle through the available lighting modes.
- Each press will switch to the next mode.
- The fans are designed with dual-ring RGB lighting for enhanced visual effects.
Maintenance
Regular maintenance helps ensure optimal performance and longevity of your PC components.
Cleaning
- Dust Filters: Periodically remove and clean the dust filters (if applicable) to maintain good airflow. Wash with water and let them dry completely before reinstallation.
- Interior: Use compressed air to blow out dust from inside the case, especially from fan blades, heatsinks, and vents. Do this in a well-ventilated area.
- Exterior: Wipe the exterior surfaces, including the tempered glass panels, with a soft, damp cloth. Avoid abrasive cleaners.
Fan Care
- Ensure all fans are spinning freely and are not obstructed by cables or dust buildup.
- If a fan becomes noisy or stops working, consider replacing it.
Troubleshooting
If you encounter issues with your PC case, refer to the following common problems and solutions:
- No Power:
- Check if the power cable is securely connected to the PSU and the wall outlet.
- Ensure the PSU switch is in the 'ON' position.
- Verify that the front panel power switch cable is correctly connected to the motherboard's power header.
- Fans Not Spinning/No RGB:
- Check if the fan power cables are securely connected to the motherboard or fan controller.
- Ensure the RGB cables (if separate) are properly connected.
- Press the LED Control Button to cycle through modes; it might be on a 'dark' mode.
- USB Ports Not Working:
- Verify that the USB 3.0 and USB 2.0 headers from the case are correctly plugged into the corresponding headers on your motherboard.
- Audio Jacks Not Working:
- Ensure the HD Audio cable from the case is correctly connected to the audio header on your motherboard.
- Check your operating system's audio settings.
Specifications
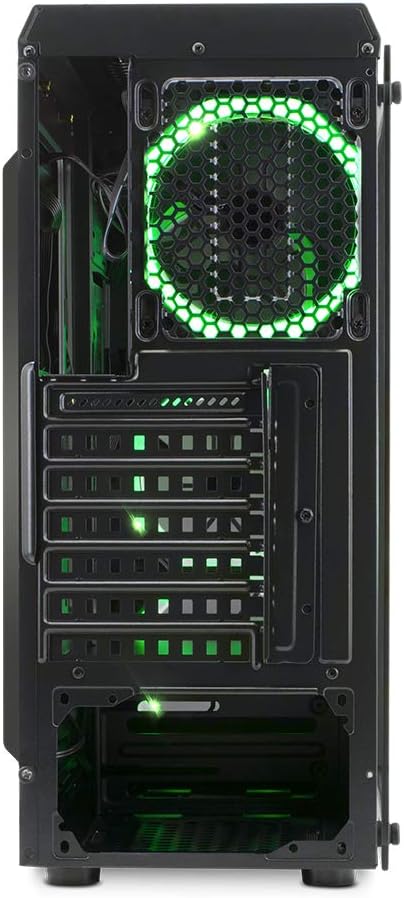
Image: A diagram illustrating the physical dimensions of the EMPIRE GAMING WarMachine PC case: 420mm length, 188mm width, and 440mm height.
| Feature | Specification |
|---|---|
| Model Name | WarMachine |
| Model Number | OE-CA-13RGB |
| Case Type | Mid-Tower |
| Motherboard Compatibility | ATX, Micro-ATX, Mini-ITX |
| Dimensions (L x W x H) | 420 x 188 x 440 mm |
| Weight | 5.18 kg |
| Material | Tempered Glass, Steel |
| Included Fans | 4 x 120mm RGB LED Fans |
| RGB Modes | 11 Predefined Modes |
| CPU Cooler Height Limit | 155 mm |
| GPU Length Limit | 320 mm |
| Watercooling Support | 120mm / 240mm Radiators |
| Drive Bays | 4 (supports 3.5" HDD and 2.5" SSD) |
| Expansion Slots | 4 |
| Front I/O Ports | 1x USB 3.0, 2x USB 2.0, HD Audio (Mic/Headphone), Power, Reset, LED Control |
Warranty and Support
EMPIRE GAMING products are designed for reliability and performance. For warranty information, please refer to the warranty card included with your product or visit the official EMPIRE GAMING website.
For technical support, troubleshooting assistance, or spare parts, please contact EMPIRE GAMING customer service through their official channels. Provide your product model number (OE-CA-13RGB) and a detailed description of the issue for faster service.