
KidKraft 53426
KidKraft Uptown Elite Play Kitchen Instruction Manual
Model: 53426
Introduction
This manual provides essential information for the safe assembly, operation, and maintenance of your KidKraft Uptown Elite Play Kitchen, Model 53426. Please read all instructions carefully before assembly and use to ensure proper function and longevity of the product. This play kitchen is designed for children aged 36 months to 8 years.

Image: The KidKraft Uptown Elite Play Kitchen, showcasing its modern design and features.
Safety Information
- Adult assembly is required.
- Ensure all screws and fasteners are securely tightened before use. Periodically check for loose connections.
- This product is intended for indoor use only.
- Keep small parts away from children during assembly to prevent choking hazards.
- The product meets or exceeds Toy Safety Standard ASTM F963.
- Batteries should be inserted with the correct polarity. Do not mix old and new batteries. Remove exhausted batteries promptly.
- Always supervise children during play.
Package Contents
Before beginning assembly, verify that all components listed below are present and undamaged:
- All wooden and plastic kitchen components
- Assembly Instructions manual
- Hardware pack (screws, bolts, etc.)
- 5 AAA batteries (included for electronic features)
- Plastic ice cubes
Setup and Assembly
The KidKraft Uptown Elite Play Kitchen features EZ Kraft Assembly™ technology, designed to simplify the setup process. Assembly typically requires one adult and can take between 30 minutes to 2 hours.
- Preparation: Clear a spacious area for assembly. Lay out all parts and hardware, organizing them by their numbered labels.
- Follow Instructions: Refer to the included Assembly Instructions manual. For enhanced clarity, 3D interactive instructions may be available for download from the KidKraft website.
- Secure Connections: Ensure all screws are tightened firmly but do not overtighten to avoid damaging the wood.
- Battery Installation: Install the 5 AAA batteries into the designated compartments for the cooktop and microwave, observing correct polarity.
- Placement: Position the assembled kitchen on a flat, stable surface. A wall anchor is included for additional stability if desired.

Image: The play kitchen highlighting its quick assembly time and durable construction.
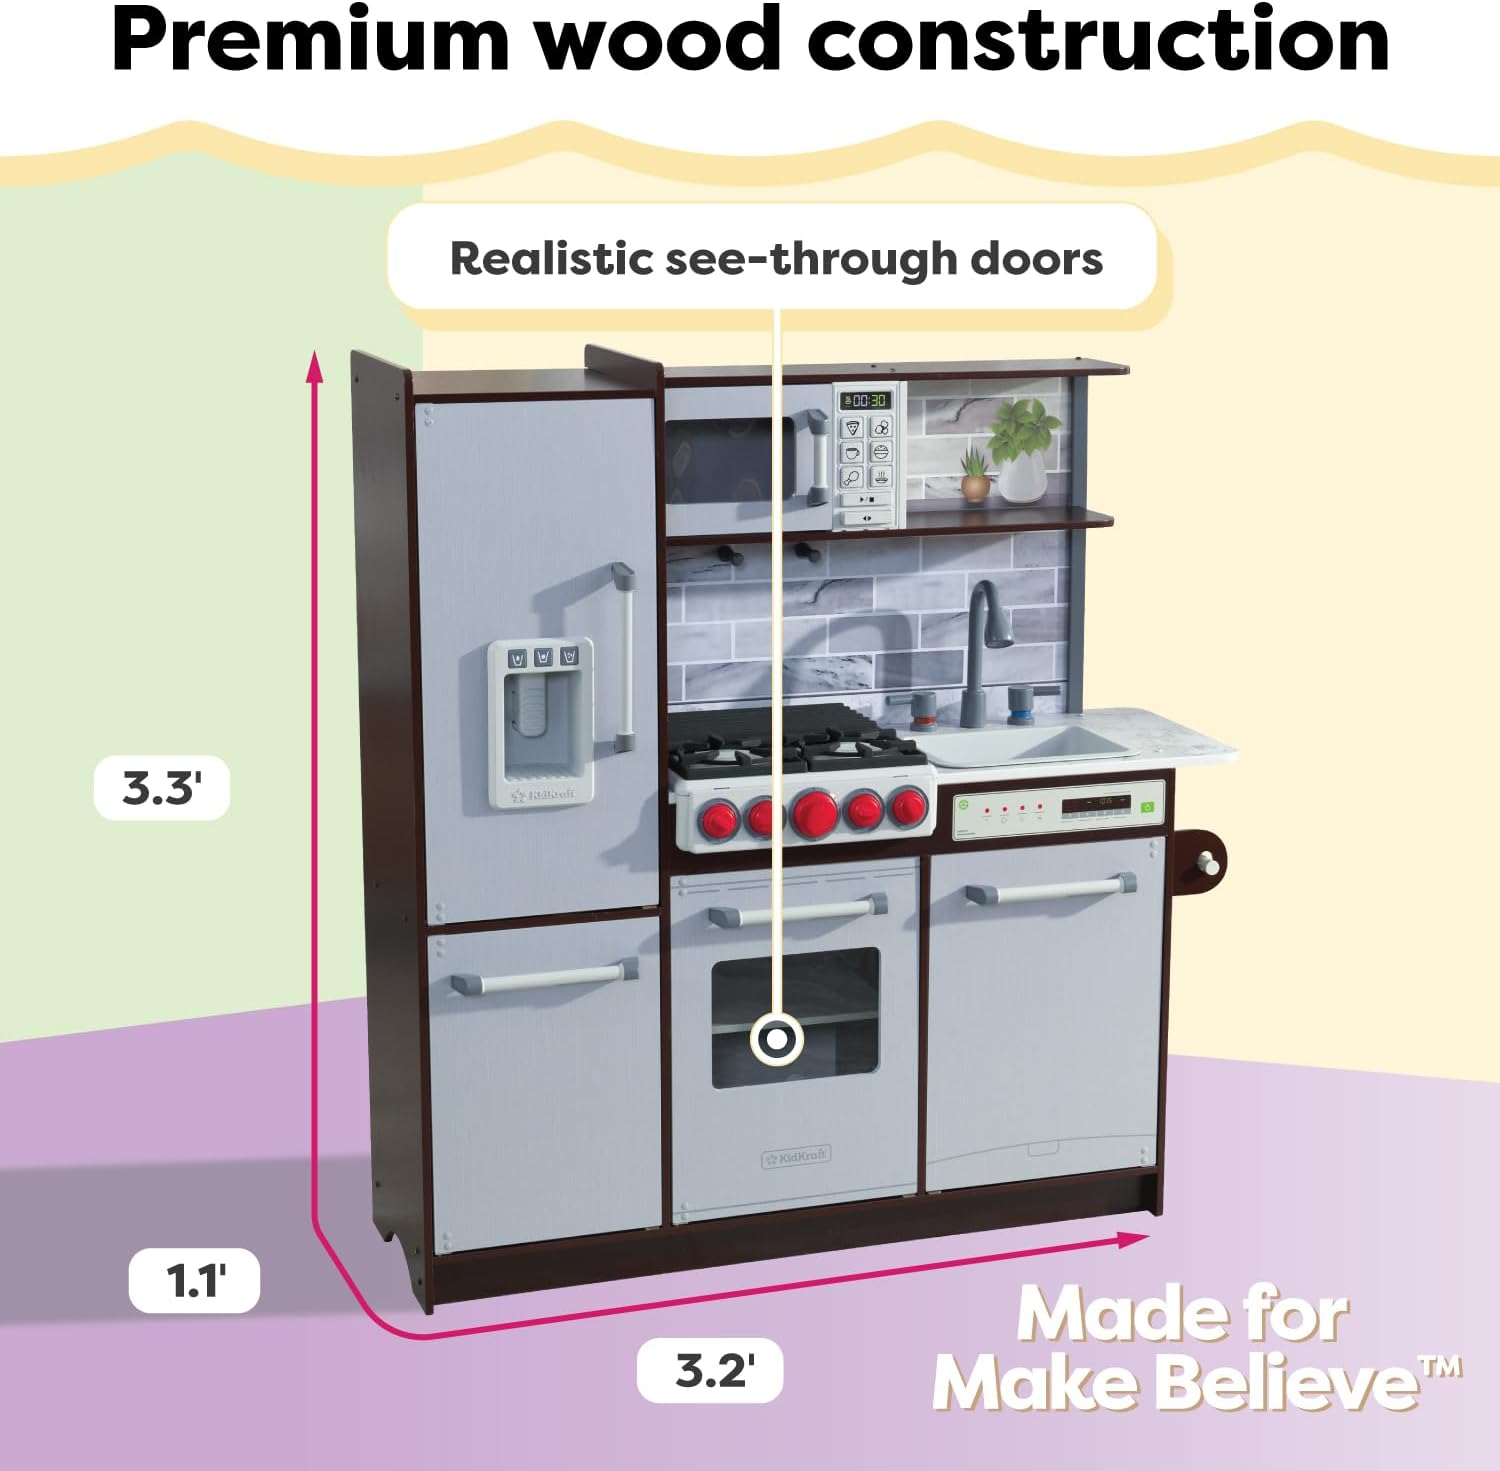
Image: Dimensional overview of the play kitchen, indicating its overall size.
Operating Instructions
The Uptown Elite Play Kitchen offers various interactive features for realistic play:
- Cooktop with Lights and Sounds: Turn the red knobs on the stovetop to activate realistic cooking sounds and illuminated burners.

Image: The cooktop with active lights and sounds, demonstrating its interactive features.

Image: The detailed click-and-turn knobs on the cooktop, providing tactile feedback.
- Microwave with Lights and Sounds: Press the buttons on the microwave to activate internal lights and cooking sounds. The microwave also features a door that opens.
- Working Ice Maker: Place a cup under the dispenser on the refrigerator door and press the lever to dispense plastic ice cubes.

Image: The functional ice maker feature, dispensing play ice cubes.
- Sink and Faucet: The sink area includes a faucet with red and blue labels to indicate hot and cold water, encouraging imaginative play.
- Storage Areas: Utilize the refrigerator, deep freezer, dishwasher, and various shelves for organizing play food and accessories.
- Side Towel Rack: A functional towel rack is located on the side of the kitchen for hanging play towels or utensils.

Image: The integrated side towel rack for play accessories.
Maintenance
- Cleaning: Wipe surfaces with a damp cloth and mild soap. Avoid abrasive cleaners or harsh chemicals that could damage the finish.
- Dusting: Regularly dust the kitchen to maintain its appearance.
- Hardware Check: Periodically inspect all screws and fasteners to ensure they remain tight. Tighten as necessary.
- Battery Replacement: Replace all 5 AAA batteries when the lights and sounds begin to dim or cease functioning.
Troubleshooting
| Problem | Possible Cause | Solution |
|---|---|---|
| Lights or sounds not working | Dead or incorrectly installed batteries. | Check battery polarity. Replace all 5 AAA batteries with new ones. |
| Microwave door does not stay shut | Latching mechanism may be stiff or misaligned. | Ensure the door is pushed firmly to engage the latch. Over time, the latch may loosen slightly. If persistent, contact customer support. |
| Ice dispenser sticks or does not dispense | Mechanism obstruction or misalignment. | Ensure plastic ice cubes are properly loaded. Manually pull the dispenser button back out after each press if it sticks. If the issue persists, contact customer support. |
| Loose parts or instability | Screws have loosened over time. | Inspect all connections and tighten any loose screws. Ensure the kitchen is on a level surface. |
Specifications
- Model Number: 53426
- Product Dimensions (L x W x H): 38.6 x 13.4 x 42.1 inches
- Item Weight: 46.3 pounds
- Recommended Age: 36 months - 8 years
- Batteries: 5 AAA batteries (included)
- Materials: Premium wood construction, plastic components
- Manufacturer: KidKraft
Warranty and Support
KidKraft products are designed for durability and quality. For specific warranty details, please refer to the warranty information included with your purchase or visit the official KidKraft website. If you require replacement parts or assistance with assembly or troubleshooting, please contact KidKraft customer support directly. In some cases, replacement parts have been provided free of charge by KidKraft.
For further assistance, you may visit the KidKraft Store on Amazon or the official KidKraft website.
Ask a question about this manual
Ask about setup, troubleshooting, compatibility, parts, safety, or missing instructions. Manuals+ will review the question and use this page’s manual context to help answer it.