1. Product Overview
The Cooler Master MasterLiquid ML360R RGB Elite is an all-in-one liquid CPU cooler designed for efficient heat dissipation and customizable aesthetics. It features a low-profile dual-chamber pump, dynamic PWM fans, and addressable RGB lighting on both the pump and fans.

Image 1: Overview of the Cooler Master MasterLiquid ML360R RGB Elite Liquid CPU Cooler, showing the radiator, three fans, and the pump/cold plate unit.
Key Features:
- Dual-Chamber Pump: Features a fluid dynamic design for enhanced heat transfer, optimized for high-performance CPUs like AMD Ryzen 9 and Intel Ultra i9.
- Quiet Operation: Dynamic PWM fans (650 to 2,100 RPM) are engineered for a balance of low noise and effective cooling.
- Customizable aRGB Lighting: Addressable RGB LEDs on the pump and fans allow for personalized lighting effects, controllable via the included controller or compatible motherboard software.
- Maintenance-Free Design: Factory-sealed FEP tubing prevents leaks and requires no refilling.
- Pre-installed Thermal Paste: CryoFuze thermal paste is pre-applied for optimal thermal conductivity.
2. Package Contents
Verify that all components are present in the package before beginning installation:
- MasterLiquid ML360R RGB Elite Liquid Cooler Unit (Radiator, Pump, Tubing, Fans)
- Mounting Hardware for Intel (LGA 1851, 1700, 1200, 1151, 1150, 1155, 1156, 2066, 2011-v3, 2011)
- Mounting Hardware for AMD (AM5, AM4, AM3+, AM3, AM2+, AM2, FM2+, FM2, FM1)
- aRGB Controller
- User Manual (this document)
3. Setup and Installation
This section provides general guidance for installing your Cooler Master MasterLiquid ML360R RGB Elite. Refer to the detailed PDF manual for specific, step-by-step instructions and diagrams.
3.1 Prepare Your System
- Power Off: Ensure your computer is completely powered off and unplugged from the wall outlet.
- Access Case: Open your computer case to access the motherboard and CPU area.
- Remove Existing Cooler: Carefully remove any existing CPU cooler. Clean the CPU surface of any old thermal paste using isopropyl alcohol.
3.2 Install Mounting Hardware
The cooler includes pre-installed brackets for simplified installation on various platforms.
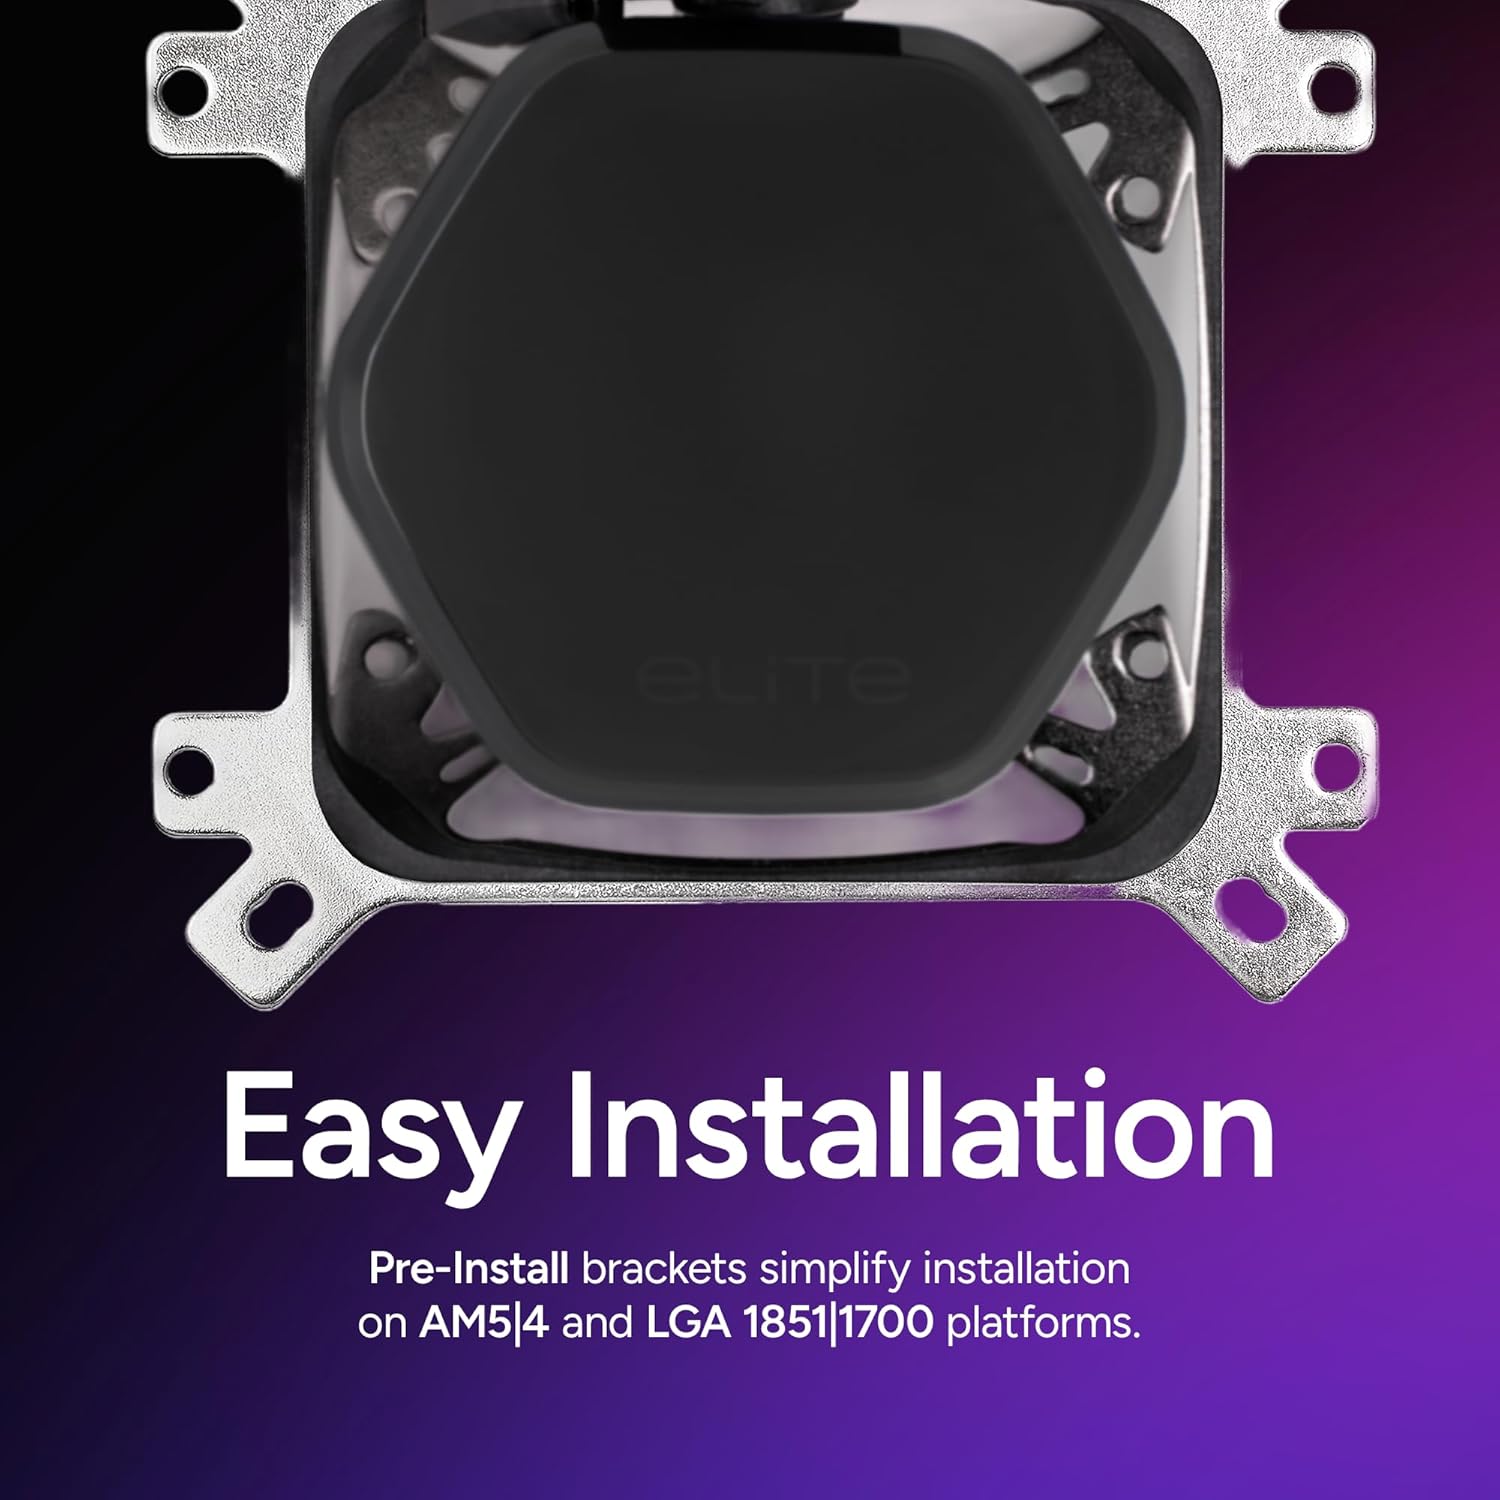
Image 2: Close-up of the pre-install mounting brackets on the pump, designed for easy installation on AM5|4 and LGA 1851|1700 platforms.
- Select Backplate: Choose the appropriate backplate for your motherboard socket (Intel or AMD).
- Secure Backplate: Position the backplate behind the motherboard, aligning the holes with the CPU socket mounting holes.
- Install Stand-offs: Screw the correct stand-offs into the backplate from the front side of the motherboard.
3.3 Mount Radiator and Fans
The ML360R RGB Elite features a 360mm radiator with three 120mm fans. The fans are daisy-chained for simplified wiring.

Image 3: Detail of the pre-installed daisy-chain fan system, illustrating how a single PWM connector powers all fans, simplifying cable management.
- Radiator Placement: Determine the optimal location for the 360mm radiator in your PC case (e.g., top, front).
- Secure Radiator: Mount the radiator to your case using the provided screws.
- Connect Fans: The fans are pre-connected in a daisy-chain. Connect the single PWM fan cable to an available CPU_FAN or PUMP_FAN header on your motherboard.
3.4 Install Pump/Cold Plate
The pump comes with pre-applied CryoFuze thermal paste.

Image 4: Close-up of the dual-chamber pump with fluid dynamic design, engineered to boost water flow to the CPU hotspot for efficient cooling.
- Position Pump: Carefully place the pump/cold plate unit onto the CPU, aligning the mounting holes with the stand-offs.
- Secure Pump: Tighten the thumb screws or nuts onto the stand-offs in a cross pattern until snug. Do not overtighten.
- Connect Pump Power: Connect the pump's 3-pin power cable to an available PUMP_FAN or AIO_PUMP header on your motherboard.
3.5 Connect aRGB Lighting
The aRGB lighting can be controlled via the included controller or compatible motherboard software.
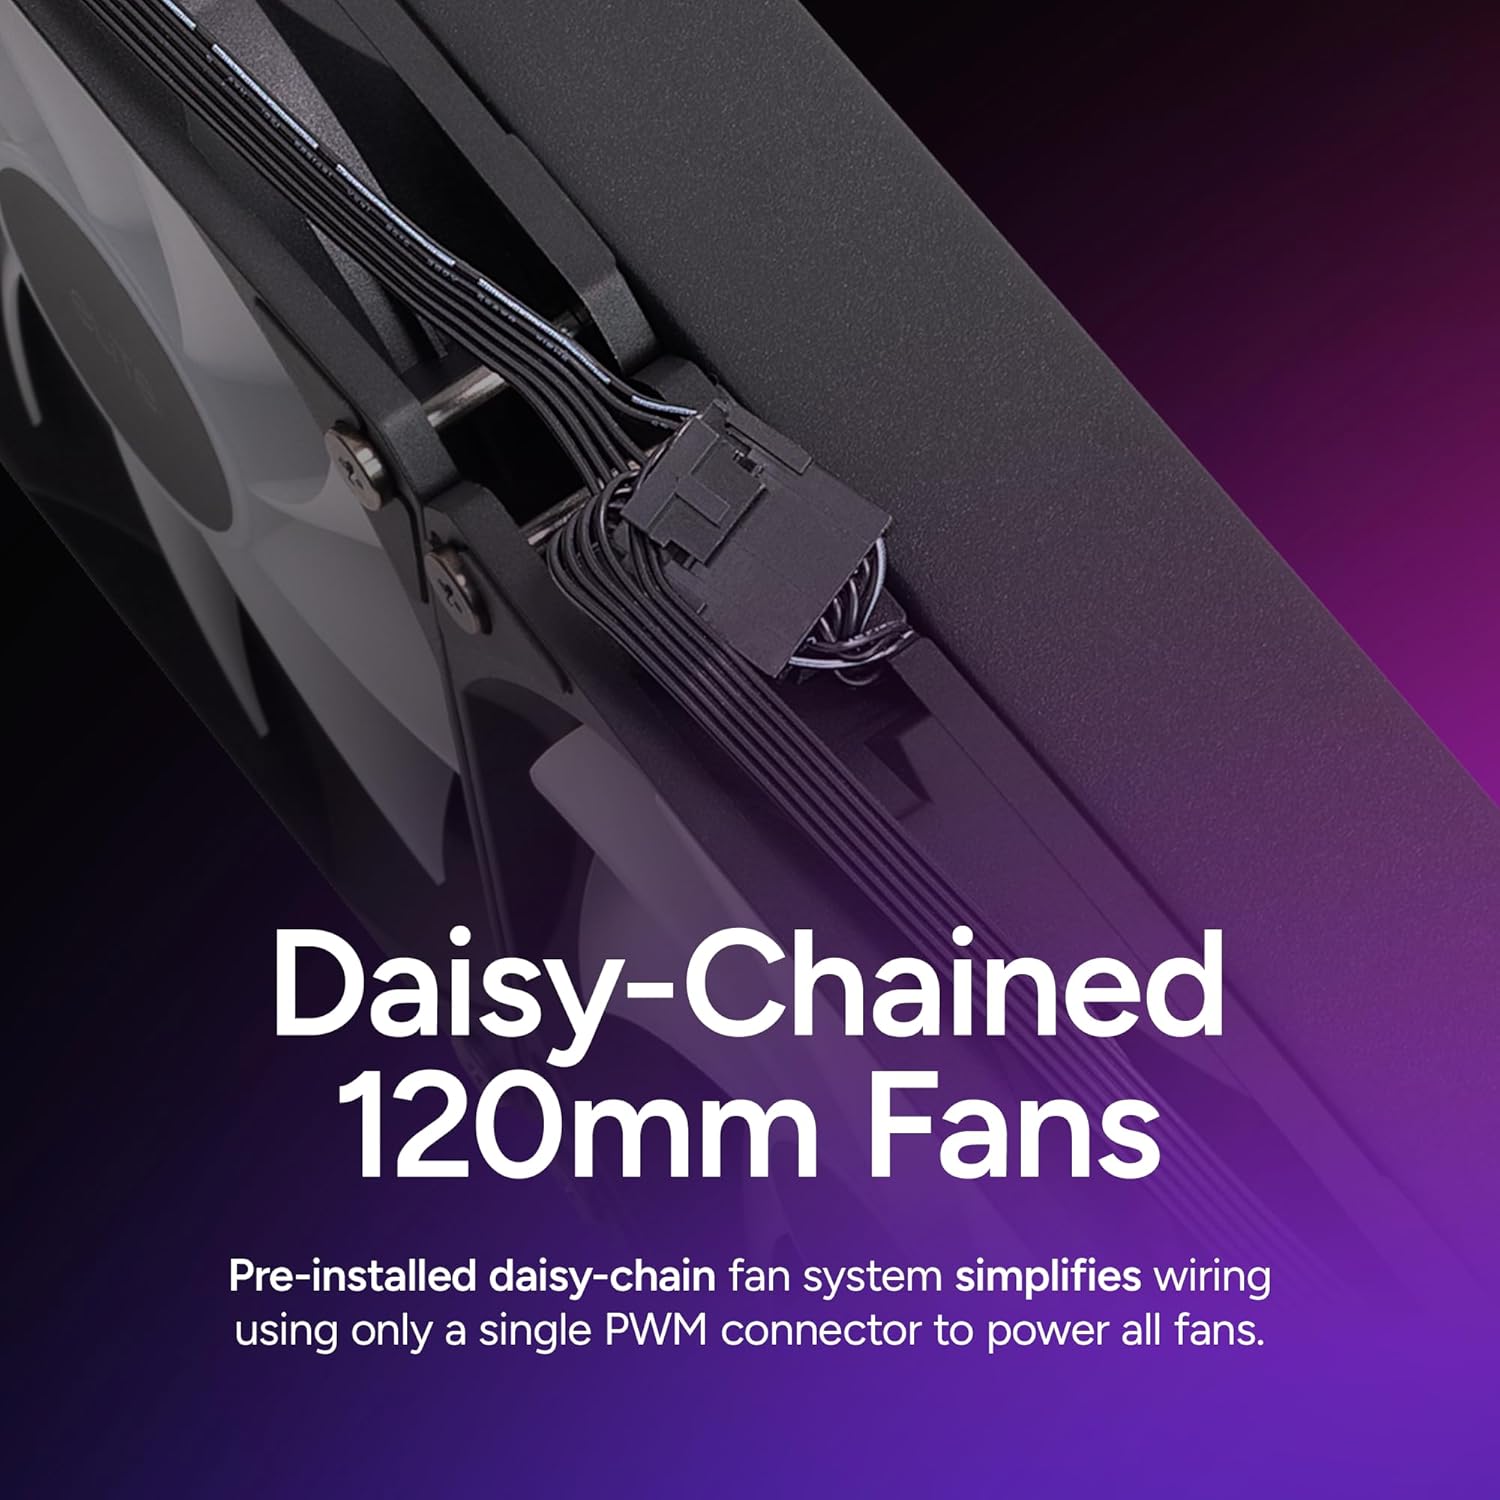
Image 5: The translucent hexagon cap of the pump, showcasing its unique design and customizable aRGB lighting capabilities.

Image 6: A close-up of the frosted fan blades, designed to enhance the dispersion of aRGB lighting for vibrant visual effects.
- Connect aRGB Cables: Connect the aRGB cables from the fans and pump to the included aRGB controller.
- Controller Power: Connect the aRGB controller to a SATA power connector from your power supply.
- Motherboard Sync (Optional): If your motherboard supports aRGB sync, connect the controller's aRGB sync cable to the motherboard's 3-pin 5V aRGB header.
4. Operating Instructions
Once installed, the Cooler Master MasterLiquid ML360R RGB Elite operates automatically to cool your CPU. The fans and pump adjust their speed based on CPU temperature, managed by your motherboard's BIOS/UEFI settings or operating system software.
4.1 Fan and Pump Control
- The dynamic PWM fans automatically adjust their speed (650 to 2,100 RPM) to maintain optimal cooling performance while minimizing noise.
- The pump operates continuously to circulate coolant. Ensure the pump is connected to a dedicated PUMP_FAN or AIO_PUMP header set to run at full speed for best performance.
4.2 aRGB Lighting Control
Customize the lighting effects of your cooler using one of the following methods:
- Included aRGB Controller: Use the physical buttons on the provided aRGB controller to cycle through various lighting modes, colors, and effects.
- Motherboard Software: If connected to a compatible motherboard aRGB header, use your motherboard's lighting software (e.g., ASUS Aura Sync, MSI Mystic Light, GIGABYTE RGB Fusion, ASRock Polychrome Sync) to synchronize and customize the lighting with other components.

Image 7: Illustration of the customizable pump design, showing how the tool-free top cap can be rotated or swapped for a personalized aesthetic.
5. Maintenance
The Cooler Master MasterLiquid ML360R RGB Elite is designed to be a maintenance-free closed-loop liquid cooling system. It does not require refilling or regular coolant checks.
5.1 General Cleaning
- Radiator Fins: Periodically inspect the radiator fins for dust buildup. Use compressed air to gently clear dust from the fins to ensure optimal airflow and cooling performance.
- Fans: Clean fan blades and frames of any accumulated dust. Ensure fan cables are not obstructing fan rotation.
- Pump/Cold Plate: Ensure the pump housing is free of dust. Do not attempt to open the pump unit.
Regular cleaning of dust from the radiator and fans will help maintain the cooler's efficiency and prolong its lifespan.
6. Troubleshooting
If you encounter issues with your Cooler Master MasterLiquid ML360R RGB Elite, refer to the following common troubleshooting steps.
6.1 High CPU Temperatures
- Check Pump Connection: Ensure the pump's 3-pin power cable is securely connected to a PUMP_FAN or AIO_PUMP header and is set to run at full speed in BIOS/UEFI.
- Verify Cold Plate Contact: Confirm the pump/cold plate unit is making firm, even contact with the CPU. Re-tighten mounting screws if necessary (do not overtighten).
- Inspect Radiator/Fans: Check for dust buildup on the radiator fins and ensure all fans are spinning correctly. Clean as needed.
- Thermal Paste: While pre-applied, ensure the thermal paste was not disturbed during installation. If in doubt, carefully remove the cooler, clean both surfaces, and reapply a thin layer of high-quality thermal paste.
- Airflow: Ensure adequate airflow within your PC case.
6.2 Fans Not Spinning or RGB Not Working
- Power Connections: Verify all fan PWM cables and aRGB cables are securely connected to the aRGB controller and/or motherboard headers.
- SATA Power: Ensure the aRGB controller is receiving power from a SATA power connector from your power supply.
- Motherboard Headers: If using motherboard aRGB sync, confirm the 3-pin 5V aRGB header connection is correct and enabled in your motherboard's software/BIOS.
- Controller Functionality: If using the included controller, try cycling through modes to ensure it is functioning.
6.3 Unusual Noises
- Fan Noise: Check for cable interference with fan blades. Ensure fans are securely mounted.
- Pump Noise: A slight hum from the pump is normal. Excessive gurgling or grinding might indicate air bubbles. Try gently tilting your PC case to help dislodge air bubbles. Ensure the pump is not running dry (verify power connection).
7. Specifications
| Feature | Specification |
|---|---|
| Model Number | MLX-D36M-A20PC-R1 |
| Brand | Cooler Master |
| Product Dimensions | 15.5"L x 4.7"W x 1.1"H (394mm x 119mm x 27mm) |
| Weight | 2.95 Pounds (1.34 kg) |
| Cooling Method | Liquid (All-in-One) |
| Compatible Devices | CPU, Desktop |
| Material | Aluminum, Copper, Plastic |
| Fan Speed | 650 - 2100 RPM (PWM) |
| Maximum Rotational Speed | 2100 RPM |
| Noise Level | 39.5 dB (Max) |
| Power Connector Type | 3-Pin (Pump), 4-Pin PWM (Fans) |
| Voltage | 12 Volts |
| Wattage | 12 watts |
| Supported Sockets | Intel: LGA 1851, 1700, 1200, 1151, 1150, 1155, 1156, 2066, 2011-v3, 2011 AMD: AM5, AM4, AM3+, AM3, AM2+, AM2, FM2+, FM2, FM1 |
| Date First Available | June 18, 2018 |
8. Warranty and Support
8.1 Warranty Information
Cooler Master products are covered by a limited warranty. For detailed warranty terms, conditions, and duration specific to your region and product, please visit the official Cooler Master website or refer to the warranty card included with your product.
8.2 Technical Support
For technical assistance, troubleshooting beyond this manual, or inquiries regarding your Cooler Master MasterLiquid ML360R RGB Elite, please contact Cooler Master customer support:
- Official User Manual (PDF): Download PDF Manual
- Cooler Master Support Website: Visit www.coolermaster.com/support/ for FAQs, drivers, and contact information.