1. Product Overview
These Springfield Speaker 8 Warm White 8V LED Lamp Fuse-Type Bulbs are designed as direct replacements for original incandescent fuse-type lamps found in various vintage Pioneer receivers and amplifiers. They provide a warm white illumination, enhancing the aesthetic of your audio equipment without requiring soldering or complex alterations.

Image 1.1: Eight warm white LED fuse-type bulbs, packaged together.

Image 1.2: A close-up view of a single warm white LED fuse-type bulb, showing its construction.
2. Compatible Models
These 8V LED fuse-type bulbs are compatible with the following Pioneer receivers, amplifiers, and tuners:
- QX-646
- QX-747
- QX-848
- QX-949
- SX-424
- SX-434
- SX-440
- SX-525
- SX-535
- SX-626
- SX-636
- SX-727
- SX-737
- SX-828
- SX-838
- SX-939
- SX-1010
- TX-6200
3. Installation Instructions
Installation of these LED bulbs is designed to be straightforward, requiring no soldering. Always ensure the audio equipment is powered off and unplugged before beginning any installation or maintenance.
- Power Off and Unplug: Disconnect the audio receiver or amplifier from the main power supply.
- Access the Lamp Area: Carefully remove the outer casing or cover of your audio equipment to gain access to the internal lamp assembly. Refer to your specific equipment's service manual for precise instructions on accessing this area.
- Locate Old Bulbs: Identify the existing fuse-type lamps that need replacement. These are typically held in place by spring clips.
- Remove Old Bulbs: Gently pull or slide out the old incandescent bulbs from their clips. Be careful not to bend or damage the clips.
- Insert New LED Bulbs: Insert the new Springfield Speaker LED fuse-type bulbs into the empty clips. Ensure they are seated firmly. The overall length of these bulbs is 1.24 inches and the diameter is 0.25 inches, designed for a direct fit.
- Test Functionality: Before reassembling the casing, temporarily plug in and power on the equipment to verify that the new LED bulbs illuminate correctly. If a bulb does not light up, try rotating it 180 degrees within its clips, as LEDs are polarity sensitive.
- Reassemble Equipment: Once all bulbs are functioning, carefully reattach the casing or cover of your audio equipment.
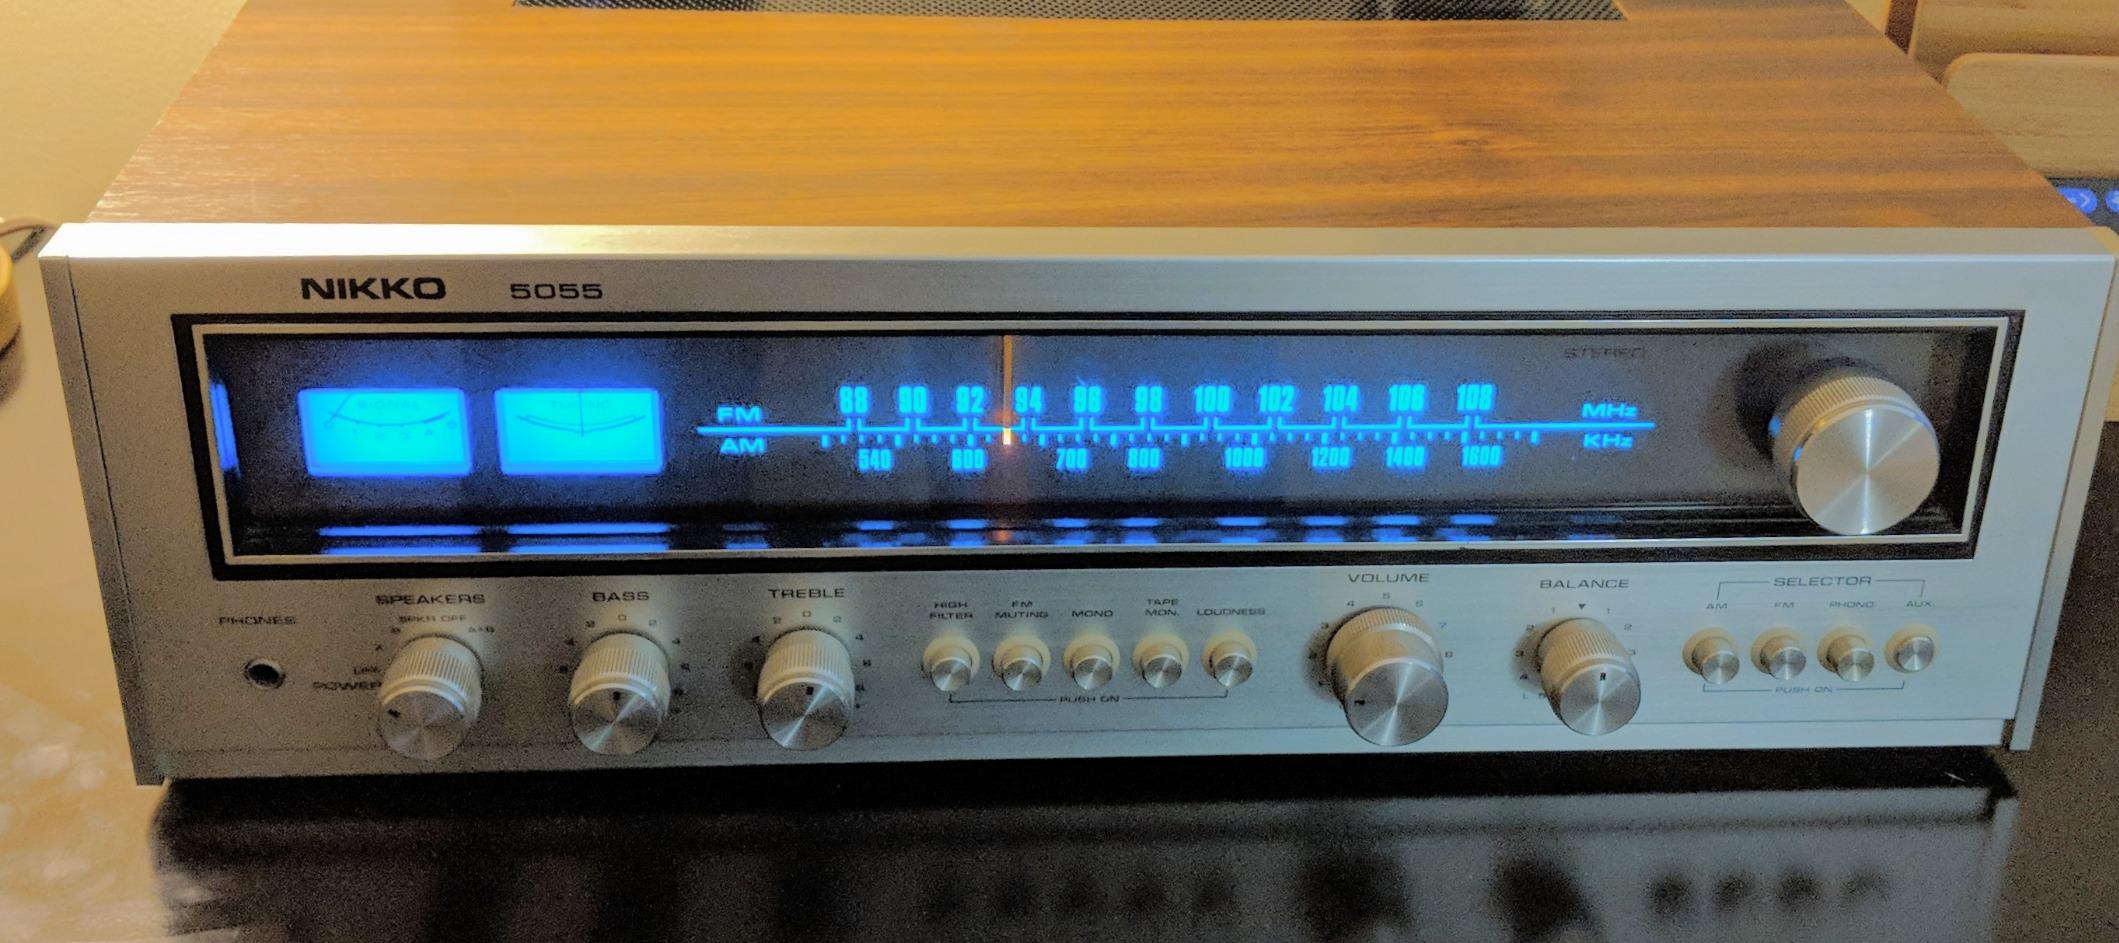
Image 3.1: A vintage Pioneer receiver with the new warm white LED bulbs installed, demonstrating the illuminated display.
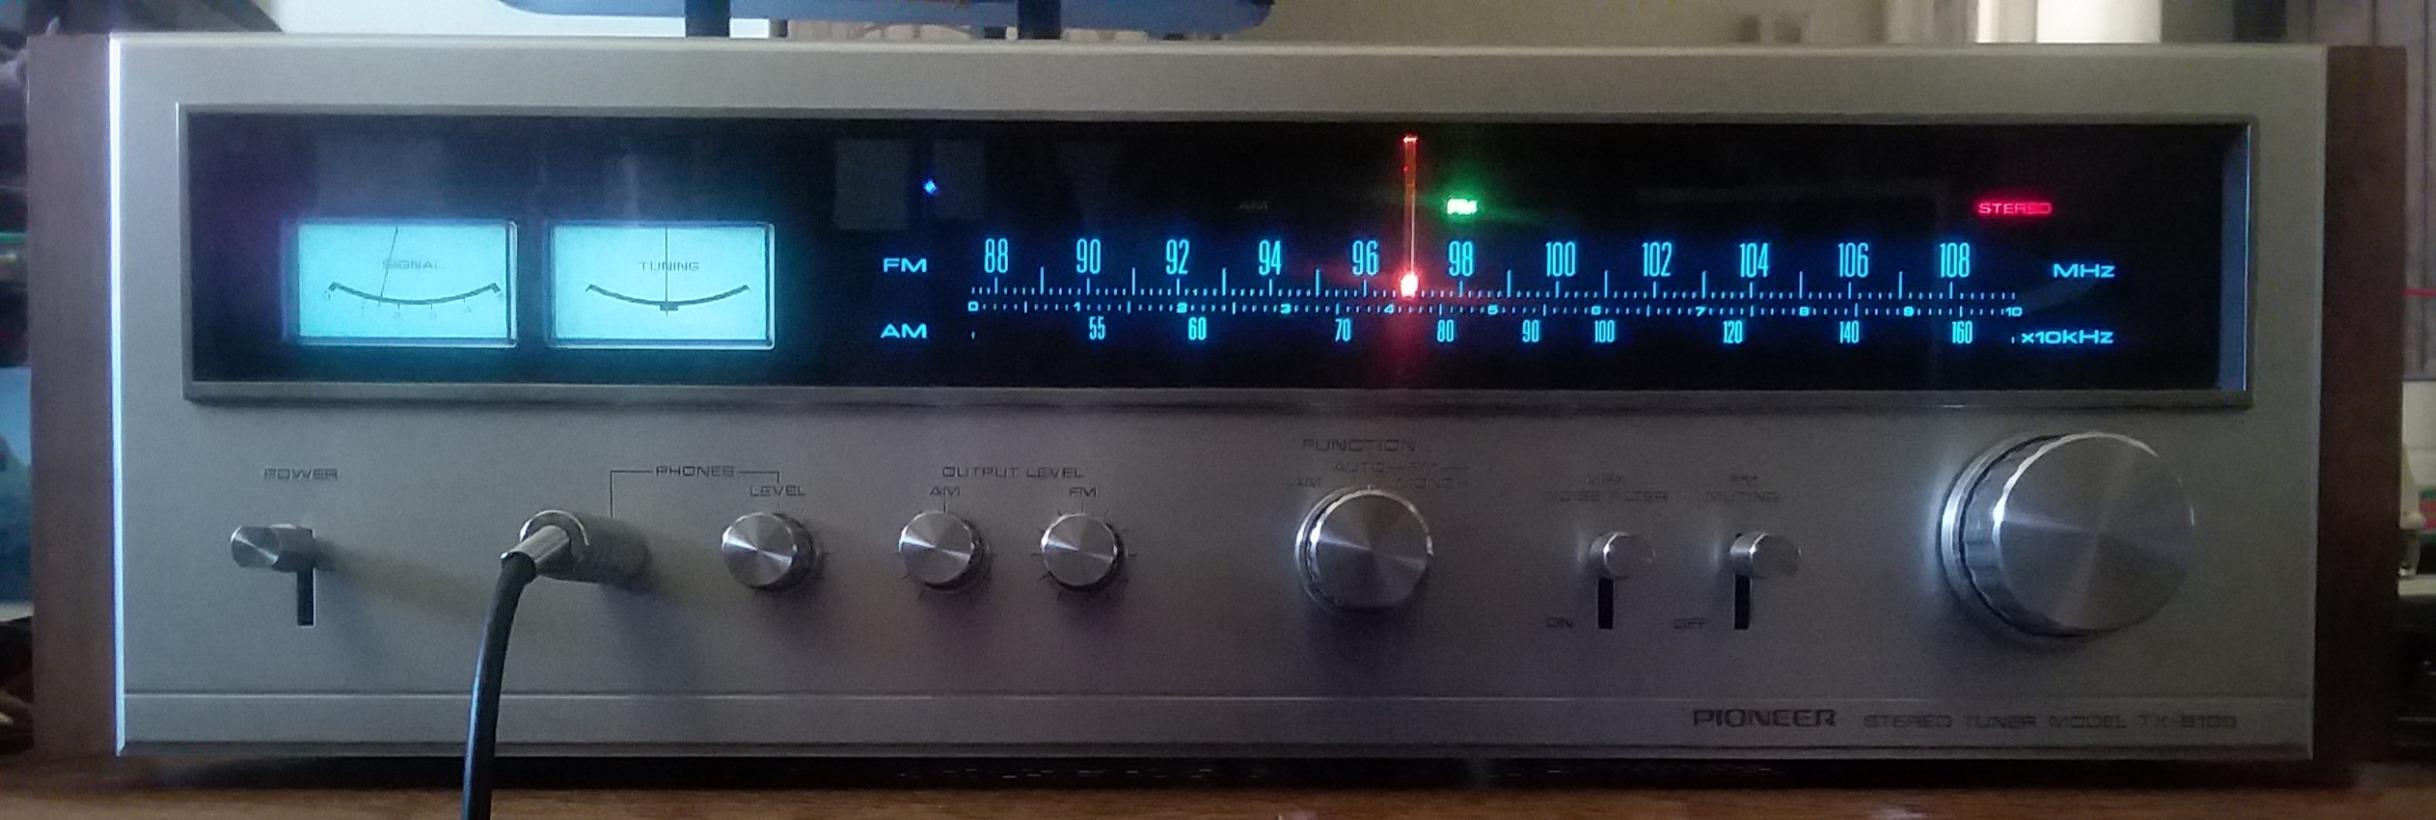
Image 3.2: A Pioneer TX-8100 Tuner after LED bulb installation, showcasing even and warm illumination.
4. Operation
Once installed, the LED fuse-type bulbs operate automatically with your audio equipment's power. They will illuminate when the receiver or amplifier is powered on, providing consistent warm white backlighting for the display and meters.
5. Maintenance
These LED bulbs require minimal maintenance. Due to their long lifespan, frequent replacement is not anticipated. If dust accumulates on the bulbs or inside the display area, ensure the equipment is unplugged before gently cleaning with a soft, dry cloth. Avoid using liquid cleaners directly on the bulbs or internal components.
6. Troubleshooting
- Bulb Does Not Light Up:
- Ensure the equipment is powered on and plugged in.
- LEDs are polarity sensitive. If a bulb does not light, remove it, rotate it 180 degrees, and reinsert it into the clips.
- Check that the bulb is securely seated in its clips and making proper contact.
- Verify that the voltage of your equipment's lamp circuit matches the 8V requirement of these bulbs.
- Uneven Illumination:
- Ensure all bulbs are correctly installed and facing the same direction if directional light is desired.
- Check for any obstructions or dust accumulation within the display area that might be blocking light.
- Flickering Bulb:
- Ensure the bulb is firmly seated in its clips. Loose connections can cause flickering.
- Inspect the clips for corrosion or damage. Clean or adjust as necessary.
7. Specifications
| Feature | Detail |
|---|---|
| Product Type | LED Fuse-Type Lamp Bulbs |
| Light Source Type | LED |
| Color Temperature | Warm White |
| Voltage | 8 Volts |
| Wattage | 8 watts (Note: This wattage is typically for the original incandescent equivalent. LEDs consume significantly less power.) |
| Overall Length | 1.24 inches (31.5 mm) |
| Diameter | 0.25 inches (6.35 mm) |
| Quantity | 8 bulbs per package |
| Installation | Snap-in replacement, no soldering required |
8. Warranty & Support
For specific warranty details and customer support regarding your Springfield Speaker LED bulbs, please refer to the product packaging or contact Springfield Speaker directly through their official website or customer service channels. Keep your purchase receipt for warranty claims.


