1. Introduction
Thank you for choosing the lionto Wooden Pet Hutch. This manual provides essential information for the safe assembly, proper use, and effective maintenance of your new pet hutch. Please read these instructions thoroughly before assembly and retain them for future reference.
This hutch is designed to provide a sheltered space for small animals, suitable for both indoor and outdoor environments. It features a durable wooden construction, a waterproof bitumen roof, and protective plastic feet.
2. Safety Instructions
- Ensure all components are securely fastened during assembly.
- Regularly inspect the hutch for any damage or loose parts that could harm your pet.
- This hutch is intended for small animals. Do not use it for animals larger than recommended.
- While suitable for outdoor use, position the hutch in a sheltered area to maximize its lifespan and protect your pet from extreme weather conditions.
- Important Note: This hutch is not designed for permanent housing of rodents or other species. For longer stays, consider integrating it with a larger outdoor enclosure or run.
3. Package Contents
Verify that all parts are present before beginning assembly. The package should contain:
- 1 x lionto Wooden Pet Hutch (disassembled components)
- Assembly kit (screws, hinges, latches, etc.)
- Assembly instructions
4. Assembly Instructions
Assembly requires basic tools, typically a screwdriver. It is recommended to have two people for certain steps, especially when attaching the roof.
- Unpack Components: Carefully remove all parts from the packaging and lay them out on a clean, flat surface. Identify each component.
- Assemble Side Panels: Connect the side panels to the front and back panels using the provided screws. Ensure all panels are oriented correctly, with the ventilation holes facing outwards and the door opening positioned as desired.
- Attach Base: Secure the base panel to the assembled side structure.
- Install Plastic Feet: Attach the plastic covers to the bottom of each leg. These protect your flooring when used indoors and prevent wood rot outdoors.

Figure 4.1: Plastic foot cover installation.
- Attach Hinged Roof: Position the roof panel onto the hutch. Secure it using the provided hinges. Ensure the roof opens smoothly.
- Install Roof Latches: Attach the metal hooks on both sides of the roof to secure it when closed.
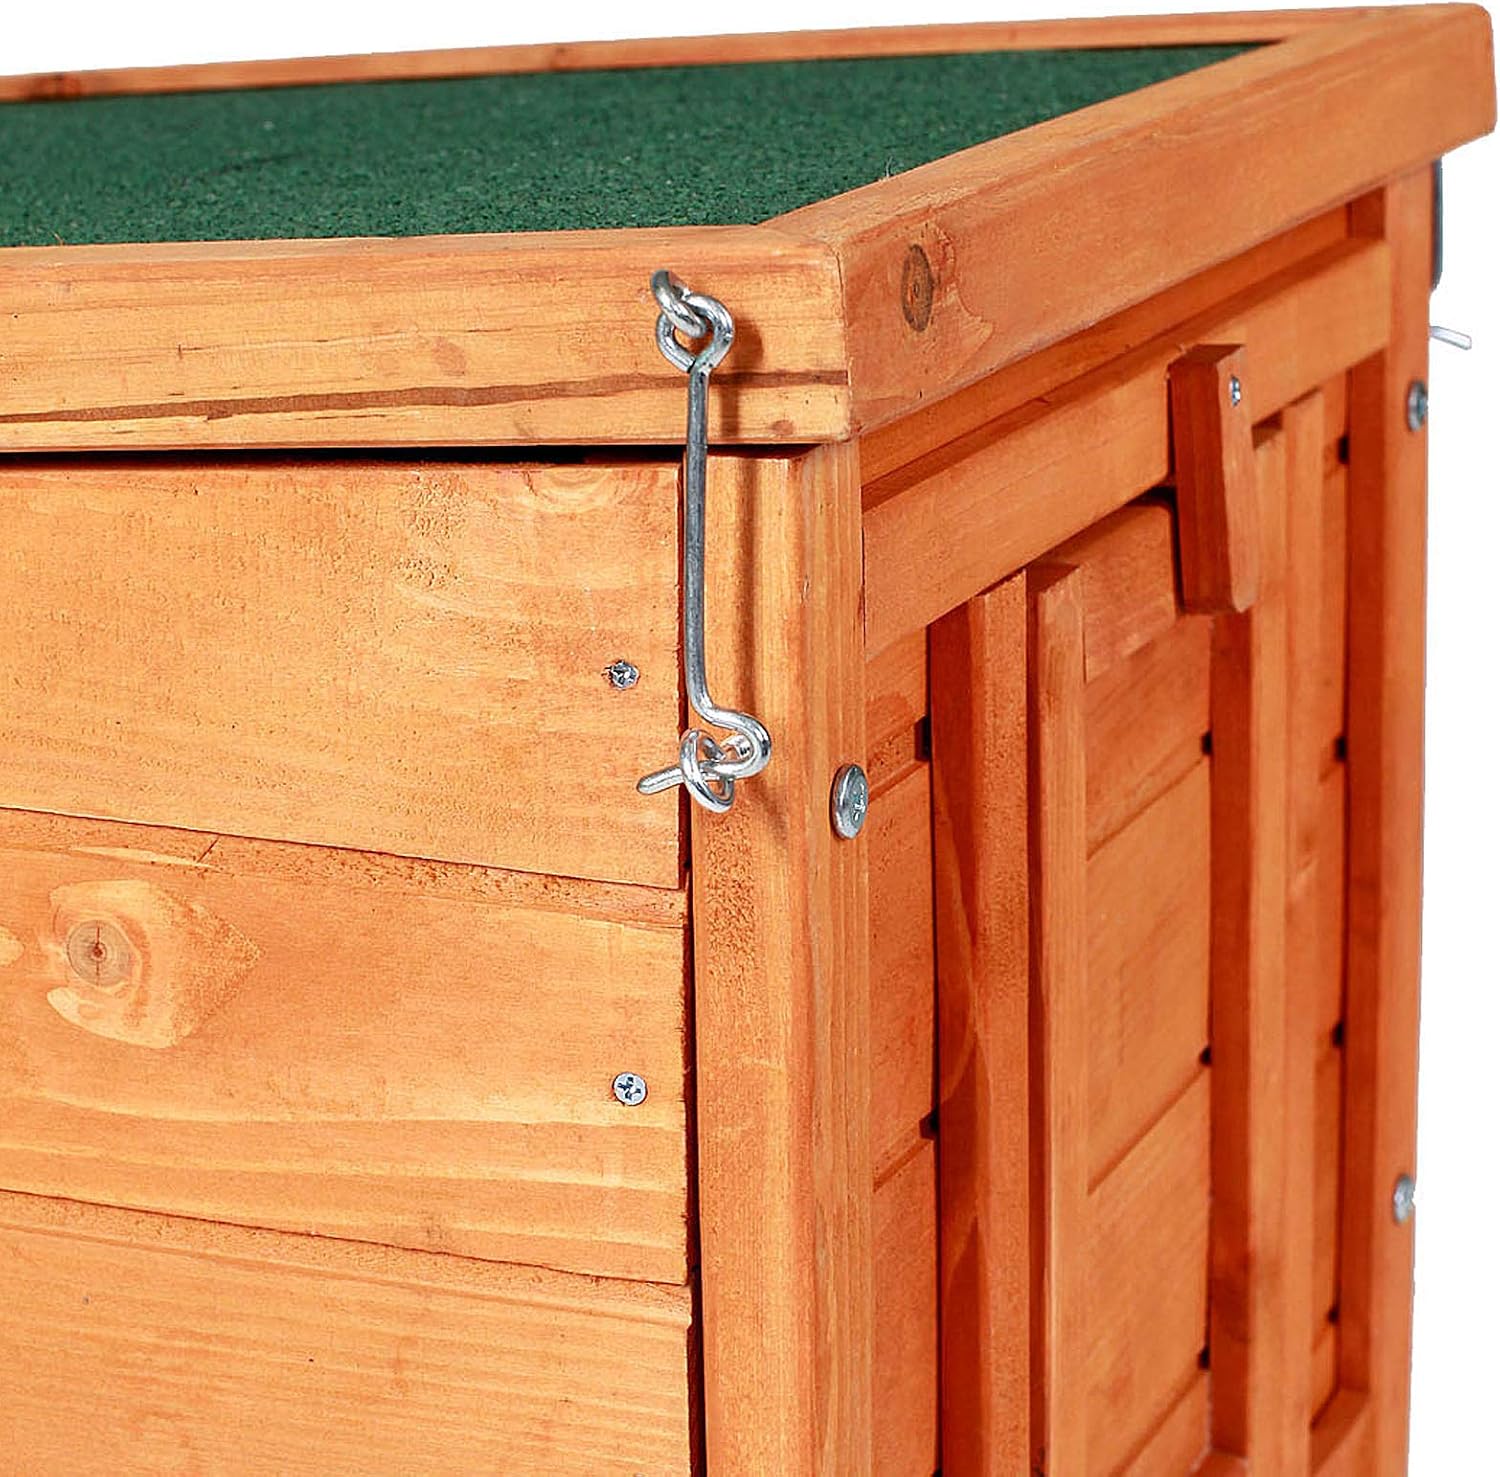
Figure 4.2: Roof latch mechanism.
- Assemble Ramp/Door: Attach the ramp component to the hutch's entrance. This piece serves as both an entry ramp and a closable door, secured by sliding mechanisms.

Figure 4.3: Hutch with open roof and extended ramp.
- Final Check: Verify that all screws are tightened and all parts are securely in place.

Figure 4.4: Assembled hutch, closed view.
5. Operating Instructions
- Accessing the Interior: The roof is hinged for easy access to your pet and for cleaning. Simply unlatch the hooks on the sides and lift the roof.
- Entrance/Ramp: The front flap serves as both an entrance and a ramp. It can be closed and secured using the sliding mechanisms to keep your pet safely inside or to restrict access.
- Ventilation: The hutch includes ventilation holes to ensure optimal air circulation for your pet's comfort.
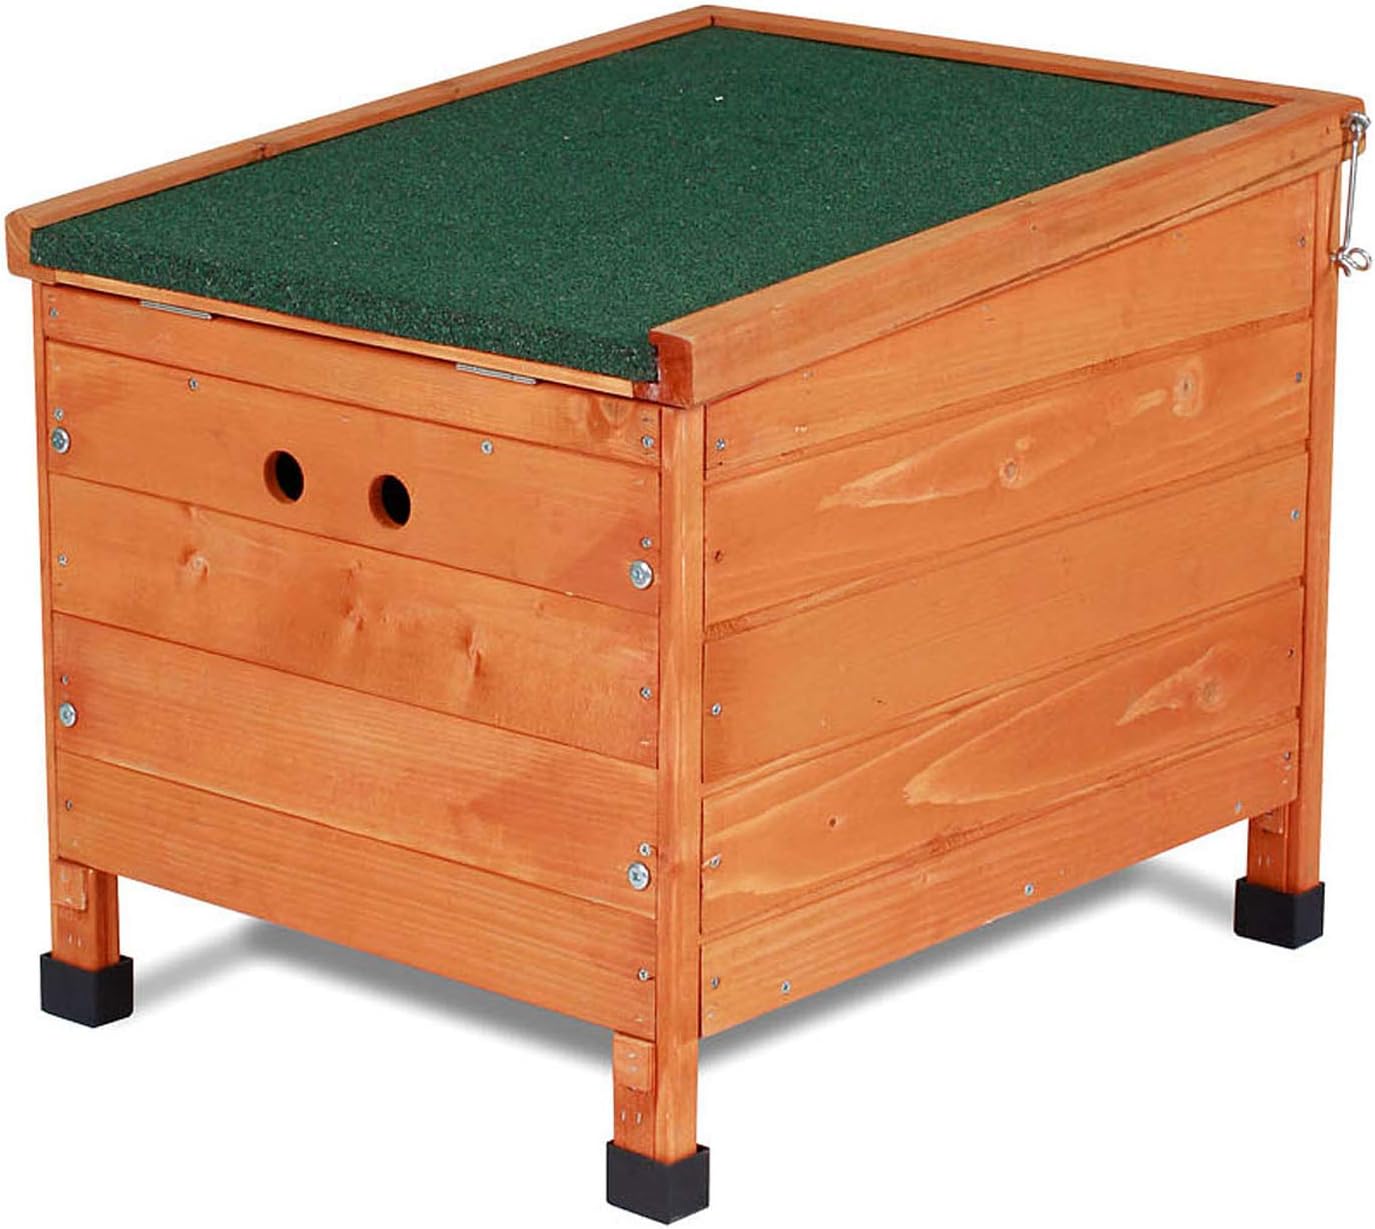
Figure 5.1: Ventilation holes on the hutch.
- Placement: The hutch is suitable for both indoor and outdoor use. When used indoors, the plastic feet protect your floors. When used outdoors, place it in a location that offers additional protection from direct sun, wind, and heavy rain.
- Combining with an Outdoor Run: For extended periods outdoors, it is recommended to connect the hutch to a secure outdoor run, allowing your pet more space to move and explore.

Figure 5.2: Hutch integrated with an outdoor run.
6. Maintenance
- Cleaning: The hutch is easy to clean. Use a damp cloth to wipe down surfaces. For deeper cleaning, mild pet-safe cleaning solutions can be used, followed by thorough rinsing and drying.
- Roof Care: The bitumen roof provides weather protection. Periodically check the roof for any damage or wear to ensure its waterproofing remains effective.
- Wood Protection: Although the hutch is made from robust fir wood, applying a pet-safe wood sealant annually can extend its lifespan, especially for outdoor use.
- Inspection: Regularly check all screws, hinges, and latches for tightness and functionality. Tighten any loose fasteners.
7. Troubleshooting
- Issue: Water leakage during rain.
Solution: Ensure the hutch is placed in a sheltered area. Check the bitumen roof for any cracks or damage and repair if necessary. Verify the roof latches are securely closed. - Issue: Difficulty opening/closing the roof or ramp.
Solution: Check hinges and sliding mechanisms for obstructions or damage. Apply a small amount of lubricant if movement is stiff. - Issue: Hutch appears unstable.
Solution: Re-tighten all assembly screws. Ensure the hutch is placed on a flat, level surface.
8. Specifications
| Feature | Detail |
|---|---|
| Model Number | RH10017 |
| Dimensions (L x W x H) | 43 x 43 x 52 cm (16.9 x 16.9 x 20.5 inches) |
| Product Weight | 6 Kilograms (13.2 lbs) |
| Material | Fir Wood, Bitumen Roof |
| Color | Natural |
| Special Features | Durable, Easy Assembly, Weather-resistant, Ventilated, Plastic Feet |
| Recommended Animal Type | Small animals (e.g., rabbits, guinea pigs) |
| Assembly Required | Yes |

Figure 8.1: Product dimensions diagram.
9. Contact and Support
For further assistance, questions, or to report any issues, please contact lionto customer support through your retailer or the official brand website. Please have your model number (RH10017) available when contacting support.