1. Introduction
This manual provides essential instructions for the safe and effective use of your Sony DCR-DVD610 DVD Handycam Camcorder. Please read this manual thoroughly before operating the camcorder and retain it for future reference. The Sony DCR-DVD610 is designed for recording video directly onto DVD-R/-RW/+RW discs and Memory Stick PRO Duo media, featuring a powerful 40x optical zoom and a 2.7-inch wide touch panel LCD.
2. Product Overview
Key Features:
- 40x Optical Zoom / 2000x Digital Zoom: Capture distant subjects with clarity.
- Carl Zeiss Vario-Tessar Lens: Ensures high-quality image capture.
- 2.7-inch Wide (16:9) Touch Panel LCD: For easy viewing and menu navigation.
- Hybrid Recording: Record to DVD discs or Memory Stick PRO Duo media.
- Infrared Connectivity: For certain remote control functions.
Camcorder Components:
Familiarize yourself with the main parts of your camcorder:

Image 2.1: Front view of the Sony DCR-DVD610 DVD Handycam Camcorder. This image displays the Carl Zeiss Vario-Tessar lens, the 'SONY' logo, 'HANDYCAM' branding, and the '40x OPTICAL ZOOM' indicator. The LCD panel is shown in its closed position, integrated into the side of the camcorder body.
- Lens: Carl Zeiss Vario-Tessar lens with lens cover switch.
- LCD Screen: 2.7-inch wide touch panel for viewing and control.
- Power Switch/Mode Dial: To turn the camcorder on/off and select recording/playback modes.
- Record Start/Stop Button: Initiates and stops video recording.
- Zoom Lever: Controls optical and digital zoom.
- Battery Compartment: Located at the rear for battery insertion.
- DVD Drive: Side-loading compartment for DVD discs.
- Memory Stick PRO Duo Slot: For inserting Memory Stick media.
3. Setup
3.1 Charging the Battery
- Connect the supplied AC power adapter to the camcorder's DC IN jack.
- Plug the AC power adapter into a wall outlet. The CHG (Charge) lamp will light up.
- Charging is complete when the CHG lamp turns off.
3.2 Inserting the Battery
- Ensure the camcorder is turned off.
- Slide the battery release lever and insert the battery pack into the battery compartment until it clicks into place.
- To remove, slide the release lever and pull the battery out.
3.3 Inserting a DVD Disc
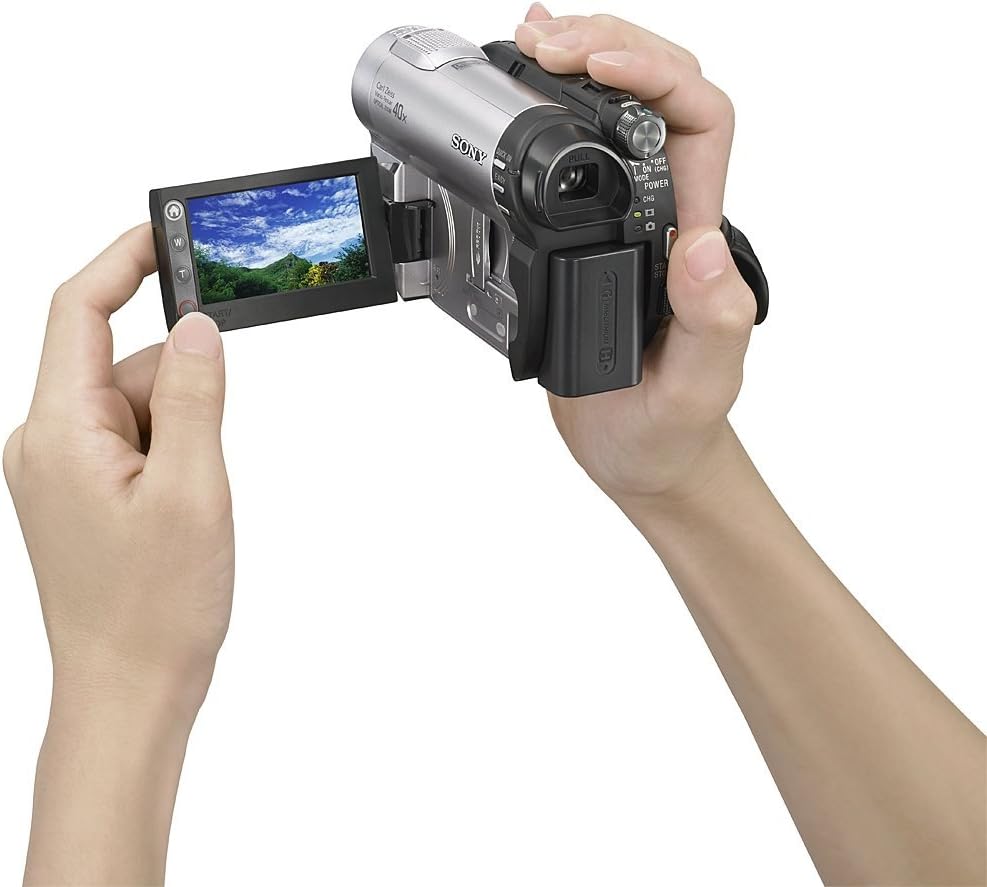
Image 3.1: Side view of the Sony DCR-DVD610 DVD Handycam Camcorder with the disc compartment open. This image clearly shows the mechanism for inserting a mini DVD disc, highlighting the 'DVD RW' and 'DVD+RW-compatible' labels.
- Open the DVD drive cover.
- Gently place a compatible 8cm DVD disc (DVD-R/-RW/+RW) onto the spindle with the recording surface facing down.
- Close the DVD drive cover until it clicks shut.
3.4 Inserting a Memory Stick PRO Duo
- Locate the Memory Stick PRO Duo slot, usually under a small cover.
- Insert the Memory Stick PRO Duo with the metal terminals facing the correct direction until it clicks.
- To remove, push the Memory Stick in once, and it will eject slightly.
3.5 Initial Power On

Image 3.2: The Sony DCR-DVD610 DVD Handycam Camcorder with its 2.7-inch wide LCD screen fully open and rotated. This view highlights the main controls on the camcorder body, including the power/mode dial, zoom lever, and record button, as well as the touch panel interface on the LCD.
- Open the LCD panel. The camcorder will power on automatically.
- If it does not power on, rotate the POWER switch/mode dial to the 'ON' position.
- Follow any on-screen prompts for initial setup, such as setting the date and time.
4. Operating the Camcorder
4.1 Recording Video
- Turn on the camcorder and open the LCD panel.
- Rotate the mode dial to the camera icon (recording mode).
- Point the camcorder at your subject. Use the zoom lever to adjust the focal length.
- Press the START/STOP button to begin recording. The recording indicator will appear on the LCD.
- Press the START/STOP button again to stop recording.
4.2 Playing Back Video

Image 4.1: A user holding the Sony DCR-DVD610 DVD Handycam Camcorder, with the LCD screen open and displaying a recorded video. The image demonstrates the ergonomic design and the interactive nature of the touch panel LCD for playback and menu navigation.
- Rotate the mode dial to the playback icon (VCR/PLAY mode).
- On the LCD touch panel, select the video you wish to play.
- Use the on-screen controls for play, pause, fast forward, and rewind.
4.3 Using the LCD Touch Panel
The 2.7-inch wide LCD is a touch panel. Tap icons on the screen to access menus, change settings, and control playback. Refer to the on-screen guide for specific icon functions.
5. Maintenance
5.1 Cleaning the Lens
Use a soft, dry cloth or a lens cleaning brush to gently remove dust and smudges. Avoid touching the lens surface with your fingers.
5.2 Cleaning the LCD Screen
Wipe the LCD screen with a soft, lint-free cloth. For stubborn smudges, slightly dampen the cloth with water or a specialized screen cleaner, then wipe gently.
5.3 Battery Care
- Store batteries in a cool, dry place when not in use.
- Avoid fully discharging the battery frequently to prolong its lifespan.
- Remove the battery from the camcorder if it will not be used for an extended period.
5.4 Storage
Store the camcorder in a dry, dust-free environment, away from extreme temperatures and direct sunlight. Ensure the lens cover is closed to protect the lens.
6. Troubleshooting
If you encounter issues with your camcorder, refer to the following common problems and solutions:
| Problem | Possible Cause / Solution |
|---|---|
| Camcorder does not power on. | Battery is not charged or not inserted correctly. Ensure battery is charged and properly seated. Check power switch position. |
| Cannot record video. | No disc or Memory Stick inserted, or media is full/protected. Ensure compatible media is inserted and has free space. Check write-protect switch on Memory Stick. |
| Disc error message appears. | Disc is dirty, scratched, or incompatible. Clean the disc, try a different disc, or ensure it's a compatible 8cm DVD-R/-RW/+RW. |
| Image is blurry. | Lens is dirty or out of focus. Clean the lens. Allow the autofocus to adjust, or manually focus if available. |
7. Specifications
Below are the technical specifications for the Sony DCR-DVD610 DVD Handycam Camcorder:
- Model: DCR-DVD610
- Brand: Sony
- Product Dimensions: 5.12 x 2.17 x 3.5 inches
- Item Weight: 2.05 pounds
- Photo Sensor Technology: CMOS
- Video Capture Resolution: 480p
- Maximum Focal Length: 76 Millimeters
- Flash Memory Type: Memory Stick PRO DUO
- Video Capture Format: MP4
- Screen Size: 2.7 Inches (LCD)
- Connectivity Technology: Infrared
- Color: Silver
- Power Source: 1 Lithium Metal battery (required)
8. Warranty and Support
For warranty information, technical support, or service inquiries regarding your Sony DCR-DVD610 DVD Handycam Camcorder, please refer to the warranty card included with your product or visit the official Sony support website. Keep your proof of purchase for warranty claims.


