1. Introduction
This manual provides detailed instructions for the assembly and care of your Italeri M163 VADS (Vulcan Air Defense System) 1:35 scale model kit. The M163 VADS is a self-propelled anti-aircraft gun developed from the M113 armored personnel carrier, featuring a 20 mm M61 Vulcan rotary cannon and a radar system for fire control. This model kit allows enthusiasts to recreate this significant military vehicle.
Please read all instructions carefully before beginning assembly.
2. Safety Information
WARNING: SMALL PARTS.
This model kit contains small parts which may pose a choking hazard for young children. Keep all components and tools out of reach of children under 3 years of age. Adult supervision is recommended during assembly.
Always use appropriate ventilation when working with model glues and paints. Avoid direct contact with skin and eyes. Refer to the safety data sheets of any adhesives or paints used for specific precautions.
3. Kit Contents
Your Italeri M163 VADS model kit includes the following components:
- Plastic sprues with molded parts
- Decal sheet for various markings
- Instruction booklet (this document)
Tools and materials required for assembly (not included):
- Plastic cement (model glue)
- Hobby knife or sprue cutters
- Small files or sandpaper
- Tweezers
- Paints (acrylic or enamel, as desired)
- Paint brushes

Figure 3.1: The packaging box for the Italeri M163 VADS model kit. The box displays an image of the completed model and indicates the scale (1:35) and model number (No. 6560).

Figure 3.2: A view of the plastic sprues containing various molded components for the M163 VADS model. These parts need to be carefully cut from the sprues for assembly.
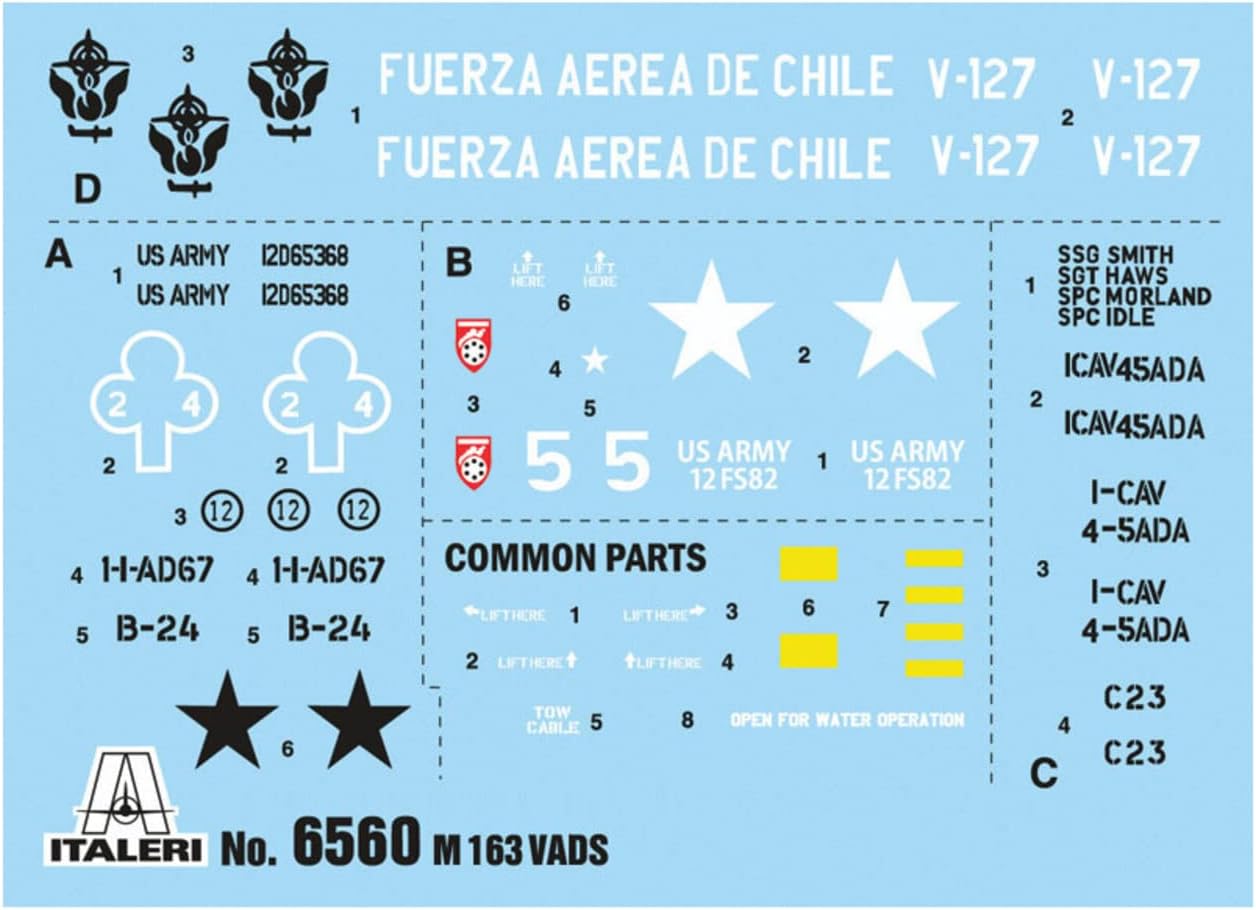
Figure 3.3: The decal sheet included with the kit, providing various markings and insignia for different versions of the M163 VADS, including US Army and Chilean Air Force options.
4. Assembly Instructions
Follow the numbered steps provided in the included diagrammatic instruction booklet. The general assembly process involves:
- Part Preparation: Carefully cut each part from its sprue using a hobby knife or sprue cutters. Remove any excess plastic (flash) with a file or sandpaper.
- Dry Fitting: Before applying glue, dry-fit parts together to ensure proper alignment and fit.
- Gluing: Apply a small amount of plastic cement to the joining surfaces. Hold parts firmly together until the glue sets.
- Sub-Assemblies: Assemble smaller sections (e.g., tracks, turret, chassis components) before combining them into the main model.
- Painting (Optional): Paint individual components or sub-assemblies before final assembly for easier detailing. Alternatively, paint the entire model after assembly.
- Decal Application: Once painting is complete and dry, apply decals according to the provided guide. Use decal setting solutions for better adhesion and a painted-on look.
- Final Assembly: Combine all sub-assemblies to complete the model.
Refer to the specific diagrams in the physical instruction booklet for step-by-step visual guidance.
5. Display and Handling
Once assembled, your Italeri M163 VADS model is intended for display. Handle the model carefully to avoid damaging delicate parts, such as antennas, machine guns, or small details.
- Place the model on a stable, flat surface away from direct sunlight, extreme temperatures, and high humidity.
- Avoid dropping or subjecting the model to impacts.
- If moving the model, support it from the main chassis to prevent stress on smaller components.
6. Maintenance and Care
To maintain the appearance of your model, occasional cleaning may be necessary.
- Dusting: Use a soft, dry brush (such as a makeup brush or soft paintbrush) to gently remove dust. For stubborn dust in crevices, a can of compressed air can be used, held at a safe distance.
- Cleaning: Avoid using water, cleaning solutions, or abrasive materials, as these can damage paint, decals, or the plastic itself.
- Storage: If storing the model for an extended period, place it in a dust-free, temperature-controlled environment, ideally in a display case or covered container.
7. Troubleshooting Common Assembly Issues
While assembling your model, you might encounter some common challenges:
- Parts Not Fitting:
- Ensure all flash (excess plastic) has been removed from the part edges.
- Verify you are using the correct parts for the step by cross-referencing with the instruction diagrams.
- Sometimes, a small amount of sanding or filing may be needed to achieve a perfect fit.
- Glue Not Holding:
- Ensure surfaces are clean and free of paint or grease.
- Apply sufficient, but not excessive, glue.
- Hold parts firmly together for the recommended curing time of your specific plastic cement.
- Broken Parts:
- Small, delicate parts can break easily. If a part breaks, attempt to re-glue it using plastic cement. For structural breaks, consider reinforcing with a small piece of plasticard or wire if possible.
- Decal Silvering:
- This occurs when air is trapped under the decal, making it look silvery. Apply decals to a glossy surface. Use decal setting solutions to help the decal conform to the surface and eliminate air bubbles.
8. Specifications
| Brand: | Italeri |
| Model: | M163 VADS (Vulcan Air Defense System) |
| Scale: | 1:35 |
| Model Number: | 6560S |
| Product Dimensions (Box): | 6 x 34.5 x 24 inches |
| Item Weight (Boxed): | 11.4 ounces |
| Recommended Age: | 14 years and up |
| Release Date: | October 1, 2019 |
9. Warranty and Support
Italeri model kits are designed for hobbyists. Specific warranty information for individual parts is typically not provided for model kits, as assembly and finishing are user-dependent.
For missing or defective parts, please contact Italeri customer support directly. Their contact information can usually be found on the product packaging or their official website.