1. Introduction
This manual provides detailed instructions for the DollaTek 5-piece 4x4 Universal 16-Key Membrane Keypad. This keypad is a versatile input device designed for use with microcontrollers such as Arduino, Raspberry Pi, and other embedded systems. It offers 16 tactile keys arranged in a 4x4 matrix, making it suitable for various data entry and control applications.

Figure 1: Front view of the DollaTek 4x4 16-Key Membrane Keypad.
2. Product Features
- 16 Tactile Keys: Arranged in a 4x4 matrix (0-9, A-D, *, #) for comprehensive input.
- 8-Pin Connector: Standard FPC connector for easy integration with microcontrollers.
- Adhesive Backing: Features a removable white sticker on the back for secure mounting.
- Durable Membrane Design: Provides reliable and consistent key presses.
- Compact Size: Ideal for projects with limited space.
3. Package Contents
Each package contains:
- 5x DollaTek 4x4 16-Key Membrane Keypads
4. Specifications
| Brand | DollaTek |
| Model | 4x4 16-Key Membrane Keypad |
| Key Type | Membrane, Tactile |
| Number of Keys | 16 (4x4 Matrix) |
| Connector Type | 8-pin FPC Connector |
| Maximum Circuit Current | 35VDC, 100mA |
| Insulation Resistance | 100M Ohm, 100V |
| Dielectric Withstand Voltage | 250VRms (50-60Hz, 1min) |
| Contact Bounce | <5ms |
| Operating Temperature | 0°C to +70°C |
| Operating Humidity | 90%-95% at 40°C for 240 hours |
| Keypad Dimensions (L x W) | Approx. 76 x 69 mm (3 x 2.7 inches) |
| Cable Length | Approx. 83 mm (3.3 inches) |
5. Setup
To integrate the DollaTek 4x4 16-Key Membrane Keypad into your project, follow these general steps:
- Identify Pins: The keypad features an 8-pin FPC connector. These pins correspond to the 4 rows and 4 columns of the keypad matrix. Typically, the first 4 pins are for rows and the next 4 for columns, or vice-versa. Refer to your specific microcontroller's documentation or a keypad library for exact pin assignments.
- Connect to Microcontroller: Connect the 8 pins of the keypad to digital I/O pins on your microcontroller (e.g., Arduino). It is common practice to connect the row pins to output pins and column pins to input pins with pull-up resistors (either external or internal to the microcontroller).
- Mounting: The back of the keypad has a white adhesive sticker. Peel off the protective layer to expose the adhesive and firmly attach the keypad to a clean, dry surface on your project enclosure.
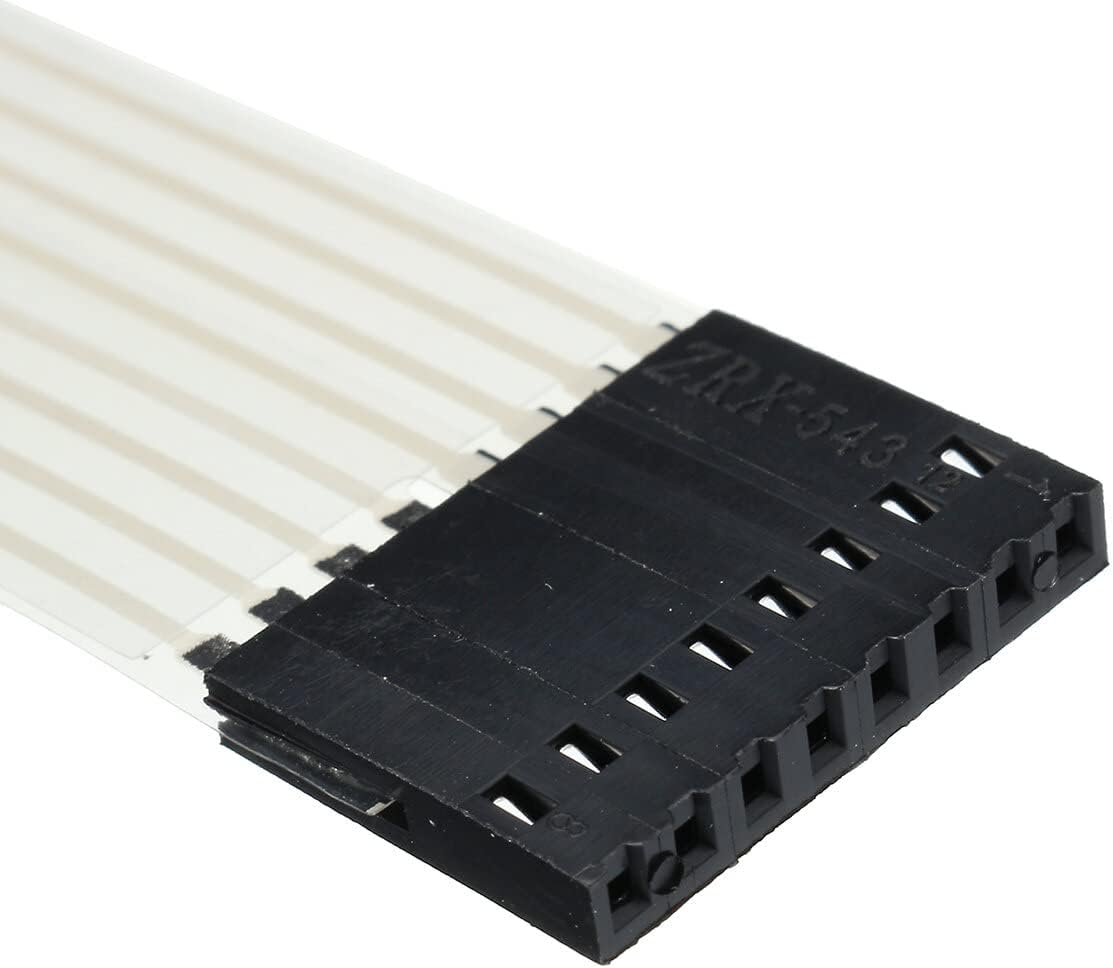
Figure 2: Close-up view of the 8-pin FPC connector.

Figure 3: Back view of the keypad showing the adhesive layer.
6. Operating Instructions
Once connected, the keypad operates by detecting when a key is pressed, which creates a connection between a specific row and column pin. Your microcontroller program will scan the rows and columns to determine which key has been activated.
- Programming: Use a suitable library for your microcontroller (e.g., the 'Keypad' library for Arduino) to simplify reading inputs from the 4x4 matrix. This library handles the scanning logic.
- Key Mapping: Define the character map for your keypad in your code. The standard layout is typically:
char keys[4][4] = {
  {'1','2','3','A'},
  {'4','5','6','B'},
  {'7','8','9','C'},
  {'*','0','#','D'}
};- Reading Input: Your program will continuously check for key presses. When a key is pressed, the library will return the corresponding character.
- Debouncing: Keypad libraries typically include debouncing mechanisms to prevent multiple readings from a single key press.
7. Maintenance
The DollaTek membrane keypad requires minimal maintenance to ensure longevity and reliable operation.
- Cleaning: Use a soft, dry cloth to wipe the surface of the keypad. For stubborn dirt, a slightly damp cloth with mild soap can be used, ensuring no liquid enters the internal components.
- Storage: Store the keypads in a cool, dry environment, away from direct sunlight and extreme temperatures.
- Handling: Avoid bending or creasing the flexible cable or the keypad itself, as this can damage the internal traces. Do not apply excessive force to the keys.
8. Troubleshooting
If you encounter issues with your DollaTek 4x4 16-Key Membrane Keypad, consider the following troubleshooting steps:
- No Key Response:
- Verify all 8 pins are correctly connected to your microcontroller.
- Check for loose connections or damaged wires.
- Ensure your code correctly initializes the keypad pins and uses the appropriate library.
- Confirm that the row and column pins are correctly mapped in your software.
- Incorrect Key Input:
- Double-check your key mapping in the code against the physical layout of the keypad.
- Ensure there are no short circuits between adjacent pins on the connector or on your breadboard/PCB.
- Intermittent Key Presses:
- Ensure your code includes proper debouncing for key presses.
- Check for environmental factors like electromagnetic interference.
- Keypad Not Sticking:
- Ensure the mounting surface is clean, dry, and smooth before applying the adhesive.
- Apply firm, even pressure across the entire keypad when mounting.
9. Warranty and Support
DollaTek products are designed for reliability and performance. For specific warranty information or technical support, please refer to the DollaTek official website or contact your retailer. Keep your purchase receipt as proof of purchase.


