1. Important Safety Instructions
Read all instructions before using this appliance. To reduce the risk of fire, electric shock, or injury to persons when using your dryer, follow basic precautions, including the following:
- Install and store the dryer in a location where it will not be exposed to water or weather.
- Do not dry articles that have been previously cleaned in, washed in, soaked in, or spotted with gasoline, dry-cleaning solvents, or other flammable or explosive substances, as they emit vapors that could ignite or explode.
- Do not allow children to play on or in the appliance. Close supervision of children is necessary when the appliance is used near children.
- Before the dryer is removed from service or discarded, remove the door to the drying compartment.
- Do not reach into the appliance if the drum is moving.
- Do not install or operate this dryer without the exhaust duct connected.
- Keep area around the exhaust opening and adjacent surrounding areas free from the accumulation of lint, dust, and dirt.
- The interior of the appliance and exhaust duct should be cleaned periodically by qualified service personnel.
- Do not repair or replace any part of the appliance or attempt any servicing unless specifically recommended in this manual or in published user-repair instructions that you understand and have the skills to carry out.
2. Setup and Installation
Proper installation is crucial for the safe and efficient operation of your dryer. Refer to the detailed installation instructions provided with your appliance for specific electrical, venting, and leveling requirements.
2.1 Unpacking
Carefully remove all packaging materials, including any shipping bolts or restraints. Inspect the dryer for any shipping damage. Report any damage immediately to your dealer.
2.2 Location Requirements
The dryer must be installed in a location with adequate clearance for proper air circulation and maintenance. Ensure the floor is level and capable of supporting the dryer's weight (approximately 136 pounds). Proper ventilation is essential to prevent lint accumulation and ensure efficient drying.
2.3 Electrical Connection
This is an electric dryer requiring a dedicated 240V, 30A electrical supply. Ensure the electrical installation complies with all local codes and ordinances. A qualified electrician should perform the electrical connection.
2.4 Venting
The dryer must be vented to the outdoors using a rigid metal duct. Avoid using flexible plastic or foil ducts, as they can restrict airflow and pose a fire hazard. The vent system should be as short and straight as possible.
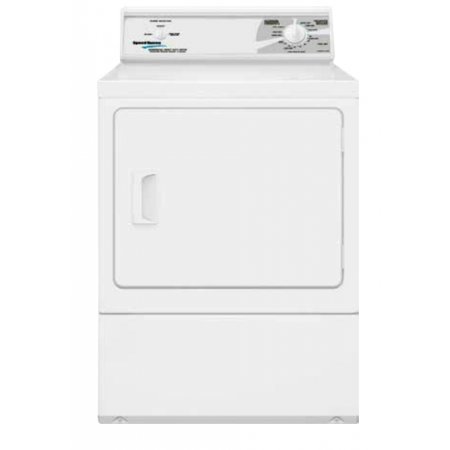
Image: Front view of the Speed Queen LDE30RGS173TW01 Home Style Mechanical Electric Dryer. This image shows the overall design of the appliance, including the front-loading door and the mechanical control panel located on the top rear of the unit.
3. Operating Instructions
This section provides guidance on how to use your Speed Queen electric dryer effectively.
3.1 Loading the Dryer
- Load items loosely into the dryer drum. Do not overload the dryer; the 18 lb capacity refers to dry weight. Overloading can reduce drying efficiency and increase wear on the appliance.
- Separate heavy items from lightweight items for more uniform drying.
- Ensure all items are suitable for machine drying according to their care labels.
3.2 Control Panel Overview
The LDE30RGS173TW01 features mechanical controls for straightforward operation.
- Cycle Selector Knob: Used to select the desired drying cycle (e.g., Regular, Permanent Press, Delicate).
- Temperature Selector Knob: Used to choose the drying temperature (e.g., High, Medium, Low, Air Fluff).
- Start Button: Press to begin the selected drying cycle.
3.3 Selecting a Drying Cycle
- Load the dryer with items.
- Close the dryer door securely.
- Turn the Cycle Selector Knob to the desired drying cycle based on the fabric type.
- Turn the Temperature Selector Knob to the appropriate heat setting.
- Press the Start Button to begin the cycle. The dryer will tumble and heat according to the selected settings.
The dryer will automatically stop when the selected cycle is complete. For optimal results, remove items promptly to reduce wrinkling.
4. Maintenance
Regular maintenance ensures the longevity and efficient performance of your dryer.
4.1 Cleaning the Lint Filter
Clean the lint filter before or after every load. A clogged lint filter restricts airflow, increases drying time, and can be a fire hazard.
- Locate the lint filter, typically inside the dryer door opening.
- Pull the filter straight out.
- Remove any accumulated lint by hand.
- Insert the filter back into its housing until it is securely in place.
4.2 Cleaning the Dryer Exterior
Wipe the exterior surfaces with a soft, damp cloth. Avoid abrasive cleaners or solvents that could damage the finish.
4.3 Cleaning the Exhaust System
Periodically inspect and clean the entire exhaust duct system to prevent lint buildup. This should be done at least once a year, or more frequently if drying large loads or lint-producing items. Professional service is recommended for thorough cleaning.
5. Troubleshooting
Before calling for service, review the following common issues and their potential solutions.
| Problem | Possible Cause | Solution |
|---|---|---|
| Dryer does not start | Power cord unplugged; circuit breaker tripped; door not closed; Start button not pressed firmly. | Check power connection; reset breaker; ensure door is latched; press Start button firmly. |
| Dryer does not heat | No heat selected; thermal fuse blown; heating element failure; incorrect electrical connection. | Verify temperature setting; contact qualified service personnel for fuse/element check. |
| Clothes take too long to dry | Lint filter clogged; exhaust vent restricted; dryer overloaded; incorrect cycle/temperature. | Clean lint filter; check/clean exhaust vent; reduce load size; select appropriate cycle/temperature. |
| Excessive noise | Foreign objects in drum; dryer not level; worn drum rollers or bearings. | Check drum for objects; level the dryer; contact service for internal component inspection. |
If these solutions do not resolve the issue, contact Speed Queen customer service or a qualified appliance technician.
6. Specifications
Key specifications for the Speed Queen LDE30RGS173TW01 Electric Dryer.
- Model: LDE30RGS173TW01
- Brand: Speed Queen
- Type: Home Style Mechanical Electric Dryer
- Capacity: 18 Pounds (dry weight)
- Fuel Type: Electric
- Heating Element: 5,350 Watts
- Control Type: Mechanical
- Drum Material: Galvanized Steel
- Door Type: Extra large 2.06 ft front load
- Item Weight: Approximately 136 pounds
- Dimensions (H x W x D): Approximately 45 x 31 x 30 inches (Package Dimensions)
- Color: White
- Certification: UL
7. Warranty and Support
Your Speed Queen dryer is backed by a manufacturer's warranty. Please refer to the warranty card included with your purchase for specific terms, conditions, and registration information. Keep your proof of purchase for warranty claims.
Customer Support
For technical assistance, service scheduling, or parts inquiries, please contact Speed Queen customer support. Contact information can typically be found on the manufacturer's website or in your warranty documentation.
When contacting support, please have your dryer's model number (LDE30RGS173TW01) and serial number readily available.