Introduction
This manual provides essential instructions for the safe and effective operation, maintenance, and troubleshooting of your RYOBI 10-inch 40-Volt Lithium-Ion Cordless Pole Saw. Please read this manual thoroughly before using the tool and retain it for future reference.

Image: The RYOBI 10-inch 40-Volt Lithium-Ion Cordless Pole Saw, including the main unit, a 40-Volt lithium-ion battery, and a battery charger.
General Safety Information
WARNING: Read all safety warnings, instructions, illustrations, and specifications provided with this power tool. Failure to follow all instructions listed below may result in electric shock, fire, and/or serious injury.
Work Area Safety
- Keep the work area clean and well-lit. Cluttered or dark areas invite accidents.
- Do not operate power tools in explosive atmospheres, such as in the presence of flammable liquids, gases, or dust. Power tools create sparks which may ignite the dust or fumes.
- Keep children and bystanders away while operating a power tool. Distractions can cause you to lose control.
Electrical Safety
- Avoid body contact with earthed or grounded surfaces, such as pipes, radiators, ranges, and refrigerators. There is an increased risk of electric shock if your body is earthed or grounded.
- Do not expose power tools to rain or wet conditions. Water entering a power tool will increase the risk of electric shock.
Personal Safety
- Always wear eye protection, hearing protection, and appropriate personal protective equipment (PPE) such as gloves and sturdy footwear.
- Stay alert, watch what you are doing, and use common sense when operating a power tool. Do not use a power tool while you are tired or under the influence of drugs, alcohol, or medication.
- Dress properly. Do not wear loose clothing or jewelry. Keep your hair and clothing away from moving parts.
Tool Use and Care
- Do not force the power tool. Use the correct power tool for your application.
- Disconnect the battery pack from the power tool before making any adjustments, changing accessories, or storing power tools.
- Store idle power tools out of the reach of children and do not allow persons unfamiliar with the power tool or these instructions to operate the power tool.
Battery Tool Use and Care
- Recharge only with the charger specified by the manufacturer. A charger that is suitable for one type of battery pack may create a risk of fire when used with another battery pack.
- Use power tools only with specifically designated battery packs. Use of any other battery packs may create a risk of injury and fire.
- When the battery pack is not in use, keep it away from other metal objects, like paper clips, coins, keys, nails, screws, or other small metal objects, that can make a connection from one terminal to another. Shorting the battery terminals together may cause burns or a fire.
- Under abusive conditions, liquid may be ejected from the battery; avoid contact. If contact accidentally occurs, flush with water. If liquid contacts eyes, additionally seek medical help. Liquid ejected from the battery may cause irritation or burns.
Setup and Assembly
1. Attaching the Extension Shaft
The pole saw comes with an extension shaft to increase your reach. To attach it:
- Align the male end of the extension shaft with the female coupling on the main power head.
- Push the shafts together until the spring-loaded button on the male end locks into the hole on the female coupling.
- Tighten the coupling knob securely to prevent separation during use.

Image: Illustrates the process of connecting the extension shaft to the main pole saw unit.
2. Installing the Battery
Ensure the battery is fully charged before first use.
- Align the ribs on the battery with the grooves in the tool's battery port.
- Slide the battery into the tool until it clicks into place.
- To remove, press the release button and slide the battery out.
3. Filling the Chain Oil Reservoir
The pole saw features an automatic oiler. It is crucial to fill the reservoir before each use.
- Locate the oil cap on the saw head.
- Unscrew the cap and fill the reservoir with high-quality bar and chain oil. Do not use waste oil or thin oil.
- Replace the cap and tighten it securely.
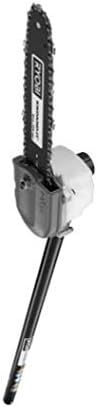
Image: A detailed view of the pole saw's cutting head, showing the chain, bar, and oil reservoir cap.
4. Adjusting Chain Tension
Proper chain tension is vital for safe and efficient operation. Check tension before each use and periodically during extended operation.
- The chain should be snug against the guide bar, but still able to be pulled around by hand.
- Refer to the tool's specific instructions for tension adjustment screws.
Operating Instructions
Pre-Operation Checklist
- Ensure the battery is fully charged.
- Verify the chain oil reservoir is full.
- Check chain tension.
- Inspect the tool for any damage or loose parts.
- Clear the work area of bystanders, pets, and obstacles.
- Wear appropriate PPE: safety glasses, hearing protection, gloves, and sturdy footwear.
Starting and Stopping the Pole Saw
- Grip the pole saw firmly with both hands, ensuring a balanced stance.
- To start, press the safety lock-out button and then squeeze the variable speed trigger.
- To stop, release the variable speed trigger.
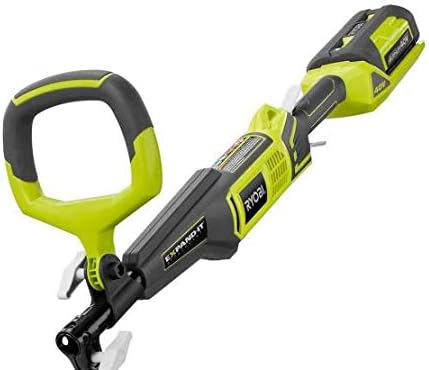
Image: A close-up of the pole saw's handle, illustrating the grip and trigger area.
Cutting Techniques
- Branch Size: This pole saw is designed for cutting branches up to 6 inches in diameter. Do not attempt to cut larger branches.
- Angled Cutting Head: The angled cutting head provides improved control and visibility for precise cuts.
- Proper Positioning: Position yourself to maintain balance and avoid falling debris. Do not stand directly under the branch being cut.
- Cutting Sequence: For larger branches, make an undercut first to prevent bark stripping, then complete the cut from the top.
- Avoid Forcing: Allow the saw to do the work. Do not apply excessive pressure, as this can cause the saw to stall or kickback.
- Extension Shaft: Utilize the extension shaft to reach branches up to 12 feet high, eliminating the need for a ladder.
Maintenance
Regular maintenance ensures optimal performance and extends the life of your pole saw. Always disconnect the battery before performing any maintenance.
Chain and Bar Maintenance
- Chain Sharpening: A sharp chain is essential for efficient cutting. Sharpen the chain regularly or replace it when dull.
- Chain Replacement: Replace the chain if it is damaged, bent, or worn beyond its service limit.
- Guide Bar Maintenance: Clean the guide bar groove and oil holes regularly. Flip the guide bar periodically to ensure even wear.
Automatic Oiler System
- Regularly check the oil level and refill as needed.
- Ensure the oil port is clear of debris to allow proper lubrication.
Cleaning and Storage
- After each use, clean the tool thoroughly, removing sawdust and debris from the motor housing, chain, and bar.
- Store the pole saw in a dry, secure location, out of reach of children.
- Remove the battery pack from the tool before storage.
Battery Care
- Store batteries in a cool, dry place, away from direct sunlight and extreme temperatures.
- Do not store batteries in a discharged state for extended periods. Charge them periodically.
Troubleshooting
| Problem | Possible Cause | Solution |
|---|---|---|
| Saw does not start | Battery not charged or improperly installed; Safety lock-out not engaged; Tool malfunction | Ensure battery is charged and properly seated; Press safety lock-out before trigger; Contact customer support if issue persists. |
| Saw stalls during operation | Cutting material too hard/large; Low battery charge; Dull chain; Improper cutting technique | Reduce cutting load; Recharge battery; Sharpen or replace chain; Review cutting techniques. |
| Chain not moving | Chain tension too tight; Chain jammed; Drive sprocket issue | Adjust chain tension; Clear any debris from chain and bar; Contact customer support. |
| Battery not charging | Charger malfunction; Battery defect; Improper connection | Ensure charger is plugged in and functioning; Try a different battery (if available); Contact customer support for battery/charger replacement. |
Specifications
| Feature | Detail |
|---|---|
| Brand | RYOBI |
| Model Number | RY40561 |
| Power Source | 40-Volt Lithium-Ion Battery |
| Bar Length | 10 Inches |
| Cutting Capacity | Up to 6 inches in diameter |
| Maximum Reach | Up to 12 feet (with extension shaft) |
| Oiling System | Automatic |
| Trigger | Variable Speed |
| Included | 2.6 Ah Battery and Charger |
Warranty Information
For detailed warranty information, please refer to the warranty card included with your product or visit the official RYOBI website. Warranty terms and conditions may vary by region and product.
Customer Support
If you have any questions, require technical assistance, or need to order replacement parts, please contact RYOBI customer service. Contact information can typically be found on the RYOBI website or in the product packaging.


