1. Introduction
This manual provides essential information and guidelines for the installation and use of your Enginetech Engine Rebuild Overhaul Kit. This kit is designed to restore the performance and longevity of 2008-2009 Dodge and Jeep vehicles equipped with the 4.7L SOHC V8 Power-Tech engine. The components included are manufactured to high-quality standards (ISO, QS & TS certified) to ensure durability and reliable operation.
For detailed vehicle-specific procedures, torque specifications, and safety warnings, always refer to the official service manual for your specific Dodge or Jeep model.
2. Kit Contents
Your Enginetech Engine Rebuild Overhaul Kit includes the following components:
- Full Gasket Set
- Dome-Top Pistons
- Premium Piston Rings
- Main Bearings
- Rod Bearings
- Full Timing Set (without sprockets)
- Oil Pump
- Freeze Plugs
- Valve Stem Seals

Figure 2.1: Overview of the Enginetech Engine Rebuild Overhaul Kit components.

Figure 2.2: The comprehensive full gasket set, labeled CR287K-3, included in the kit.
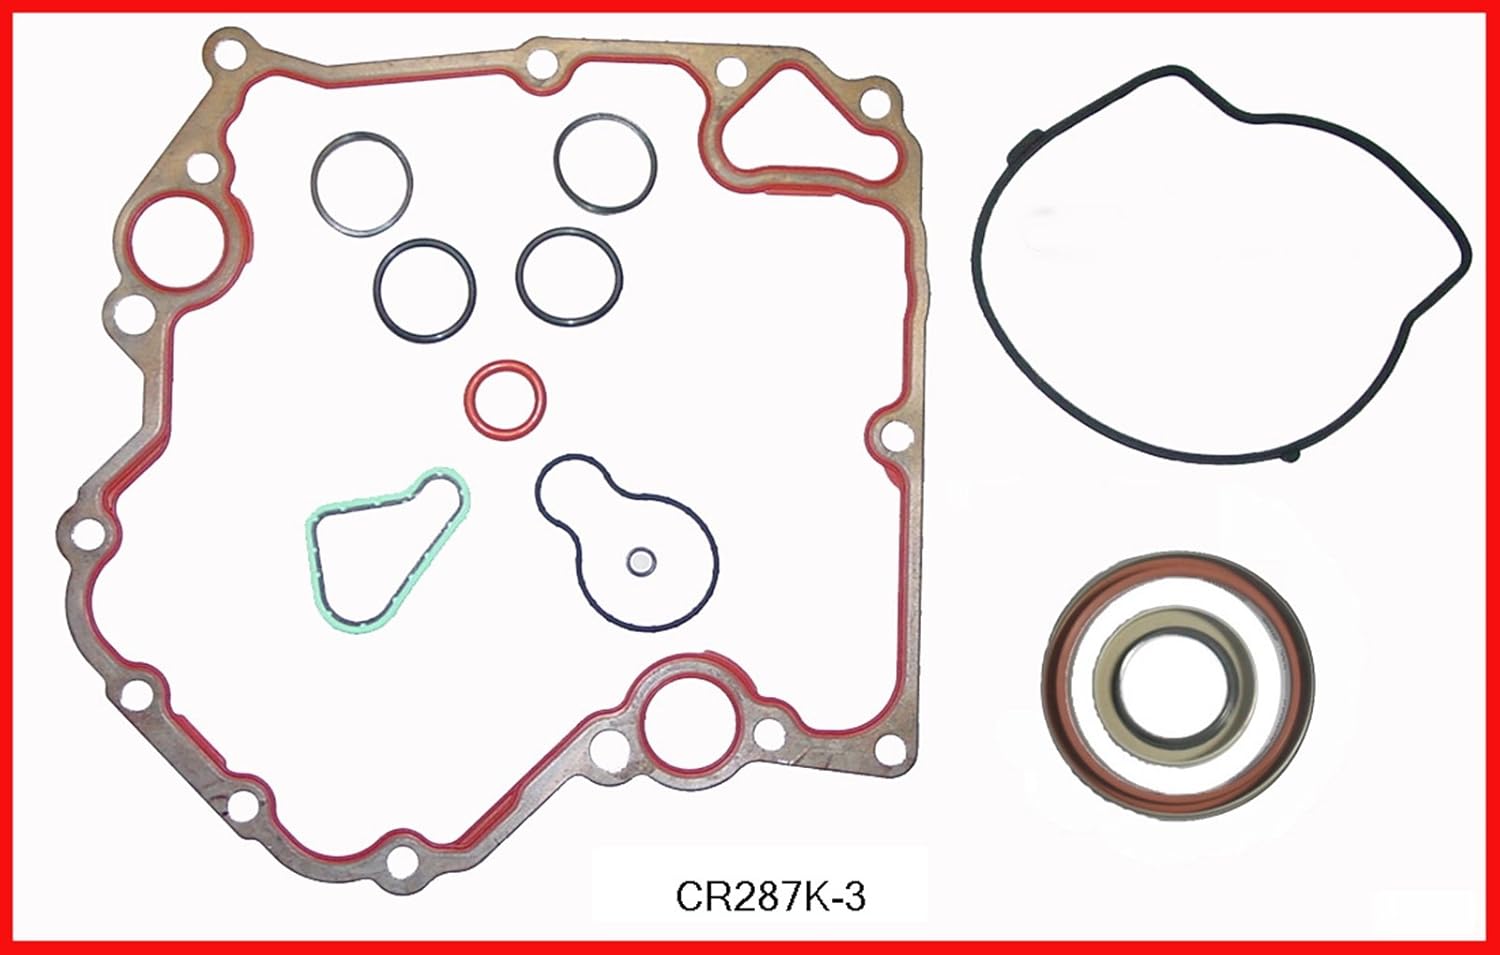
Figure 2.3: Additional components of the gasket set, including various seals and smaller gaskets.

Figure 2.4: A dome-top piston, identified as P6008, designed for optimal combustion efficiency.
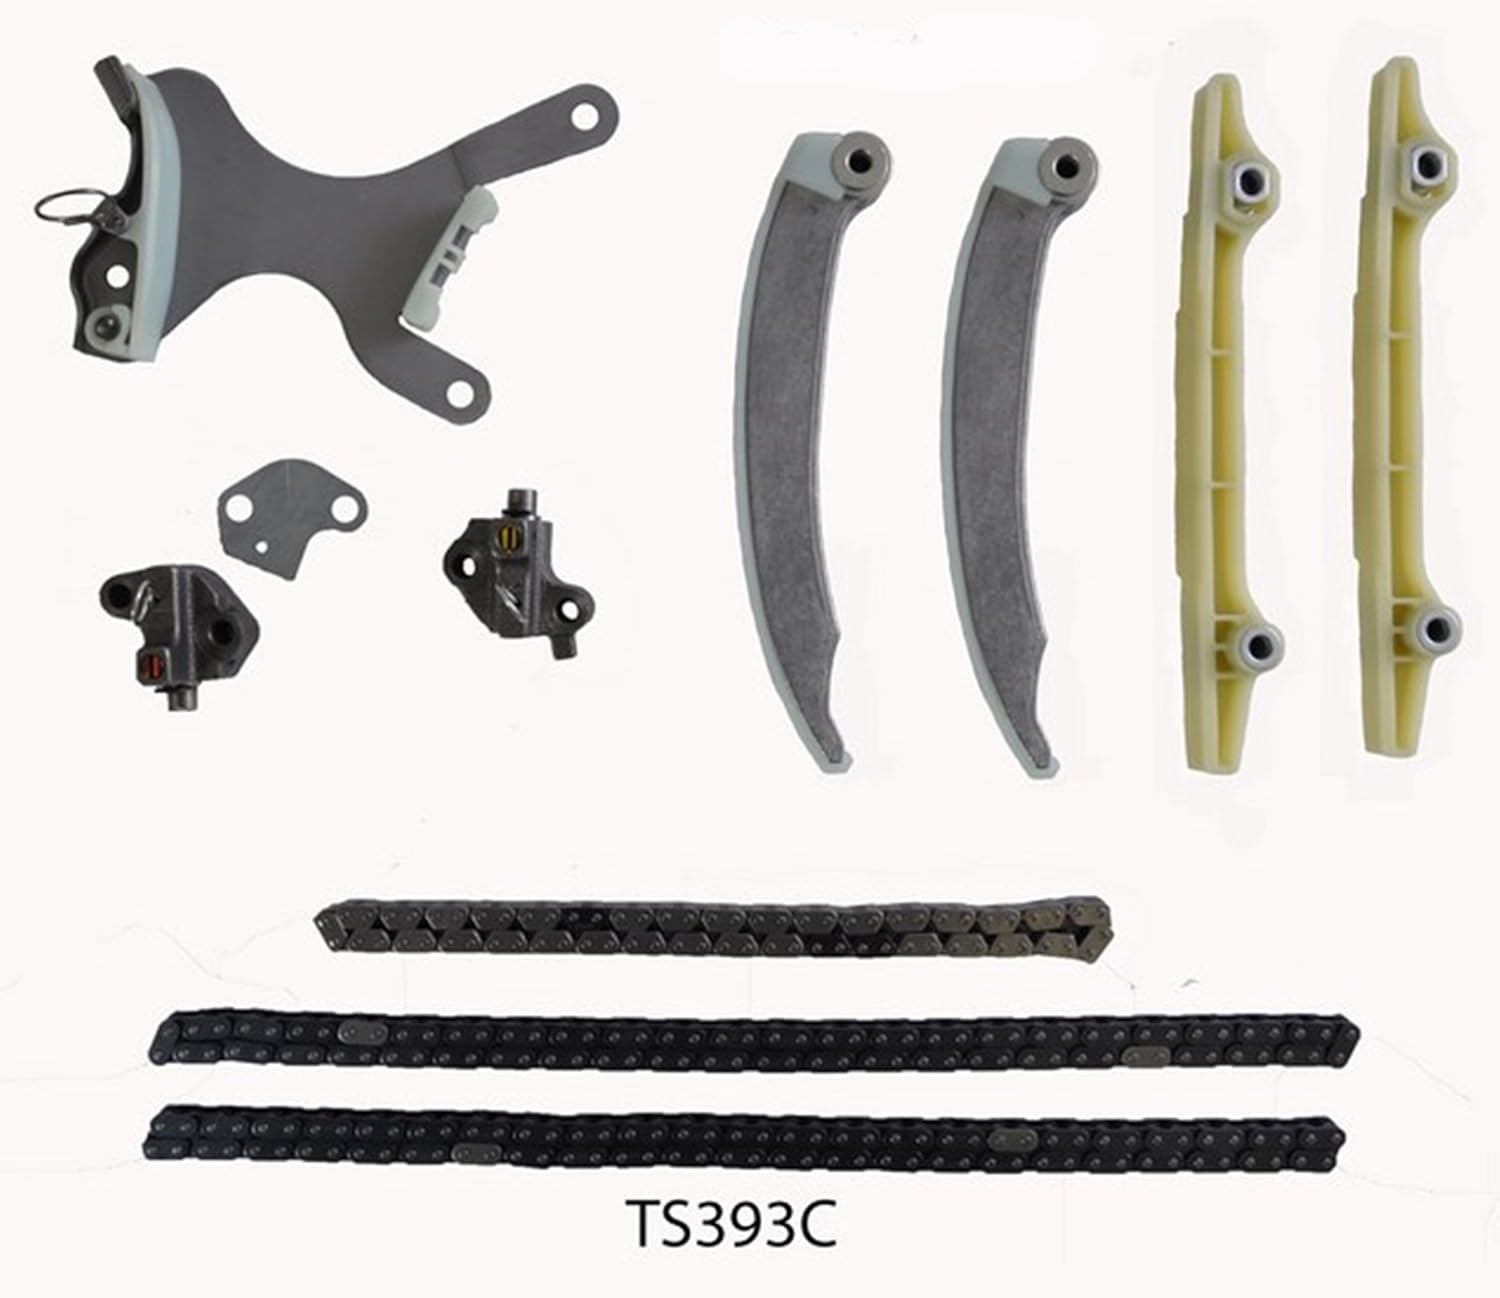
Figure 2.5: The full timing set, labeled TS393C, including chains and tensioners (sprockets not included).

Figure 2.6: The oil pump, identified as EP297, crucial for engine lubrication.

Figure 2.7: Main and rod bearings, labeled BC502J, essential for crankshaft and connecting rod rotation.
3. Important Considerations
This kit offers various sizes for critical components to match your engine's specific requirements after machining or wear. It is crucial to verify and specify the correct sizes needed for your application.
- Piston Rings: Available in Standard (STD), 0.020 inch (020), 0.030 inch (030), and 0.040 inch (040) oversizes.
- Rod Bearings: Available in Standard (STD), 0.010 inch (010), 0.020 inch (020), and 0.030 inch (030) undersizes.
- Main Bearings: Available in Standard (STD), 0.010 inch (010), 0.020 inch (020), and 0.030 inch (030) undersizes.
Ensure you have confirmed the required sizes for your engine's pistons, crankshaft, and connecting rods before beginning the rebuild process. Incorrect sizing will lead to engine damage.
4. Setup and Preparation
A successful engine rebuild requires meticulous preparation and a clean working environment. Adhere to the following general guidelines:
- Workshop: Ensure your workspace is clean, well-lit, and organized. Prevent dust and debris from contaminating engine components.
- Tools: Gather all necessary tools, including torque wrenches, micrometers, plastigauge, ring compressors, and specialized engine tools.
- Cleaning: Thoroughly clean all engine block, cylinder head, crankshaft, and connecting rod surfaces. Remove all old gasket material, carbon deposits, and oil residue.
- Inspection: Inspect all engine components for cracks, wear, or damage. Machine shop services may be required for cylinder boring, crankshaft grinding, and cylinder head resurfacing.
- Service Manual: Always consult the vehicle-specific service manual for your 2008-2009 Dodge or Jeep 4.7L SOHC V8 for precise disassembly, assembly, and torque specifications.
5. Installation Guidelines
The following are general steps for installing the components of your engine rebuild kit. These are not exhaustive and must be supplemented by your vehicle's specific service manual.
5.1. Bearings (Main and Rod)
- Clean crankshaft journals and bearing saddles thoroughly.
- Install main bearings into the block and main caps, ensuring correct orientation.
- Carefully place the crankshaft into the main bearings.
- Install rod bearings into connecting rods and caps.
- Lubricate all bearing surfaces with assembly lubricant before installation.
- Measure bearing clearances using plastigauge to ensure they are within manufacturer specifications.
- Torque main and rod caps to specifications found in your service manual.
5.2. Pistons and Piston Rings
- Install piston rings onto pistons, ensuring correct ring orientation and gap spacing as per service manual.
- Lubricate cylinder walls and piston skirts with engine oil.
- Use a piston ring compressor to carefully install each piston assembly into its respective cylinder bore.
- Connect connecting rods to the crankshaft journals.
5.3. Gasket Set and Seals
- Ensure all mating surfaces are clean and free of old gasket material.
- Install new gaskets for cylinder heads, intake manifold, exhaust manifold, oil pan, timing cover, and valve covers as required.
- Replace all valve stem seals.
- Apply appropriate sealants where specified by the service manual.
5.4. Timing Set
- Install the timing chains, guides, and tensioners according to the vehicle's service manual.
- Ensure all timing marks are correctly aligned to prevent engine damage.
5.5. Oil Pump
- Install the new oil pump, ensuring proper alignment and sealing.
- Prime the oil pump before initial engine startup to ensure immediate oil pressure.
6. Operating and Break-In Procedures
After completing the engine rebuild, proper break-in is critical for the longevity and performance of the newly assembled engine.
- Initial Startup: Ensure the engine has oil pressure before starting. Crank the engine without spark plugs until oil pressure registers.
- First Run: Start the engine and immediately check for oil pressure. Allow the engine to run at varying RPMs (above idle) for 20-30 minutes to seat the piston rings. Avoid prolonged idling.
- Fluid Checks: Monitor oil level, coolant level, and check for any leaks during and after the initial run.
- Driving Break-In: For the first 500-1000 miles, avoid heavy loads, sustained high RPMs, and sudden acceleration/deceleration. Vary engine speed frequently.
- Oil Change: Perform an initial oil and filter change after 500-1000 miles to remove any break-in contaminants.
7. Maintenance
Regular maintenance is essential to preserve the life of your rebuilt engine.
- Oil Changes: Follow the manufacturer's recommended oil change intervals and use the specified oil type.
- Fluid Levels: Regularly check engine oil, coolant, and other fluid levels.
- Inspections: Periodically inspect for leaks, unusual noises, or performance changes.
- Tune-ups: Adhere to the vehicle manufacturer's recommended tune-up schedule.
8. Troubleshooting
If you encounter issues after the rebuild, consider the following general troubleshooting steps. Always consult a qualified mechanic for diagnosis and repair.
- Low Oil Pressure: Check oil level, ensure oil pump is primed, inspect for leaks, or potential bearing issues.
- Engine Overheating: Verify coolant level, check for air in the cooling system, inspect thermostat and water pump operation.
- Unusual Noises: Could indicate incorrect bearing clearances, piston slap, or timing component issues. Stop engine immediately and investigate.
- Oil Leaks: Re-check all gasket and seal installations, ensure fasteners are torqued correctly.
- Poor Performance/Misfires: Verify correct timing, spark plug installation, fuel delivery, and sensor connections.
9. Specifications
| Specification | Detail |
|---|---|
| Manufacturer | Enginetech |
| Brand | Enginetech |
| Model Number | R-RCCR287PP |
| Item Weight | 1 pounds (approximate, kit components vary) |
| Date First Available | May 15, 2018 |
10. Support and Exchanges
If you receive your kit and find any issues, or if you require a different size part than initially ordered, please contact the seller directly. Do not initiate a return through the marketplace system for size exchanges. Instead, send a message to the seller detailing your request or issue, and include a call-back phone number if necessary. The seller is committed to resolving any problems quickly and efficiently.
11. Warranty Information
Specific warranty details for the Enginetech Engine Rebuild Overhaul Kit are not provided within this document. For information regarding product warranty, terms, and conditions, please contact the seller or Enginetech directly.