Klarstein TKV2-Garcont
Klarstein Garçon Electric Kettle User Manual
Model: TKV2-Garcont
1. Introduction
Thank you for choosing the Klarstein Garçon Electric Kettle. This manual provides important information regarding the safe operation, installation, maintenance, and troubleshooting of your appliance. Please read these instructions carefully before using the kettle and keep them for future reference.
1.1 Product Overview
The Klarstein Garçon is an elegant stainless steel electric kettle designed for precise water heating. It features a gooseneck spout for controlled pouring, adjustable temperature settings from 40°C to 100°C, and a convenient keep-warm function. Its intuitive LED display and 360° cordless base enhance user experience.

Figure 1: Klarstein Garçon Electric Kettle. This image shows the stainless steel kettle with its gooseneck spout, black handle with control buttons, and the base, alongside a cup of tea.
1.2 Safety Instructions
- Read all instructions before use.
- Do not touch hot surfaces. Use handles or knobs.
- To protect against fire, electric shock, and injury to persons, do not immerse cord, plugs, or the kettle base in water or other liquid.
- Close supervision is necessary when any appliance is used by or near children.
- Unplug from outlet when not in use and before cleaning. Allow to cool before putting on or taking off parts, and before cleaning the appliance.
- Do not operate any appliance with a damaged cord or plug or after the appliance malfunctions, or has been damaged in any manner. Contact customer service for examination, repair, or adjustment.
- The use of accessory attachments not recommended by the appliance manufacturer may result in fire, electric shock, or personal injury.
- Do not use outdoors.
- Do not let cord hang over edge of table or counter, or touch hot surfaces.
- Do not place on or near a hot gas or electric burner, or in a heated oven.
- Always attach plug to appliance first, then plug cord into the wall outlet. To disconnect, turn any control to "off", then remove plug from wall outlet.
- Do not use appliance for other than intended use.
- Extreme caution must be used when moving an appliance containing hot water.
- The kettle must only be used with the provided base.
- This appliance is for household use only.
- Ensure the lid is securely closed before operating.
- Do not overfill the kettle beyond the maximum fill line to prevent boiling water from spilling.
- The appliance is equipped with dry-boil protection. If the kettle is accidentally switched on without water, it will automatically switch off. Allow it to cool down before refilling.
2. Components
Your Klarstein Garçon Electric Kettle consists of the following main components:
- Kettle Body: Stainless steel vessel with gooseneck spout and handle.
- Lid: Removable lid for filling.
- Power Base: 360° rotational base with power cord.
- Control Panel: Integrated into the handle with LED display and buttons for temperature selection and keep-warm function.
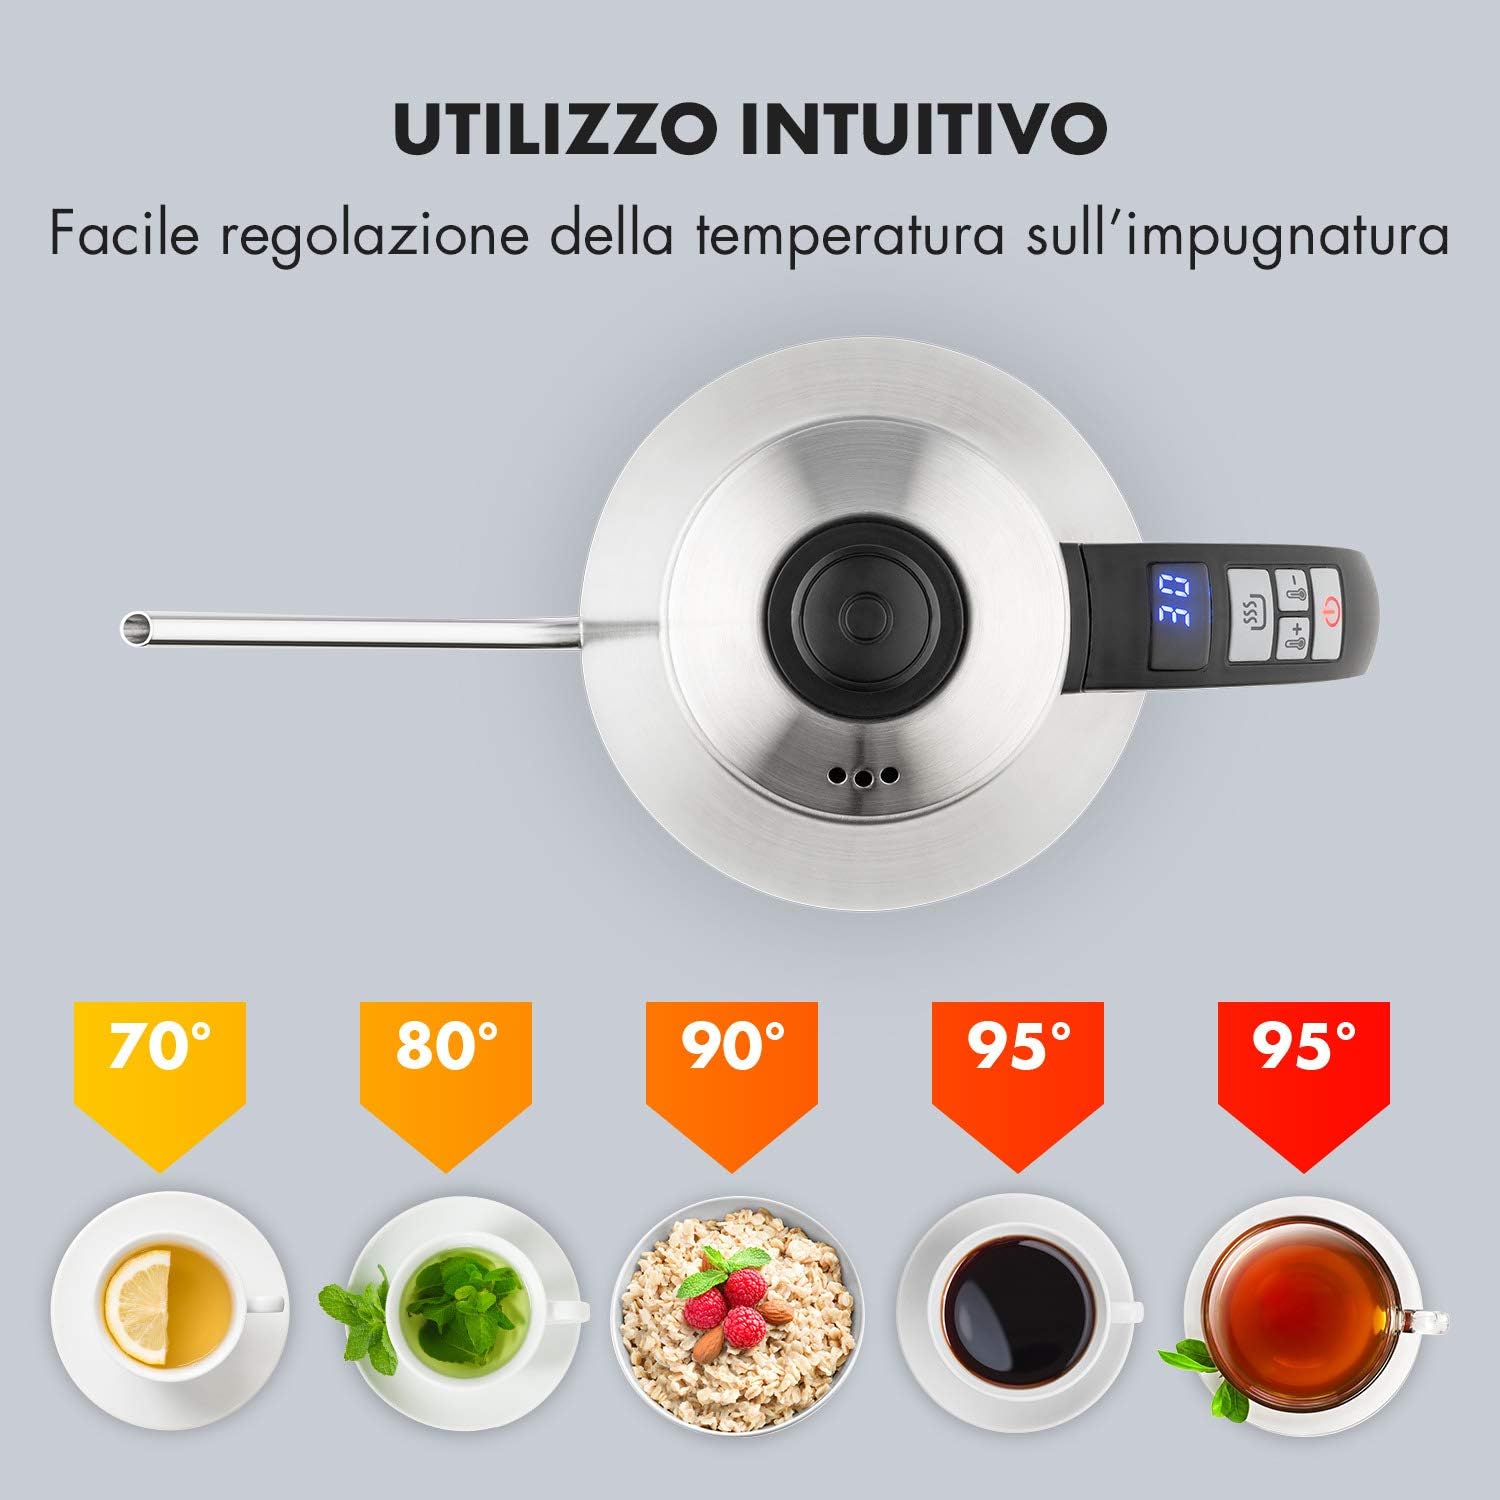
Figure 2: Intuitive Control Panel. This image shows a top-down view of the kettle's handle, highlighting the LED display showing "30" (likely temperature or time) and the control buttons for temperature adjustment and keep-warm function.
3. Setup
3.1 Unpacking
- Carefully remove all packaging materials from the kettle and its base.
- Check that all components listed in Section 2 are present and undamaged.
- Keep packaging materials out of reach of children.
3.2 Initial Use
- Before first use, fill the kettle with clean water to the maximum fill line (1.0 liter).
- Boil the water at 100°C (refer to Section 4.2 for operation).
- Discard the boiled water.
- Repeat this process 2-3 times to remove any manufacturing residues.
- Wipe the exterior of the kettle with a damp cloth. Do not immerse the kettle or base in water.
4. Operating Instructions
4.1 Filling the Kettle
- Remove the kettle from its power base.
- Open the lid and fill the kettle with the desired amount of fresh water. Ensure the water level is between the minimum (0.5 liters) and maximum (1.0 liter) fill marks.
- Close the lid securely.
- Place the kettle back onto its power base.
4.2 Basic Operation and Temperature Selection
- Plug the power base into a suitable electrical outlet (230V). The LED display will illuminate briefly.
- Use the temperature control buttons (usually marked with '+' and '-') on the handle to select your desired water temperature. The temperature can be set between 40°C and 100°C in increments. The current temperature setting will be shown on the LED display.
- Press the power button (often marked with 'ON/OFF' or a power symbol) to start the heating process. The kettle will begin heating the water to the selected temperature.
- Once the selected temperature is reached, the kettle will automatically switch off.

Figure 3: Fast Heating Technology. This diagram illustrates the internal heating elements and rapid heat distribution within the kettle, indicating its efficient heating capability.
4.3 Keep Warm Function
The kettle features a keep-warm function that maintains the water temperature for up to 30 minutes after reaching the set temperature (up to 95°C).
- After selecting your desired temperature (below 95°C), press the 'Keep Warm' button (often indicated by a thermometer or wavy lines symbol).
- The kettle will heat the water to the set temperature and then maintain it for approximately 30 minutes.
- To deactivate the keep-warm function, press the 'Keep Warm' button again or remove the kettle from its base.

Figure 4: Keep Warm Function. This image focuses on the kettle's handle and control panel, showing the LED display and indicating the activation of the keep-warm function, possibly displaying the remaining time or target temperature.
4.4 Pouring
The gooseneck spout is designed for precise and controlled pouring, ideal for pour-over coffee or tea.

Figure 5: Precise Pouring. This image demonstrates a user pouring hot water from the gooseneck kettle into a coffee dripper, highlighting the controlled flow for brewing.

Figure 6: Ergonomic Handle. This image shows a hand comfortably holding the kettle's ergonomic and heat-resistant handle during pouring, emphasizing ease of use.
5. Cleaning and Maintenance
5.1 Cleaning the Exterior
- Always unplug the kettle and allow it to cool completely before cleaning.
- Wipe the exterior of the kettle with a soft, damp cloth. Do not use abrasive cleaners or scouring pads, as they may scratch the stainless steel surface.
- Ensure no water enters the control panel or electrical components.
5.2 Descaling
Over time, mineral deposits (limescale) may build up inside the kettle, especially in hard water areas. Regular descaling is recommended to maintain performance and extend the life of your kettle.
- Fill the kettle with a mixture of one part white vinegar and two parts water, or use a commercial descaling solution according to its instructions.
- Boil the mixture (or let it soak as per descaler instructions).
- Allow the solution to sit in the kettle for at least 30 minutes, or longer if scale is heavy.
- Pour out the solution and rinse the interior of the kettle thoroughly with fresh water several times.
- Boil a fresh kettle of water and discard it to remove any residual vinegar or descaler taste.
6. Troubleshooting
| Problem | Possible Cause | Solution |
|---|---|---|
| Kettle does not heat. |
|
|
| Water takes too long to boil or does not reach desired temperature. |
|
|
| Kettle leaks. |
|
|
7. Specifications
| Brand | Klarstein |
| Model Number | TKV2-Garcont (1003523) |
| Power | 1800-2000 W |
| Voltage | 230 V |
| Capacity | 1.0 Litre (Min: 0.5 Litre) |
| Temperature Range | 40°C - 100°C |
| Keep Warm Function | Up to 95°C for 30 minutes |
| Material | Stainless Steel |
| Kettle Dimensions (Ø x H) | 16 x 20 cm |
| Base Dimensions (Ø x H) | 14.5 x 4 cm |
| Kettle with Spout and Handle Dimensions (L x W x H) | Approx. 30 cm (length from spout to handle) x 16 cm (width) x 24 cm (height) |
| Kettle Weight | Approx. 1.5 kg |
| Base Weight | Approx. 0.28 kg |
| Cord Length | Approx. 80 cm |
| Special Features | Gooseneck spout, LED display, 360° cordless, Dry-boil protection |

Figure 7: Product Dimensions. This image provides a visual representation of the kettle's dimensions, including height, width, and length with the spout and handle.
8. Warranty and Support
Klarstein products are manufactured to high-quality standards. In the unlikely event of a defect or malfunction, please contact your retailer or the Klarstein customer support team for assistance.
Please retain your proof of purchase for warranty claims. Specific warranty terms and conditions may vary by region and retailer.
For further information or support, you may visit the official Klarstein website or contact their customer service department. A link to the brand's store is available here.
Ask a question about this manual
Ask about setup, troubleshooting, compatibility, parts, safety, or missing instructions. Manuals+ will review the question and use this page’s manual context to help answer it.